
You are using an out of date browser. It may not display this or other websites correctly.
You should upgrade or use an alternative browser.
You should upgrade or use an alternative browser.
GT-Forte GTs40 build
- Thread starter fastdruid
- Start date


Really should not have bought GTA V ")
Despite that eating lots of my time I've been busy still on the car.
Having looked at a load of seats and not found any I'm happy with I've decided I'll make my own, so made the first rough shape prototype out of fibreboard and tape then made this functional prototype out of steel, already got a load of changes I plan on making to it but as its steel its very easy.

Once I'm happy with the seats I'll either fab them from aluminium or take a mould and make them from fibreglass.
So with the seat in I sat in the car and made Brumm noises while 'steering'

Surprisingly comfortable actually!
Currently its sitting on a spacer to make it equivalent to being on rails but I'm not sure if I'm going to bother, I'm 5'8" and with it touching the rear bulkhead the pedals are perfect and they're as far forward as they can be.
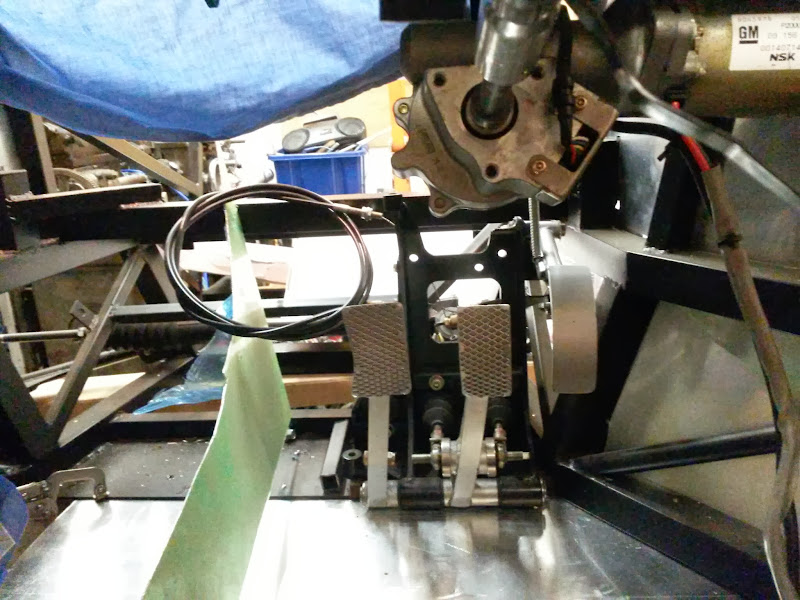
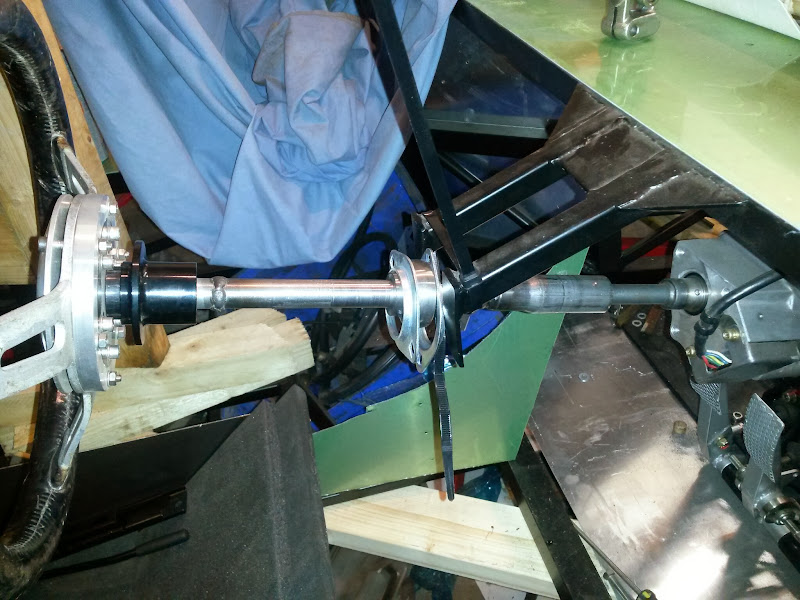
So I lined up the pedals and after trying a few positions got them somewhere I was comfortable, axis of the steering passes just left of the middle of the brake pedal. I think between the clutch and brake is ideal but I just can't manage that.
As it stands the throttle is limited by the chassis but having measured both our daily' cars the travel is the same. I can always lop the corner off if I need more travel. I won't be panelling that section though!
The randomly shaped sheet of aluminium btw was an off cut used to fake up the 'tunnel' side so I could see how much room I had on the other (clutch) side too.
and then lined up the steering wheel

Then weld up the steering column

And make up spacers for under the pedals as without them the pedal pivot sits below the 'floor' level. They'll be welded to the chassis later hence the powder coat having been removed.

I'll need to make a bit of a chamfer out of the top of the pedal bracket for the steering column linkage but as the pedal box is out of an SPF which is a (near) copy of the original GT40 but fabricated (welded) steel rather than cast (IIRC Magnesium alloy) it's massively overkill anyway.
Also note in that last picture the plastic ring. This came from the steering column and it looks like GM basically filled the middle of the joint with plastic so that there were only two (~4mm) pins effectively preventing the column from sliding down (they break easily so it can telescope down in a crash). Obviously when taken apart these break off. Without the plastic it's a sliding fit and I'm not sure what to do, I was thinking maybe when it comes to permanently fixing it in place to inject araldite into the hole. Not sure how I could replicate the plastic GM originally used.
Despite that eating lots of my time I've been busy still on the car.
Having looked at a load of seats and not found any I'm happy with I've decided I'll make my own, so made the first rough shape prototype out of fibreboard and tape then made this functional prototype out of steel, already got a load of changes I plan on making to it but as its steel its very easy.
Once I'm happy with the seats I'll either fab them from aluminium or take a mould and make them from fibreglass.
So with the seat in I sat in the car and made Brumm noises while 'steering'
Surprisingly comfortable actually!
Currently its sitting on a spacer to make it equivalent to being on rails but I'm not sure if I'm going to bother, I'm 5'8" and with it touching the rear bulkhead the pedals are perfect and they're as far forward as they can be.
So I lined up the pedals and after trying a few positions got them somewhere I was comfortable, axis of the steering passes just left of the middle of the brake pedal. I think between the clutch and brake is ideal but I just can't manage that.
As it stands the throttle is limited by the chassis but having measured both our daily' cars the travel is the same. I can always lop the corner off if I need more travel. I won't be panelling that section though!
The randomly shaped sheet of aluminium btw was an off cut used to fake up the 'tunnel' side so I could see how much room I had on the other (clutch) side too.
and then lined up the steering wheel
Then weld up the steering column
And make up spacers for under the pedals as without them the pedal pivot sits below the 'floor' level. They'll be welded to the chassis later hence the powder coat having been removed.
I'll need to make a bit of a chamfer out of the top of the pedal bracket for the steering column linkage but as the pedal box is out of an SPF which is a (near) copy of the original GT40 but fabricated (welded) steel rather than cast (IIRC Magnesium alloy) it's massively overkill anyway.
Also note in that last picture the plastic ring. This came from the steering column and it looks like GM basically filled the middle of the joint with plastic so that there were only two (~4mm) pins effectively preventing the column from sliding down (they break easily so it can telescope down in a crash). Obviously when taken apart these break off. Without the plastic it's a sliding fit and I'm not sure what to do, I was thinking maybe when it comes to permanently fixing it in place to inject araldite into the hole. Not sure how I could replicate the plastic GM originally used.
Last edited:
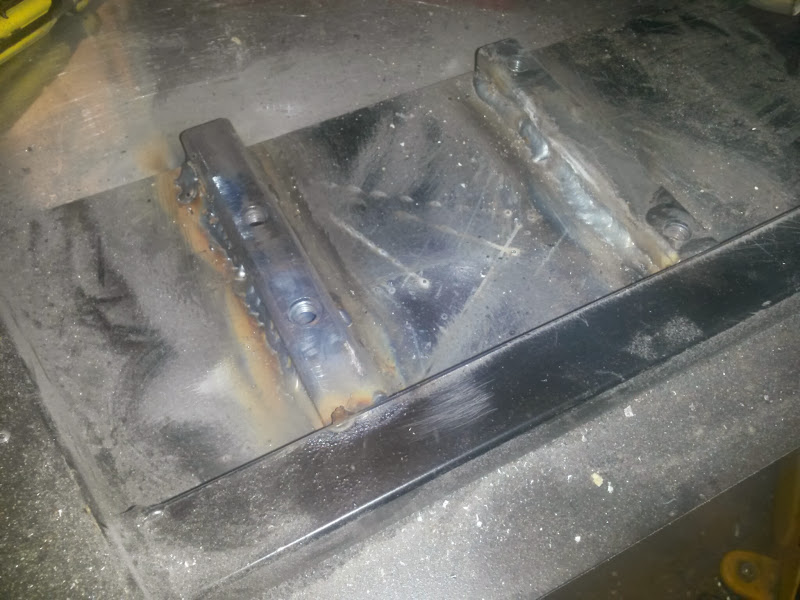
Welded the runners for the pedal box. Not my neatest welds due to limited room/access but they're not going anywhere!
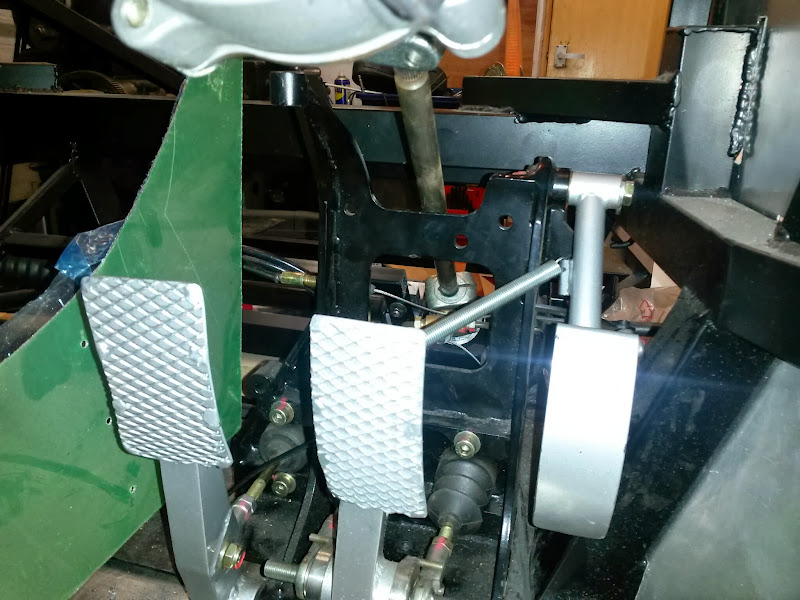
Pedals fitted (note that the rough piece next to it is mocking up the coolant tunnel side), room for a dead pedal.
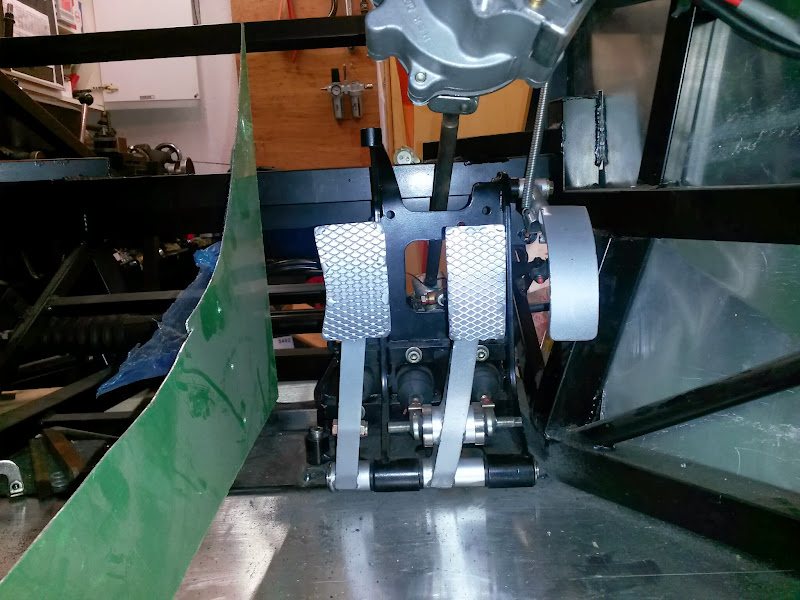
Overlap of the throttle pedal with the chassis, about 6cm travel which is the same as our road cars.
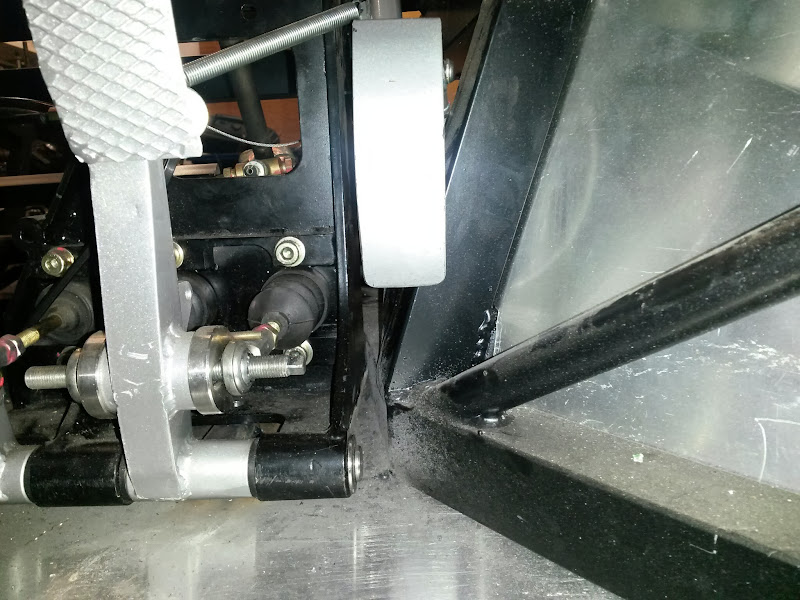
With the steering wheel and rack in position the steering column downlink, *just* touches the pedal box, won't need to cut much out to clear easily.
And from the otherside
Have ordered a load of bolts so I can actually bolt the pedal box down.
Pedals fitted (note that the rough piece next to it is mocking up the coolant tunnel side), room for a dead pedal.
Overlap of the throttle pedal with the chassis, about 6cm travel which is the same as our road cars.
With the steering wheel and rack in position the steering column downlink, *just* touches the pedal box, won't need to cut much out to clear easily.
And from the otherside
Have ordered a load of bolts so I can actually bolt the pedal box down.
Last edited:
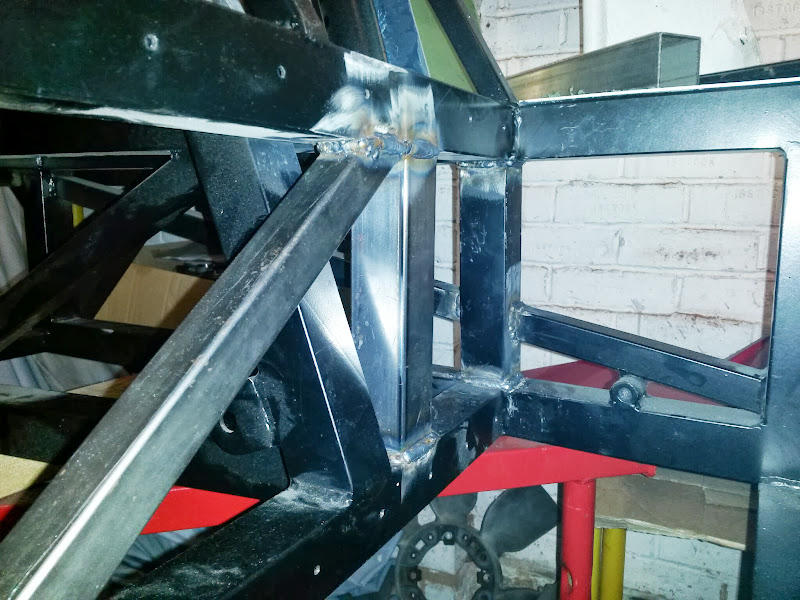
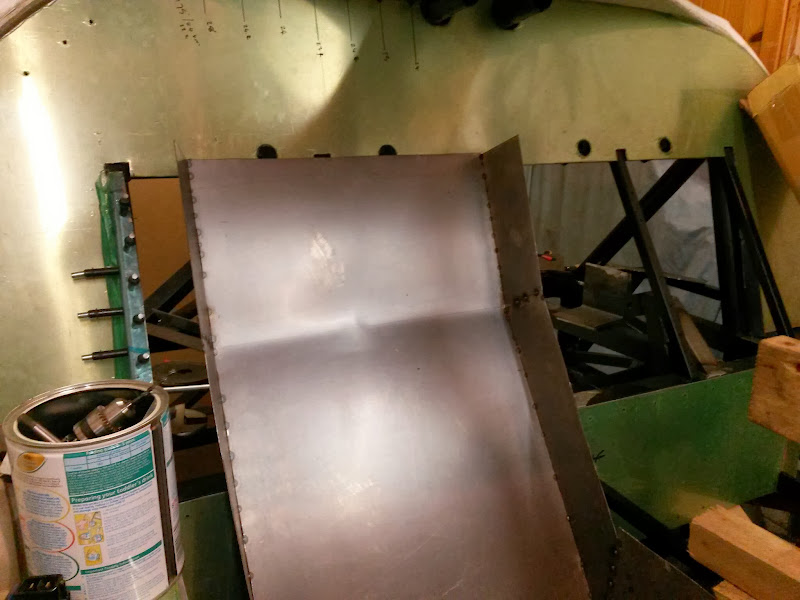
Finally got round to welding up from the piece I cut out in Jan
http://www.gt40s.com/forum/gt40-build-logs/35077-gt-forte-gts40-build-14.html#post398511

Just need to cap the end of the open tube
Then modified my 'development' seat to version 1.1.
Lopped off the top (might take a bit more off later)
then increased the length and decreased the slope of the 'ramp' on the bottom.
http://www.gt40s.com/forum/gt40-build-logs/35077-gt-forte-gts40-build-14.html#post398511
Just need to cap the end of the open tube
Then modified my 'development' seat to version 1.1.
Lopped off the top (might take a bit more off later)
then increased the length and decreased the slope of the 'ramp' on the bottom.
Bolted the back of the spider down. I'll use M8 bolts to do it finally, M6 for now so I can move it a bit if required.

Also have some 5mm plates to go on top (but they need shaping) and will cut down the spacer underneath. Oh and of course need the panelling underneath! I just used some rough off-cut pieces of aluminium to get the height right as I couldn't clamp it in place with the panelling fitted!
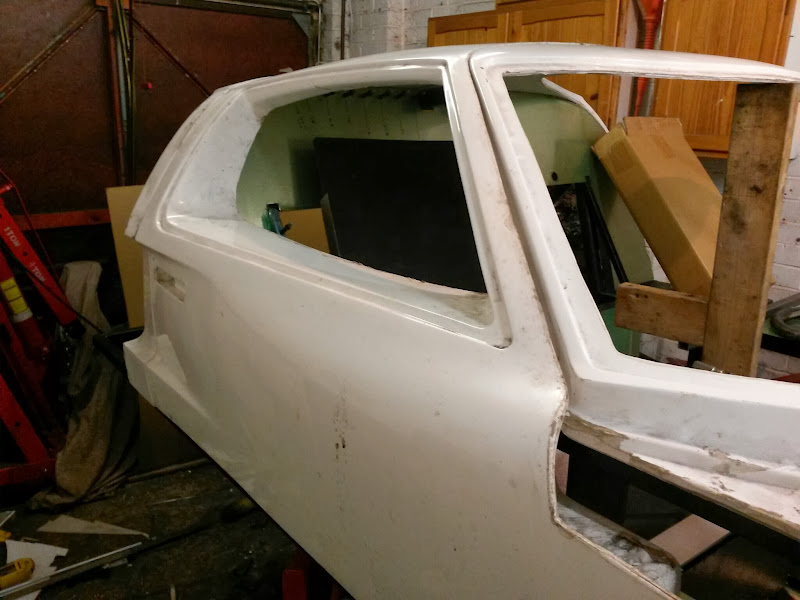
Popped the doors on, just resting at the moment and need to align the front of the spider (which is the whole reason why they're on).

Should possibly do some dusting/cleaning...

Also have some 5mm plates to go on top (but they need shaping) and will cut down the spacer underneath. Oh and of course need the panelling underneath! I just used some rough off-cut pieces of aluminium to get the height right as I couldn't clamp it in place with the panelling fitted!
Popped the doors on, just resting at the moment and need to align the front of the spider (which is the whole reason why they're on).
Should possibly do some dusting/cleaning...
Yeah well I've still got lots of panelling to do and when that's finished I hope it then looks half as good as yours! Although I'm going to go for black panels and silver rivets rather than the plain alloy look (one of the reasons I've not worried too much about the finish of the panels being perfect, I've always planned to paint/coat them).
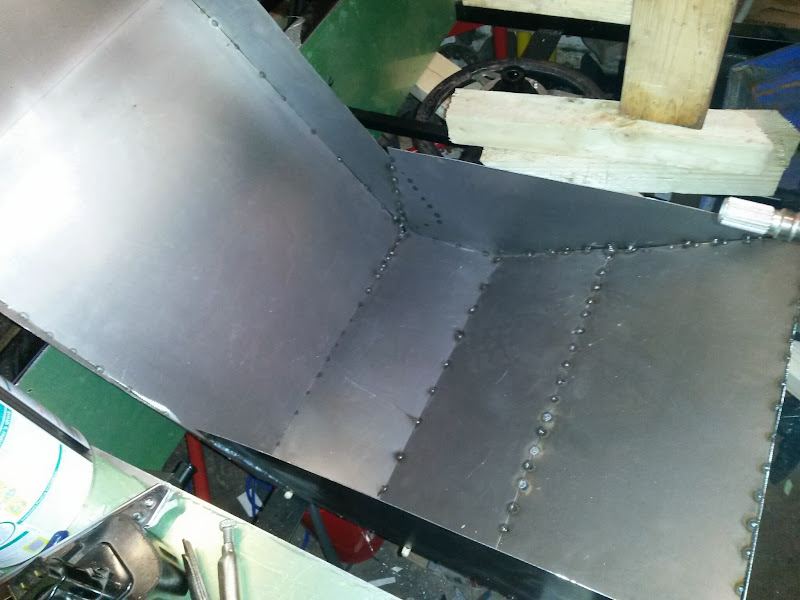
One of the reasons I wanted to mount the spider was so I could sort the rear bulkhead and I needed to get it drilled (rather than just clamped) so I could fit the rear sponson panelling. Then the doors need mounting (need to order some disposable suits and gloves for the fibreglass work involved in that). So I can sort the locks and then I can properly rivet the bulkhead in place.
Also now I know how I'm going to do the seats I can sort out welding in the mounts for the harness[1] and the runners, then once I've got the spider aligned it's coming off again, flip it over and finally do the floor! Then back over and start actually doing the panelling for real.
I'm going to try and get all the remaining panelling at least rough cut this w/e (engine bay, rear of rear bulkhead and the front sides).
Then I've got a few days holiday left this year, plan is to book them off just to work on the car. So much to do but at the moment I'm managing to get a bit done every week so its moving on steadily (if slowly).
[1] I really want to get an cheap FIA time expired 6-point harness for fitting, I'll get new ones later but no point getting something with 6 years life when there is a possibility it could expire before I even get to IVA! (although I'd hope not)
Hi David - looking good
Just wondered if you've thought about how you're going to paint the panels yet? I've done a little research and came across this for the primer....
U-pol ACID#8 1K Etch Primer 1L Galvanised Aluminium Steel Metal Davids
then probably a normal top coat, like Dulux outdoor paint. Are you planning something similar?
Also - I understand that the IVA test doesn't check the dates for seat belts, so you may be OK buying them now.
Cheers
James
Last edited:
Brett James-McCall
Moderator
Current IVA says in the notes, so I take it that it needs to meet the standard. The date is for motorsport only I belive otherwise you would have to replace car seat belts regularly:
A British Standard BS3254 Part 1 1988 or evidence of FIA 8853-98 approval for a harness belt is acceptable
A British Standard BS3254 Part 1 1988 or evidence of FIA 8853-98 approval for a harness belt is acceptable
James and David,
Came across this article the other night. Was struggling with the terms in priming a car. You know filler, surfacer, sealer etc. Good article here even though it is a bit dated. best post is mid way down .
Epoxy Primer Vs. Urethane Primer • How to Paint Your Own Car, Auto Body Discussion Forum & Videos • AutoBody101.com
Bill
Thanks Bill, we can't use 2k for 'home' spraying in the UK. So it'll be either send them off or 1k at home. The panels concerned aren't exposed to UV but at the same time round the front there is the possibility of (minor) petrol spillages and I've had bad experiences in the past with 1k cellulose paint and petrol...
This is my track bike
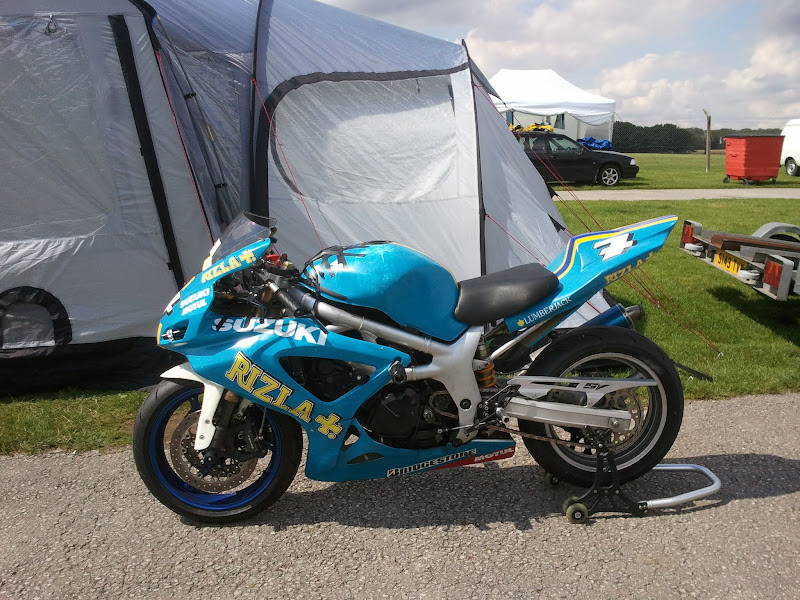
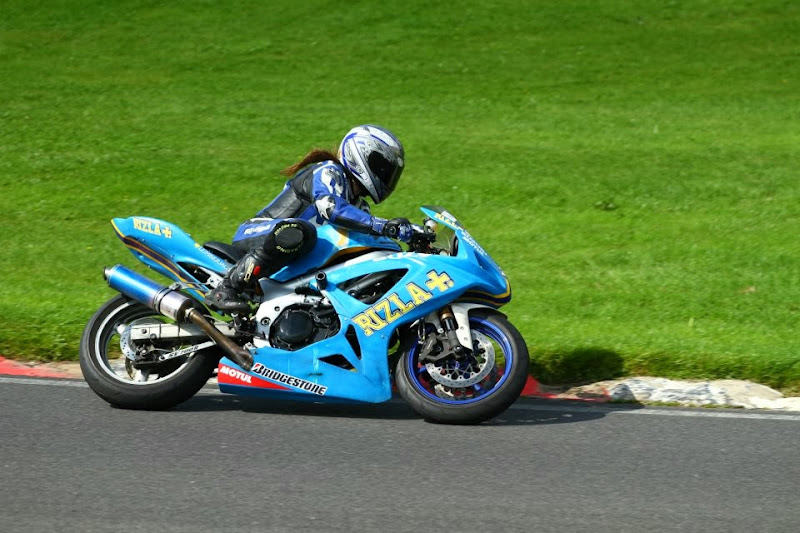
I did a quick-n-dirty rattle can+stickers job on it (no point in an expensive paint job for something likely to throw down the road, which as it happened, happened) look at the state of it where I spilt a bit of petrol out of the filler!

Massive missing bit of paint on the tank, white streaks down the side and paint on the frame.
I either have to be very happy that petrol will not wash the paint off the aluminium or I shall farm it out.
I have no intention of spraying the bodywork myself.
This is my track bike
I did a quick-n-dirty rattle can+stickers job on it (no point in an expensive paint job for something likely to throw down the road, which as it happened, happened) look at the state of it where I spilt a bit of petrol out of the filler!
Massive missing bit of paint on the tank, white streaks down the side and paint on the frame.
I either have to be very happy that petrol will not wash the paint off the aluminium or I shall farm it out.
I have no intention of spraying the bodywork myself.
Added a brace for the top of the pedal box


Made up the lower door hinges (chassis side)
Mostly made up the upper door hinges (chassis side) - need to chop that bit of tube in half and weld it on to both pieces.

Already made up the bits to go in the door here are the top and bottom bushes and the hinge pin. Top bush not pressed in yet as need to weld up the top plate first (the bush is oil-impregnated and the oil boils out if you weld in-situ).
Then this is the lot 'assembled', the piece in the middle will have an AIB attached.
Still need to make up a spacer/adjuster plate for the hinges. Plan is to slot them so that the spacers can move front to back and the hinges can move in and out.
Made up the lower door hinges (chassis side)
Mostly made up the upper door hinges (chassis side) - need to chop that bit of tube in half and weld it on to both pieces.
Already made up the bits to go in the door here are the top and bottom bushes and the hinge pin. Top bush not pressed in yet as need to weld up the top plate first (the bush is oil-impregnated and the oil boils out if you weld in-situ).
Then this is the lot 'assembled', the piece in the middle will have an AIB attached.
Still need to make up a spacer/adjuster plate for the hinges. Plan is to slot them so that the spacers can move front to back and the hinges can move in and out.
I've been slacking somewhat recently, mostly because just about everyone in the family has been ill all year so far (nothing major just multiple colds and in my case tonsillitis). Just not felt like working in the garage so just been working on designing some bits.
Anyway, a few bits done.
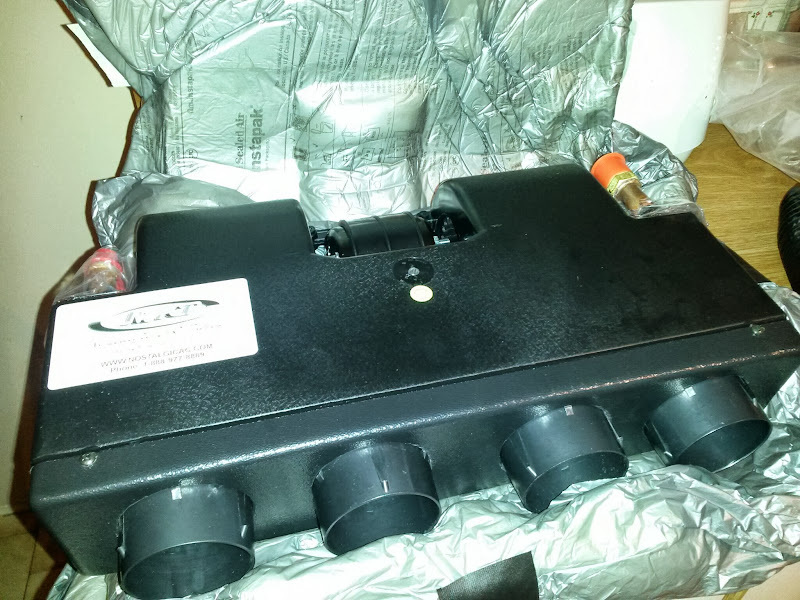
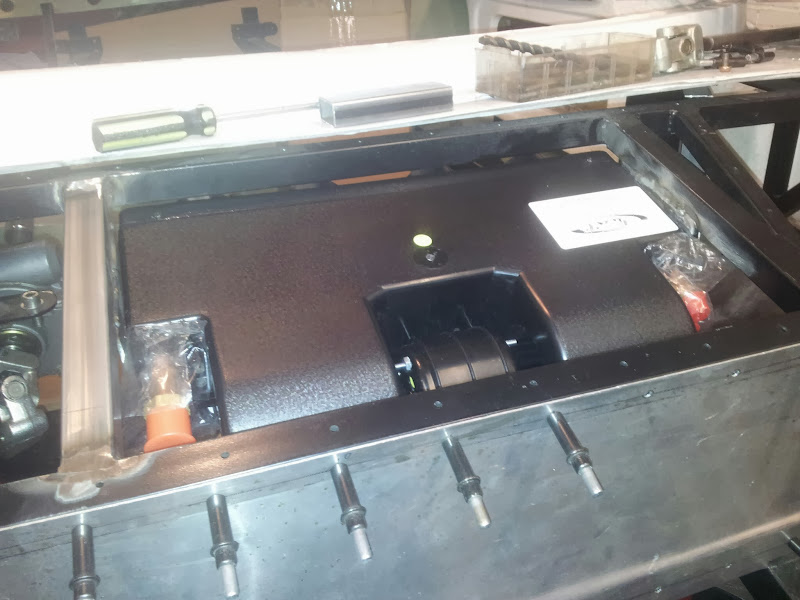
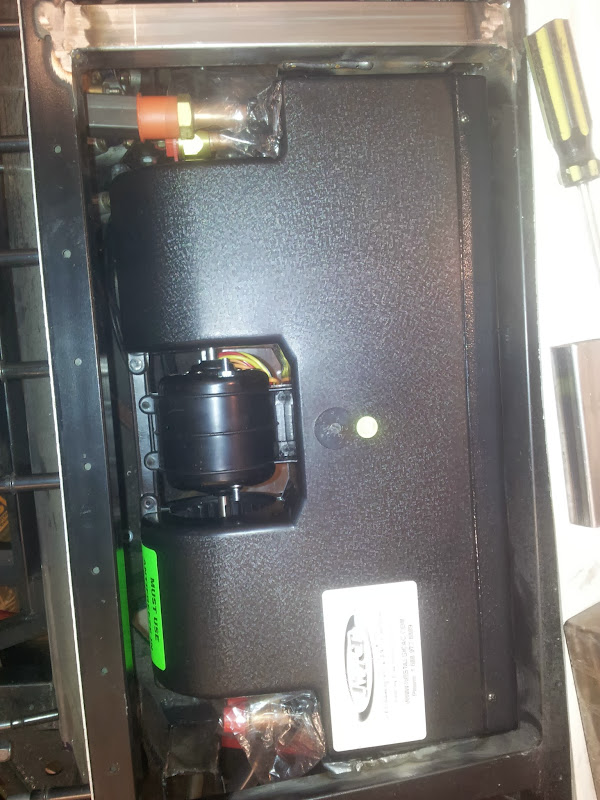
Mounted the air-con
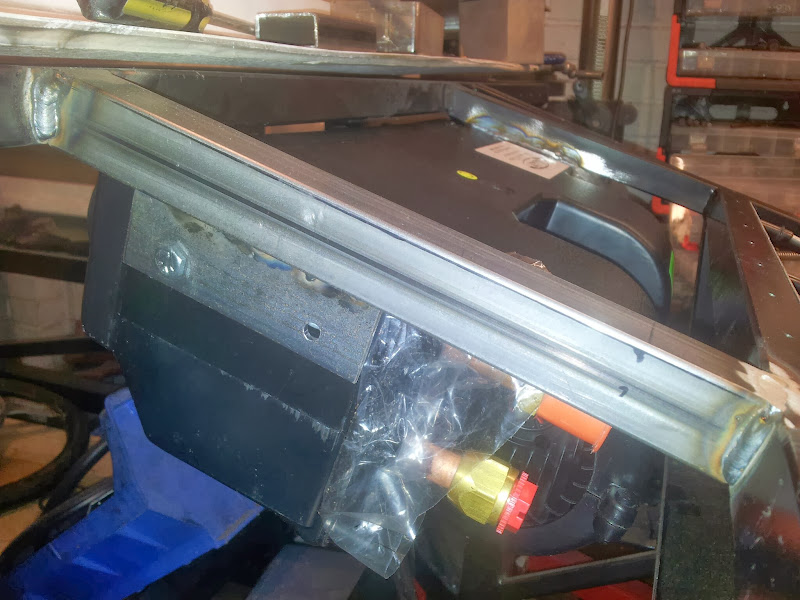
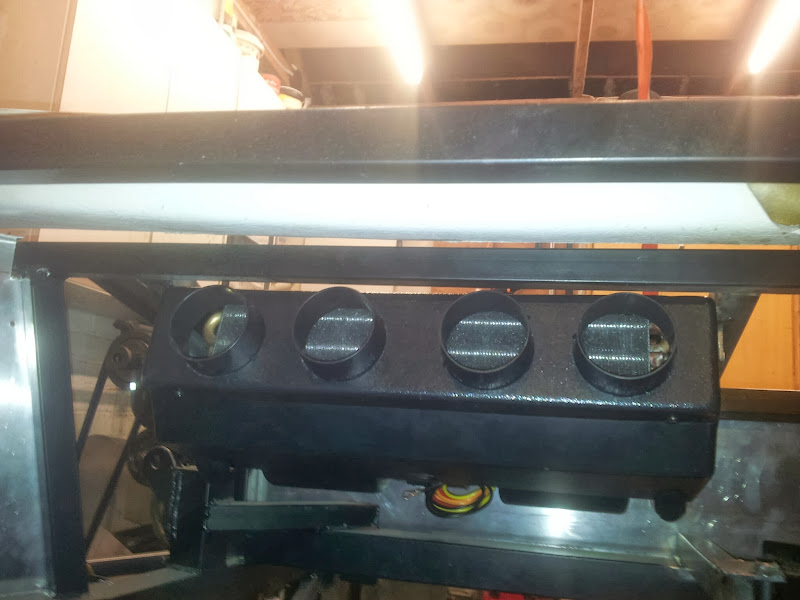
Btw, if you think it looks not straight you're right, bloody thing takes UNC bolts but only two in the kit so waiting on some more.
Anyway, a few bits done.
Mounted the air-con
Btw, if you think it looks not straight you're right, bloody thing takes UNC bolts but only two in the kit so waiting on some more.
Hi Nick,
It's a Nostalgic Air ID-255
Nostalgic AC - ID-255 Heat Air In-dash Evaporator Unit - Indash Evaporators - Evaporator Units
I got it while I was in holiday to Florida to save on shipping.
It's a Nostalgic Air ID-255
Nostalgic AC - ID-255 Heat Air In-dash Evaporator Unit - Indash Evaporators - Evaporator Units
I got it while I was in holiday to Florida to save on shipping.
Brett James-McCall
Moderator
Same as mine Nick