Darrin's MMR BOSS based GT40

Mine (and I think Renato's) had the control unit attached.

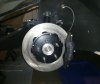
I got the whole thing, column, motor, and control unit, for $100 shipped to my door. The guy I bought it from MIGHT have another. His email is: [email protected]

I know that my builder has a modified Corsa unit at a reasonable cost but being in the US, I'd rather have a part we can get in the US easily.

Darrin,
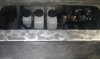
What are you using for a controller for the steering? I am about to order my column. I am thinking of going with the Corsa C, and a variant of the controllers out there. I tried to find out what Renato is or is planning to use but didn't get a response that directly addressed the controller. That is a key part. the final price of the Toyota is a little less than the Corsa with shipping included. So it is a toss up at this point.There are some guys working on a controller for the Corsa as well as some of the aftermarket guys on Ebay. Rallywhiz is about to come out with a Toyota Yaris controller, but haven't heard from them yet. Shipping is the biggest drawback with them. They aren't able to find any without ABS so they are working on an ABS model. Thanks for any help and/or pics you can provide.

Bill
 
Still needs a controller. You have the ECU but that's normally fed with a speed signal and an rpm signal, both of which you need to fake otherwise I think it falls back to I think maximum assistance.
 
Some of the units need an rpm signal that can come from several sources as I understand it. It can come from an electronic spedo for instance , that uses a pulse signal of a magnetic sensor, if the count is correct. This also tells the EPAS unit to shut down when it senses no signal, thus not running the battery down if you forget to shut the fake signal off. There is more, but I am still in the learning stage.

Bill
 
I think you are correct. Was wondering about how it would determine speed and meant to bug Renato a while back and had forgotten about it when I started work on the pedal assembly.

Still needs a controller. You have the ECU but that's normally fed with a speed signal and an rpm signal, both of which you need to fake otherwise I think it falls back to I think maximum assistance.
 
Some progress on my project. Front driver's side paneling riveted, rubberized undercoat applied, and A-arms loose fitted. Also completed driver's side fuel tank and top sill work. Next I will rotate the chassis 180 and finish the passenger side (space limitations) as I wait on some more laser cut panels.

Also think I've decided on the Sparco R100 seats. About the only things low and narrow enough to fit the car with a good reputation.

What do you all think about the rubberized undercoat? Leave it as is, or spray something else over top of it? It's kind of ugly stuff but it sure helps keep the noise down from rocks that hit the panels (I tested it before and after).


Darrin,

Looking at the front paneling... should the panel that covers the front of the gas tank be in a shape of the body to seal off water (as shown in post #73). I have seen other kits have the shape of the body and a rubber gasket pressed on the edge of the panel that fits tightly to the body. Also how or where are you going to put the reservoir for the brake and clutch cylinders?

Frank
 
Yes, a half moon shape. I am just now finishing the mounting for the lower body (I am bolting it into place instead of riveting to make it easy to remove to gain access to the tanks) and couldn't make something to fit just yet but I will soon.

The reservoir will go on the other side of the panel in front of where the cylinders are shown in the photo with lines through the panel to feed them. There is plenty of room for this and, to me, it made it a lot cleaner than to have the cylinders protrude themselves and allowed for a shorter pedal (Wilwood only had the shorter pedal with rearward facing cylinders).


Darrin,

Looking at the front paneling... should the panel that covers the front of the gas tank be in a shape of the body to seal off water (as shown in post #73). I have seen other kits have the shape of the body and a rubber gasket pressed on the edge of the panel that fits tightly to the body. Also how or where are you going to put the reservoir for the brake and clutch cylinders?

Frank
 
One step at a time...

Reservoirs and master cylinders in place behind the bulkhead under the removable access panel. Will get the steering just right next. Need to make another bracket for it. Then it's boosters. After that, I need to get a radiator from RCR (great price on them and have heard they are of very good quality) and then start thinking about that front clip that is now hanging over my head in the garage! LOL
 

Attachments

  • CAM00982-1.jpg
    CAM00982-1.jpg
    117 KB · Views: 495
Made some brackets to allow the front clip to swing like a reverse hood (except the front air dam is so low it will probably hit the ground before fully raised).

Total cost was about $20. They consist of aluminum sheet 0.09" thick, 1/2" sway bar bushings and brackets, 3/8" bolt with a 3/8" to 1/2" sleeve (get them at Lowes).

My plan is to replace the bots with pins with a ring on one end and a cotter pin on the other but for now the bolts are fine until I get everything on the other end set up right.

I took the 2" x 12" aluminum and bent it to form a a bridge with a 2" base on each side and 2" tall. I then glassed those in (man I am not a fan of working with fiberglass) and drilled the holes.

It's not perfect yet in that I still have some fiberglass trimming to do on the lower area of the clip to allow for more upward travel, but the majority of it is done and it works well.
 

Attachments

  • HingesForFront.jpg
    HingesForFront.jpg
    152.4 KB · Views: 498
Last edited:
Here is one of the Aerocatch 3 latches installed. It's flush against the body. Have a bit of clean up to do obviously but it's in there and works very well. Note that there isa body locator to the right of it. Partially why it is offset.
 

Attachments

  • CAM01160-1.jpg
    CAM01160-1.jpg
    226.9 KB · Views: 549
Just mocked up. Some specialty bolts on order and I will probably get Fran's clevis yokes instead of the black steel one you see here, but here is what the rear drivers side looks like so far.

MANY thanks to Renato for reworking the rear uprights to use these hubs which will allow for late model Mustang brakes (or in my case, a Wilwood rear disc and parking brake kit). He also did the upper link you see and did a darn good job on it too.
 
Just mocked up. Some specialty bolts on order and I will probably go with Fran's clevis yokes instead. MANY thanks to Renato for reworking the uprights to accept Mustang brakes. Will be putting a Wilwood disc/parking brake kit on eventually. He also did the upper link and did a very good job on it as well.
 

Attachments

  • RearDriversSide.jpg
    RearDriversSide.jpg
    16.2 KB · Views: 358

Renato

Lifetime Supporter
Hi Darrin,

Nice progress, I need to step it up a notch... :thumbsup:

RCR's clevis yokes require 1/2-20 thread so you need to bore out the upright holes and mounting points on the chassis. For that reason I also changed all my hardware and rod ends to 1/2.
Probably an overkill but...

I like your latches, very tempting...

Renato
 
Hi Darrin,

Very clean looking rear clip attachment. I may have to use it. I'm b ways behind you and Renato. Good thing, you both have some nice ways of getting the job done. Keep it up. By the way, do you need any more info on the dash?
Richard
 
Hi Darrin,

Nice progress, I need to step it up a notch... :thumbsup:

RCR's clevis yokes require 1/2-20 thread so you need to bore out the upright holes and mounting points on the chassis. For that reason I also changed all my hardware and rod ends to 1/2.
Probably an overkill but...

I like your latches, very tempting...

Renato

Just last night I bored the uprights for 1/2 as the ones from GTs40 I got had half inch holes but the hardened 1/2 bolts I have run the coarse thread so I guess I'd have to replace those.

BTW, the Hitachi 1/2, 9 amp drill with a 1/2 cobalt bit made fast work of it.
 
Hi Darrin,

Very clean looking rear clip attachment. I may have to use it. I'm b ways behind you and Renato. Good thing, you both have some nice ways of getting the job done. Keep it up. By the way, do you need any more info on the dash?
Richard

I was thinking today that I need to make a decision about the dash. I'll remeasure mine to see if the one supplied by the guy you know will fit and if so I'll probably go with it. I leveled the one I have but the thing is at least 8-10 pounds heavier than it was and I don't see the need for all that extra weight coupled with the fact that the outer edge still needs fiddled with.
 
Little more work done. Fueling system just about complete and the driver's side rear brakes are on.
 

Attachments

  • HighPressureSideSmall.jpg
    HighPressureSideSmall.jpg
    613.2 KB · Views: 632
  • LowPressureSideSmall.jpg
    LowPressureSideSmall.jpg
    482.4 KB · Views: 576
  • 20131005_155538-1.jpg
    20131005_155538-1.jpg
    126.9 KB · Views: 590
Rear is just about there now. Tweaking and tightening later of course. Gotta get the brake lines attached too.

Starting to resemble a car now I think. Will talk to Scott tomorrow to see when I can expect the transaxle to be done (any day now I think). Really excited to see it. Special built 01E with higher first and second gears, Waveloc, cryo treated. Nice unit.
 

Attachments

  • 2013-10-08 21.00.03.jpg
    2013-10-08 21.00.03.jpg
    363.6 KB · Views: 752
Back
Top