Jason's Coyote Powered RCR40 Downunder

Well spotted. That part is now anodised black so its hard to see. It is the engine inlet air temperature sensor for the ECU.

Work on the car has been moving forward well, I just need to get some photos up soon. I have been doing a lot of electrical work.
 

Randy V

Moderator-Admin
Staff member
Admin
Lifetime Supporter
Thanks Jason - mystery now solved! :)

Looking forward to more pictures too!
 
This is such a bad ass shot.

GT40-Exhaust-2.jpg


So, if one were to purchase a SPF package with coyote mounts, and ford racing 5.0L crate engine with wiring harness, how difficult would it be to install? I would prefer to limit the amount of fabrication.
 
Jason,
Your GT40 is beyond perfection.
Love the nice CNC parts and the level of details.
What a dream car :thumbsup:
 
Thanks for the kind comments guys. I will put some images up on what's been happening lately very soon. I have been working hard on the electrical side. Lots of detail work. I have worked hard to make the electrical side as good as possible as well.
 

Larry L.

Lifetime Supporter
I just discovered this thread and scanned thru it for the first time.

What an absolutely MIND-NUMBING build!

'Truly unbelievable...

:thumbsup::thumbsup::thumbsup::thumbsup:
 
More Electrical!

More work has been done on the Electrics including the selection of the equipment to run the engine. I have decided to use a Haltech Elite 2500 Engine Management System for my Coyote. I have also decided to use a Racepak power module to eliminate fuses and relays. The Haltech system with O2 module and ignition module were assembled into a fabricated assembly to stow them in the RHS rear compartment which is sealed.

gt40-Haltech-Elite-2500-1.jpg


After anodising and final assembly it worked out well and will allow the removal and refit to take a few minutes and help to keep the wiring neat.

gt40-Haltech-Elite-2500.jpg


I am making all the harnesses removable with Deutsch connectors for all the major mating points. The dash was wired with a racepak switch module that allowed me to reduce the wire count somewhat out of the dash allowing just one connector to carry all gauge signal, switch, indicators and other functions.

gt40-dash-racepak.jpg


It will make removing the dash a 5 minute activity as there are only a few fasteners and one plug.

GT40-dash-electrical-2.jpg


Still lots of wiring to do!

GT40-dash-electrical-3.jpg
 
Just went through this build and what is there to say, you ARE perfection. The attention to detail beyond anything I could muster and makes my build look very rough, But it's guys like you that drive us mear mortals try that much harder. You have been at it for 7 yrs a real test of fortitude indeed, how much longer do you think before it's on the road? I have been 6 yrs on my build and at times feel it's too much and then I look at other builds and it brings back. Thanks for sharing your journey with us.

Cheers Leon.
 
Hi Jason
Yes I agree with Leon brilliant build and a masterfull eye for detail keep up the good work
.If you have time could you post a pic of the underside of your gear shift lever, would like to see how the cross shit cable works
Cheers
Woody
 
Hi Jason,
Deep respect. It is built with aerospace precision and beyond.
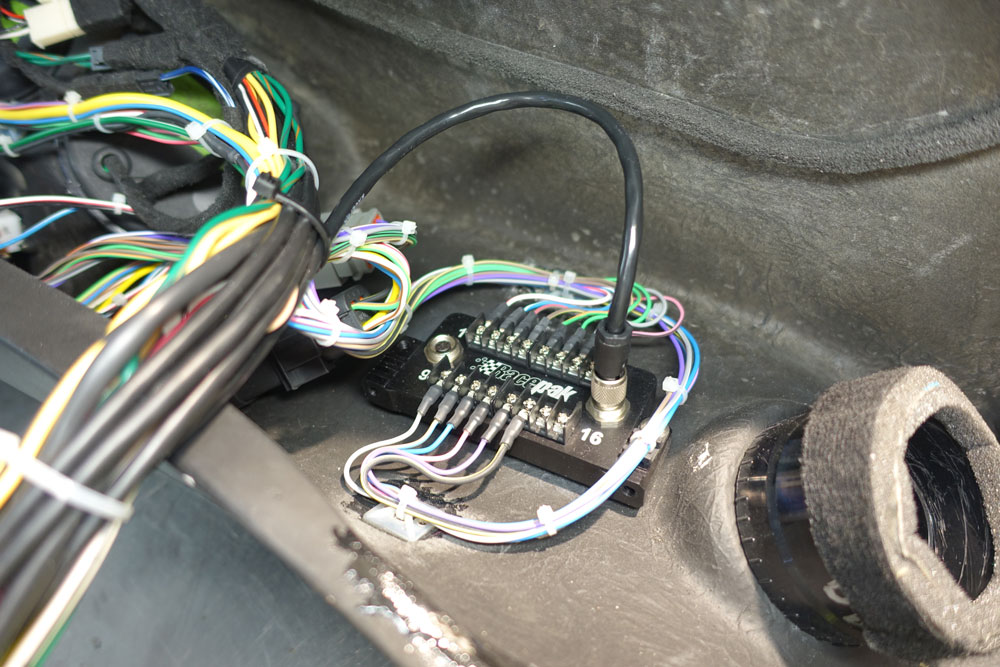
Which type of Deutsch connector and contacts are you using ?
Titanium connector with gold plated contacts ?
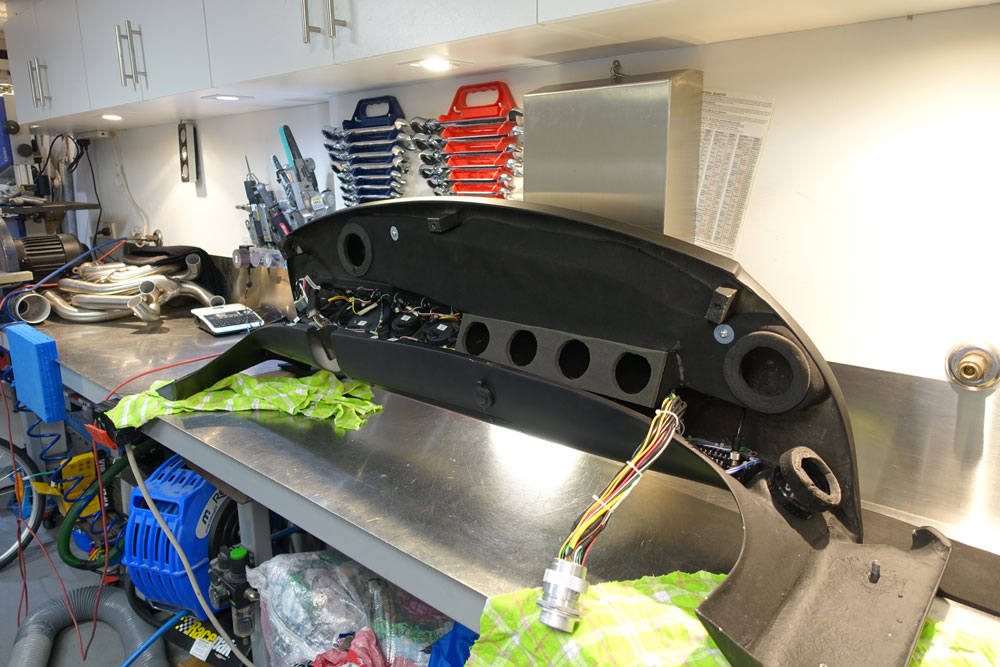
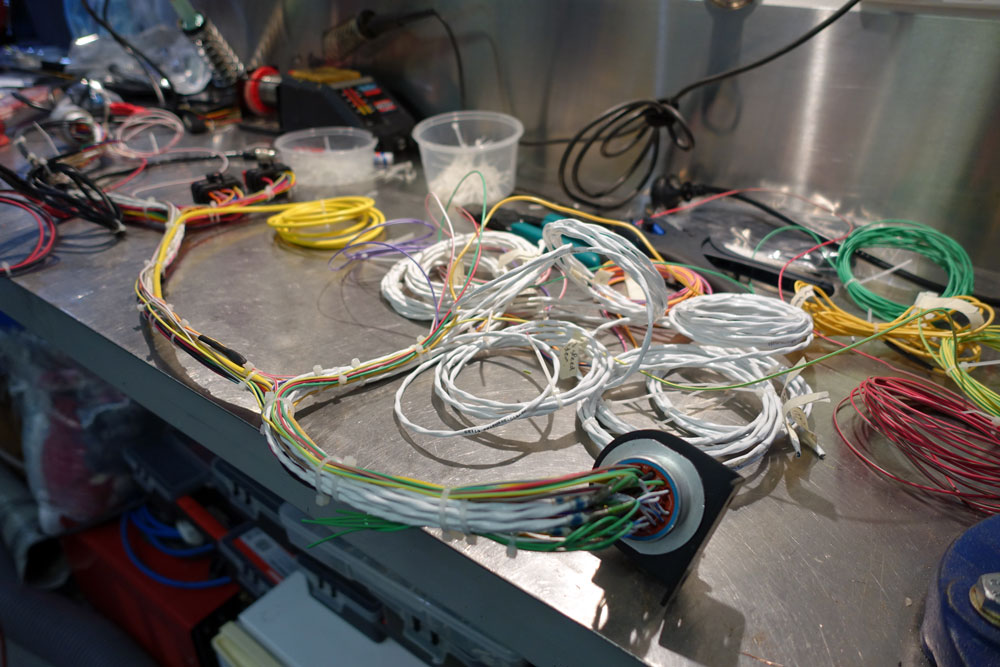
Perhaps you are aware, make sure the receptacle plug is fixed somewhere to the chassis since it is relative heavy and you dont want this to float around. They also have composite connectors on the market in this type but they tend to become brittle at higher temps and after 10 years. The bundle to connector has to be supported for stress relief in case you pull on the cable. We use metal braided socks over the bundle and use bendix clamps to fix the bundle down to the connector. In case you pull on the bundle, the metal braided sock takes the loads and not the crimped wires in the contacts. You also can use viton rubber at the end of the connector in between to seal it down as much as possible. Or use Raychem shrink boots at the end of the connector.
Keep up the good job, you could publish a photo book of your build with all the nice anodished parts , a joy to watch.
 
Thanks for the comments guys, this is not hard it just takes a LOT of time that I don't really have!

I would have liked to use Deutsch Motorsport connectors but they are REALLY expensive and they are not really suited for the wire I am using. The connectors I am using are the DT and DTM series for the low pin count areas and the HD36 series for high pin counts. They are aluminium so they are light and robust. I do use gold contacts for all the shielded signal wires, for power I use the nickel plated ones. With each gold terminal costing over $2 they cannot be used everywhere.

All these connectors are mounted using a flange mount to custom alloy brackets on the car (see the black anodised bracket below). This ensures the connectors are retained as mentioned below. All connectors will be fitted with Raychem adhesive lined heat shrink boots (with Capton tape under them in case I need to cut the boots and re-wire). The boots have high shrink ratios and can be fitted right at the end after debugging.

I am making the harnesses as separate looms, it adds some connectors but means all firewall etc. pass-throughs are with connectors and the harnesses can be removed. The zip ties shown below are used during construction just to hold the wires together until they are wrapped (after testing).

GT40-Wiring-loom.jpg


I cannot wait to finish the wiring, its one of the last big jobs before getting everything back together and looking at adding fluids etc.
 
Hi Jason,
You are really handling it as a pro.
I was already wondering about cable size and contacts since aerospace uses thinner cables compared to the cables for cars.
In aerospace they tend only to braid the bundles in the outside area with Ni-Cu wires or stainless (to handle lightning strikes and cope with interference signals). On top of this metal braid, they use sometimes Nomex (dupont) braid but PEEK is also used. Or if not needed, they use only the PEEK braid.
It can be done in almost all colours also with tracer colours in the braid.
Braided bundles are nice and clean.

Your build is not only about time,
where did you got all the knowledge from to build it
at such high quality level on all levels ?
 
You have some great knowledge on cables. Whenever I do anything on the car I look at forums and try to do as good as the last guy. The fact is many have done better than I have in a lot of areas (full carbon body, better engines etc.). I just hope to get a good all round car to have a lot of fun tuning to drive well over the years.
 
Awesome work as always Jason.

Did I ever tell you that I used your cupcake design for our wedding cake many years ago, I have a very understanding wife :laugh: :thumbsup:


Clayton
 
She's a keeper..... :laugh:
 

Attachments

  • Clay & Jen's wedding 258.jpg
    Clay & Jen's wedding 258.jpg
    166 KB · Views: 377
  • Clay & Jen's wedding 266.jpg
    Clay & Jen's wedding 266.jpg
    145.2 KB · Views: 319
Back
Top