Build Progress-Week Ending 09/20/2013:
I know that I said this before but it's worth repeating: of all the projects that we tackled so far; the Vintage Air has been the most challenging, time consuming and required the most preplaning! About a month ago we hit a road block when we discovered that the condenser/compressor refrigerant line fittings would not fit through the upper radiator port hole.
There were a couple of possible solutions: one was to reroute the line outside the radiator nose pace and
run it to the rear of the car. I didn't like that option at all! The other solution would be to feed the UN-crip-ed hose and find someone with a portable crimp-er to crimp the fitting on the car. However, in a small town like this, sometimes those types of dreams turn out to be just dreams. After searching for a source, I found an R.V shop that runs into these problems all the time. And better yet, it's not a hand held crimp-er. I'll be able to back into his shop and next to his hydraulic crimp-er and run the compressor end to the machine. Yahoo, problem solved!
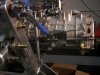
Curb Side Radiator Nose Coolant Fitting:
Last week I showed you the mock-up of a fitting we made out of PCV pipe. The radiator shop finished the fitting and it fits perfectly. Originally, I planed to run the hose from the radiator, through the back of the nose piece and to the passenger side coolant hard line. The problem was because of the location of the lift pump, the bend in the hose was to radical and kinked. The solution was the a hard line with three 90* bends and as I stated earlier, it worked great.
(pic.#005)
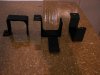
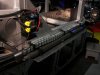
Passenger Side Coolant/Heater Lines Brackets:
George and I fabricated some rectangular shaped “U” flanged brackets that would allow me to stack the two coolant lines and the two heater hose in a nice neat cube.
(pic. #001) I lined the inside of the brackets with some anti-abrasion adhesive rubber.
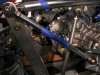
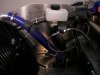
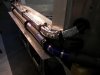
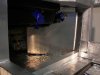
Passenger Side Coolant/Heater Lines:
I wrapped the the two coolant lines and the two heater hoses with some Dynamat heat reflective tape.
(pic.#002 & #003)
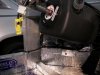
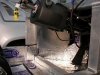
Passenger Side Foot Well Hose Cover:
We routed the four hoses through two 2.5” holes we drilled into the 45* angled-ed section of the passenger side foot well. This proposed two problems:
1) The hose was very visible, very ugly and would be difficult for the upholster to conceal!
- If involved in an accident, the heater hose could rupture and possibly scald the passengers legs (this actually happened to a very good family friend.).
Solution: I fabricated a cover that hides the hoses and can be easily carpeted over.
(pic. #004)
Driver's Side I.S.I.S Cover:
We mounted the two I.S.I.S electric control panels on the 45* angle portion of the street side driver's foot well. Although not as ugly as heater hoses, I wanted to conceal them so I fabricated a cover that would hide the control panels and could be easily carpeted over. For someone that didn't plan to do a lot of fabricating....I find myself doing a lot of fabricating!
Jim

 ) blew and had to be replaced. On a side-note Jay has been great to deal with and warrantied it even though I bought it in 2009.