Thanks Udo, I have a question for all you guys, I have got part of the car wrong and it annoys the hell out of me. My mates don't notice it and when i point it out they tell me I'm being pedantic. So my question is can you guys see it. If you have noticed then I'm picking you're being polite or you also think its nothing and doesn't warrent concern. But I would like to know if anybody has seen it. I know that sounds vague but I'm not going to point it out because if its not obvious to you guys then its nothing to worry about. Cheers Leon

You are using an out of date browser. It may not display this or other websites correctly.
You should upgrade or use an alternative browser.
You should upgrade or use an alternative browser.
M20 Dreaming
- Thread starter leonmac
- Start date
In truth, its hard to 'play' that game without some guidelines, Are we talking body, paint, mechanicals?
The thing I notice (and who knows if rightfully so, you have not got to it yet) the rear wing needs to be blue.
Since being no M20 expert, I may never notice.
In truth, the project is so impressive it's hard to find any 'fault'
The thing I notice (and who knows if rightfully so, you have not got to it yet) the rear wing needs to be blue.
Since being no M20 expert, I may never notice.
In truth, the project is so impressive it's hard to find any 'fault'
Hi Mesa, you are right about the rear wing on both counts it should be blue and it will be I just haven't got to it yet. It is the body and thinking about it today with the fact that I have had to change the shape of the rear deck to sort the heat issue kind of makes the other issue meaningless. It just bugs me every time I look at it now but then I see it every day. I'm still curious to see if others can pick it, after all thats how you improve things from other peoples observations.
Cheers Leon
Cheers Leon
Hello guys I have put a link to an article that has been posted by the local paper/online news about my car, my 5mins of fame so to speak.
A truck driver's 12 year quest to build the replica McLaren that's taken him over the moon | Stuff.co.nz
A truck driver's 12 year quest to build the replica McLaren that's taken him over the moon | Stuff.co.nz
Howard Jones
Supporter
GEBX cooler NACA duct on top of the rear deck?
As far as improving the car. One of the most difficult things I have found to address on my SLC is the "heat soak" problem. Airflow thru the car is really the key, not only insulation. I have found that even the most efficient insulation will transfer heat given enough time. To combat that, airflow across the heat source will in effect "pre-cool" the transfer process and lengthen the time it takes to soak the stuff you want to keep cool. Directed ducting will work as well as venting covered and enclosed spaces.
In some ways, race cars can be easier to address because you don't have to sit still in traffic or drive at very low speeds. Two things that have become a religion for me are first USE the cool-down lap at the end of a session to only cool the car. Stay off the brakes as much as possible, roll the straights as fast as allowed in neutral with the engine at near idle and add as little heat to the package as possible until you get the car back to the pit space. It helps to pick a paddock spot near the track exit.
Then open up the back of the car right away as soon as you get out of the car and let it cool between sessions. This may be the most important thing you can do that's not a modification to the car.
Ceramic coating inside and out on the headers really works. I am trying to address this issue on my car right now and I will let you know if the stuff I am going to use as a sleeve for cables work well when I know.
Fantastic car! And no you don't need the NACA duct.
Last edited:
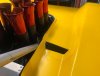
Thanks for tips Howard, I have had to remodel the rear deck between the wheel bulges in doing that I have added air intakes either side mid way down the Injection opening this will scoop air and direct it over the exhaust where they come together at the collector I will then add a heat shield covered with the heat reflective foil and I think that should be the body protected. Then I'll replace the cooked plug leads with the ceramic booted leads with the MSD heat shielding. I have been told about ceramic coating the exhaust ( I have done it before) but I like the almost Titanium look the stainless pipes have become so don't want to cover it up. I will put some photos of the remodeled deck up soon, I think once its yellow again most people won't even notice it.
And Howard it's not the NACA duct but you have a keen eye to notice it was gone, I had to remove it again because of the exhaust system.
And Howard it's not the NACA duct but you have a keen eye to notice it was gone, I had to remove it again because of the exhaust system.
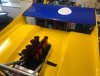
Hello guys I have done the rear deck mods. just some finishing work and color back on it and it will be done the ceramic plug leads are on their way so hope to fire it up again soon. I'm hoping to get it to the MG classic in November but I won't be able to drive it as I have had a bit of a health scare and will get a mate of mine to run around in it for some more test miles. I will put up some more photos when its running again. Cheers Leon
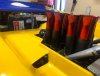
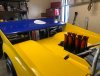
Finally got the repair on the rear clip finished after the small fire from the test day. Lined the under side with fire resistant heat proofing and wrapped the rear wing. The wrap has not gone as well as hoped and will probably come off and get painted at a later date, I have a magazine coming to do an article next moth so it will do for the photos. The plug leads are here now so will fit them during the week and give it another fire up. The MG classic has been cancelled so not sure when it will get another run in the near future. Cheers Leon
Attachments
Leon,
You probably mention it in this thread but, what intake manifold did you use, or did you cast it yourself? Also, why are the intake tubes clearanced on the inner side?
Don't you have car track days in NZ? Nothing like trundling around in the slow group with the likes of Honda Civic Rs")
You probably mention it in this thread but, what intake manifold did you use, or did you cast it yourself? Also, why are the intake tubes clearanced on the inner side?
Don't you have car track days in NZ? Nothing like trundling around in the slow group with the likes of Honda Civic Rs
Leon - I followed your build with great interest and scanned through it again. To build the entire car from scratch like you did is an enoumous undertraking - I still admire the resilience level to master all the challenges over such a long period - Congratulations to that fantastic looking end result ! One thing I am I am also facing is to build a large wing like you did in AL. Can you shed some light on how you build your wing - especially the skin process, e.g. what gauge is your sheet and how did you wrap that massiv sheet around the ribs ?
Wolfgang, if I can comment on how I did mine with no facilities other than my press. First I drew out some wing foil shapes, band sawed them from ply and then set out finding a sheet metal guy with rollers and patience! Some large dollars later I had the top and bottom sections handed to me. Nobody offered any way to make the leading edge so Kiwi ingenuity to the for. Take one long piece (longer than your wing) of10`` by 2`` timber and screw 2 bits of 100`` by 50`` leaving approx. a 35mm gap. glue and screw this set up together. Then get a bit of stout smooth EWS tube 35mm in dia and a piece of 150`` by50`` to act as a strong back for when you put this set up into your hyd press. For my leading edge, I used .8 mm aly cut to approx 225 mm wide and the exact length /width of your wing. To assit in keeping shape I had the edges folded approx 10mm in along the length and this helped keep things in shape. Working back and forth, it forms easily. By very carefully pre drilling all your holes in the leading edge you can Cleco it in place and transfer drill holes /rivet the front and bottom together.

 I also put a 90deg Gurney fold on the bottom. You can see a spare leading edge in the back ground.
 trailing edge to keep everything strait. Mark where your `ribs go and then glue them in and complete the process with the top. Think about how you will attach the wing to the car and design in the mounts, aly sheet sandwiched over two correctly spaced ribs is really strong. This set up makes a very strong structure that certainly looks the part. Mine is for looks but has successfully done over 100k on the trailer.
Russel - brilliant - love that hands on approach - its only when you have to make one you begin to realize that its not that trivial as it seems. Yours is looking great without dents by the rivets. I also considered a foam/grp one but thats also not easy, might be heavier and does not look that authentic. Keep up your great work - much appreciated mate !
Back in the '70s a friend ran a top fuel dragster and wanted to add a rear wing. I told him I'd build it for him if he would return it to me if he ever sold the car. He did sell the car eventually and I still have that wing.
My approach to building the wing was a standard aircraft technique- all aluminum sheet metal. The spar was formed into a "C" section by bending back both edges of a strip of 0. 090" 6061-T6 aluminum. To this spar I riveted on eleven formed aluminum ribs. These ribs were formed in two pieces, one from leading edge to the spar and the other from the spar back to the trailing edge. I cut NACA 4412 profile rib forming blocks out of Rock Maple with the edges tapered to account for springback and grooves to shrink the edges. The two pieces of wood were held together by bolts with aluminum sandwiched in between. I hammered oversized pieces of 0.064" 6061-T4 over the wood blocks to form 11 ribs. Two lightening holes were in each rib.
The skin was very thin- 0.016" 2024-T3 aluminum sheet purchased from Hughes Aircraft Missile Division surplus. Being so thin, it was very easy- but rather clumsy- to bend it around the ribs that I had already riveted to the spar. Working around the ribs methodically, I drilled and deburred #30 holes and inserted Clecos to hold the sheet to the ribs and spar. The Clecos were removed and the sheet was trimmed to its final size and the spar/rib assembly was given a coat of zinc chromate with a spray can. The sheet was re-attached with Cleco fasteners and Pop riveted in place. A quick spray can coat of black paint was applied (I didn't think this would have any longivity so it was a "quick & dirty" paint job) and the wing was finished. No end plates were used on this wing. It was stiff and strong and extremely light weight. Russell's approach is far easier and very straightforward if weight is not such a critical factor. Sorry for such a long post....
Neil - if I understand correctly - your approach was handforming the skin around the substructure was possible because the skin was such a thin gauge. This also ment your skin was just one piece rather than 3 like in Russels case ?
Yes, bending the 0.016" aluminum sheet around the ribs was very easy due to its thin gauge. The skin was a single piece but there was also a very small "V" section that covered the skin joint at the trailing edge.
Hi Wolfgang, My approach was a combination of both Russell and Neil's I used ply to make the ribs as Russell did, I used 0.075 6061-T6 and rolled the front edge over a length of roll cage tube and folded the trailing edge flat then at 45 deg 100mm down from that. The 1200 x 2400 sheet was not quite enough to do in one complete piece so there is a strip about a foot wide on the bottom surface. I also ran 1" x 1" angle alloy a foot apart the width of the wing top and bottom and then glued and rivetted the skin to them and the edge of the ribs. A 20mm Angle runs the width of the trailing edge for rigidity. I hope everyone is having a great Christmas, Cheers Leon.
Similar threads
- Replies
- 7
- Views
- 872