
You are using an out of date browser. It may not display this or other websites correctly.
You should upgrade or use an alternative browser.
You should upgrade or use an alternative browser.
Mark Reid RCR-40 Build
- Thread starter MReid
- Start date
I used a thermostat housing from CSR.
CSR Swivel Thermostat Housings - summitracing.com
I then turned it to make the hose miss the rear wall.
Jeff Hamilton
CSR Swivel Thermostat Housings - summitracing.com
I then turned it to make the hose miss the rear wall.
Jeff Hamilton
Jeff, that's exactly what I plan on using. The hose, housing, and filler on there now were left over from another project. I just stuck them on to keep dirt out. I don't recall seeing an email from you? Try reidinlondon at aol.com. Sorry!
I should have mentioned that Fran got me the transaxle and sent it and the shifter out to Dennis for rebuilding and set up. All for a very reasonable price. While he had it, I asked Dennis to install that slick external clutch slave (Got that after seeing Ron's RCR40 at Carlisle last year). He also supplied the stub axles and half shafts, making the whole drive train install as painless as possible.
Ron Randall, I am very impressed with how fast the coupe rebuild is coming! Glad you and Fran have connected on the secret project.
in my post above, I mean that Fran supplied the half shafts and stub axles, not Dennis. Sometimes my typing gets ahead of my brain!
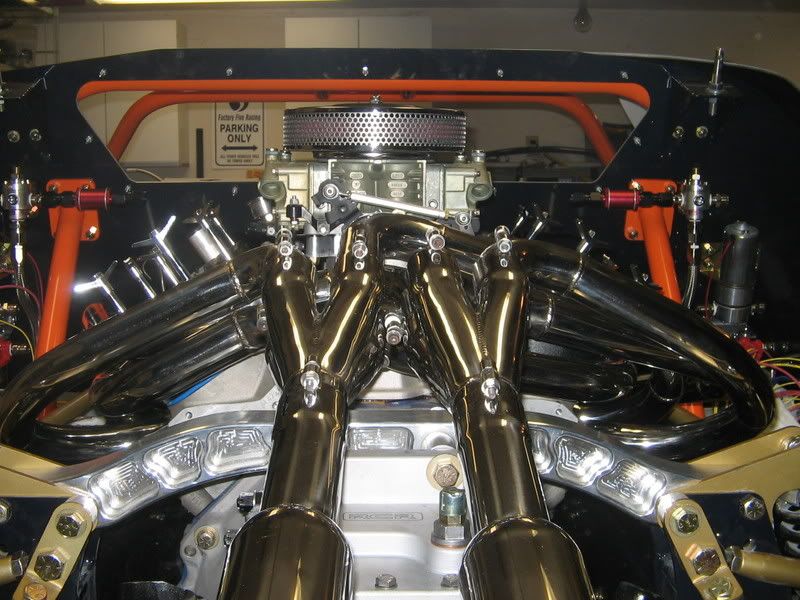
I have to go to my inlaws and pick up my engine hoist tomorrow. In the meantime, I started working on the fuel pumps, filters, and plumbing:
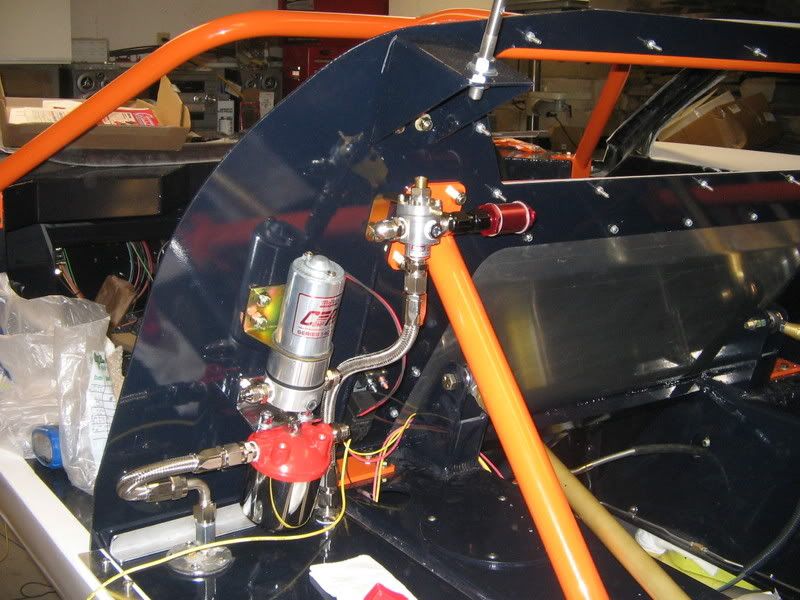
I finished both sides with the exception of the hard line that will connect the filter to pump, pump to regulator, and regulator to tee. I only used flex line where the filters and regulators connect to the tanks. Everthing else on the firewall will be plumbed with hard line.
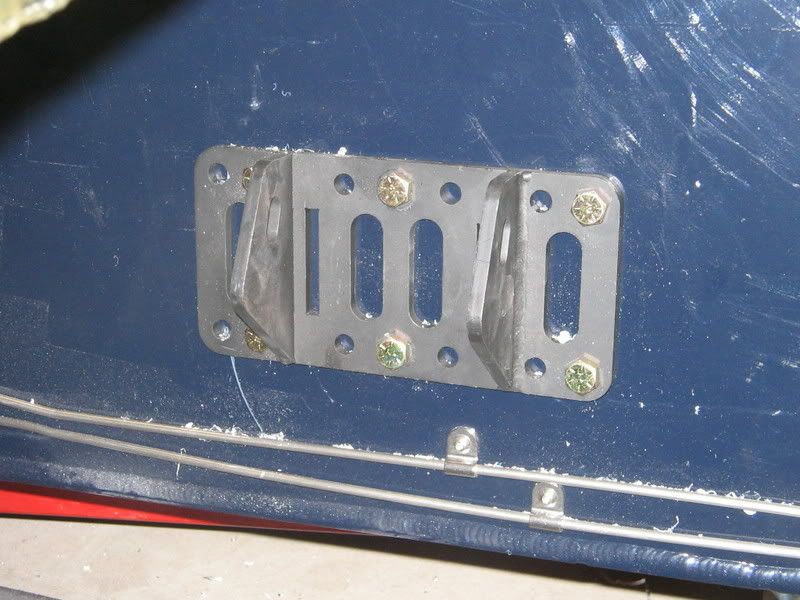
You'll also notice that I installed the rear clip retainer brackets that Fran made and had powdercoated in the same dark blue as the rest of the chassis.
I'm dropping the engine in this weekend if everything goes as planned. That will be exciting!
I have to go to my inlaws and pick up my engine hoist tomorrow. In the meantime, I started working on the fuel pumps, filters, and plumbing:
I finished both sides with the exception of the hard line that will connect the filter to pump, pump to regulator, and regulator to tee. I only used flex line where the filters and regulators connect to the tanks. Everthing else on the firewall will be plumbed with hard line.
You'll also notice that I installed the rear clip retainer brackets that Fran made and had powdercoated in the same dark blue as the rest of the chassis.
I'm dropping the engine in this weekend if everything goes as planned. That will be exciting!
Last edited:
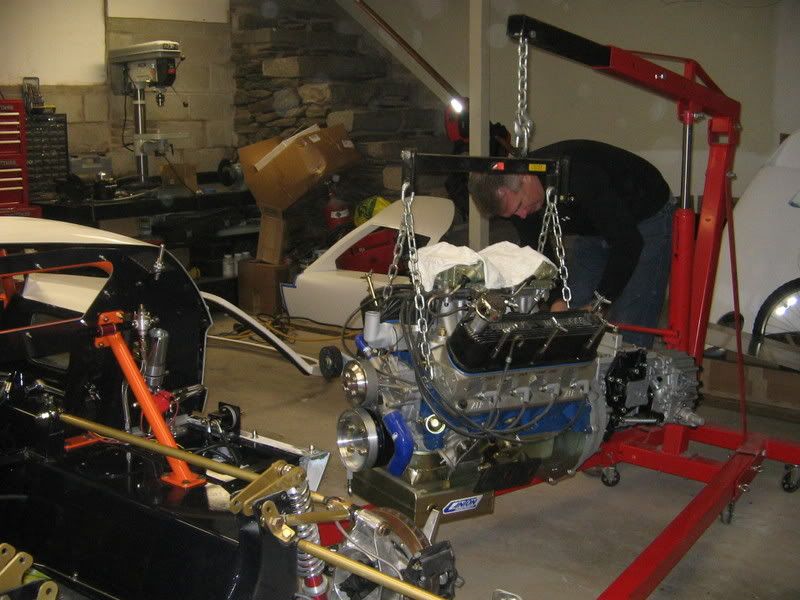
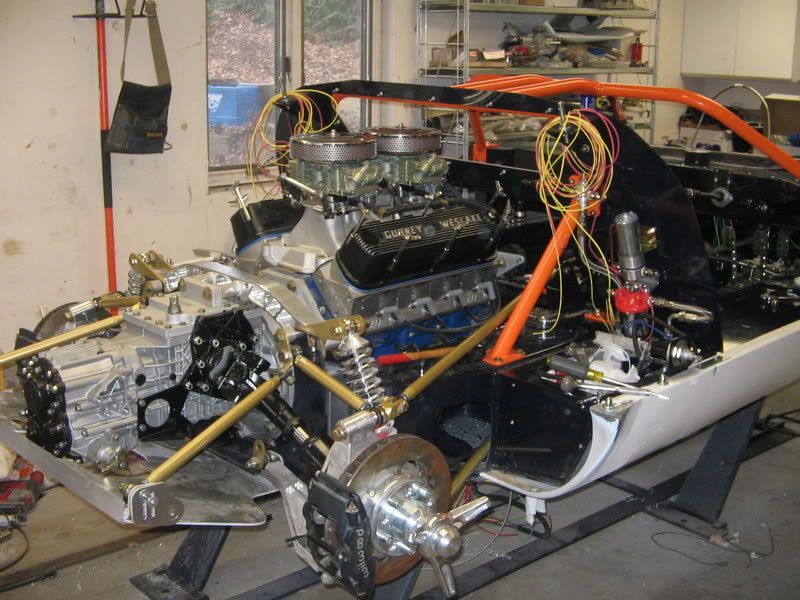
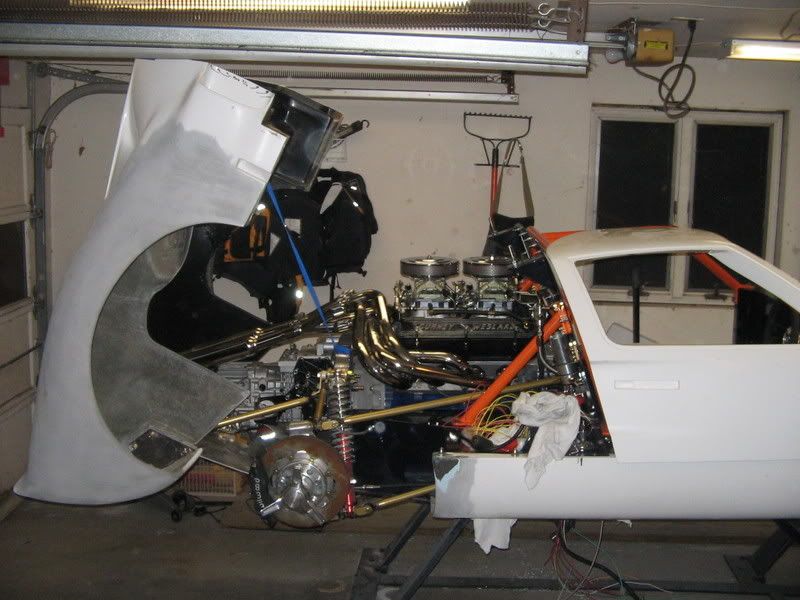
Well, after about 6 hours of work the engine is in hopefully for the last time!
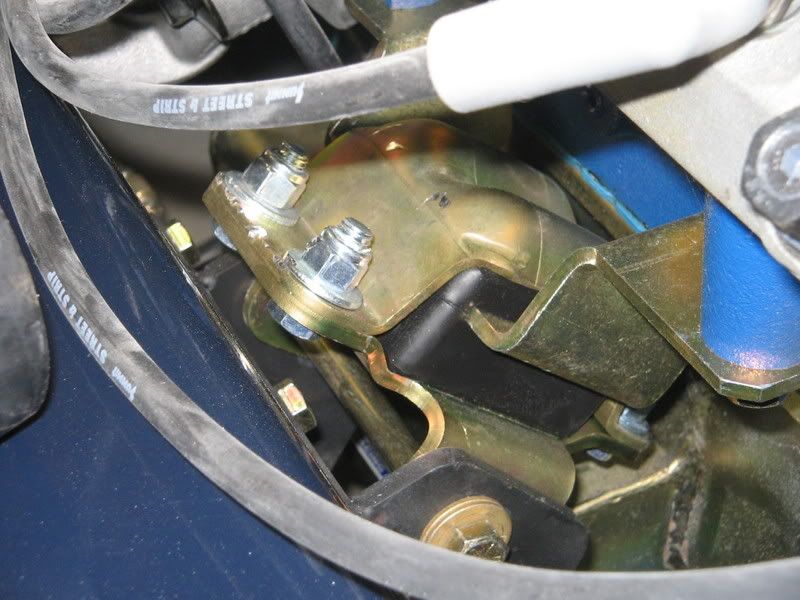
She's up, off the stand with motor mounts and frame brackets bolted on:

Before I go any farther, the roll cage and firewall have to come off:
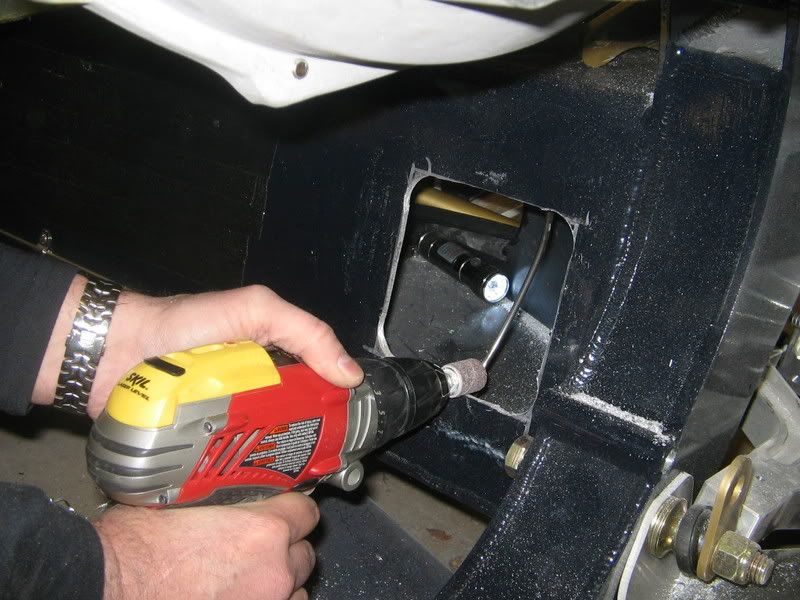
Ah, a perfect fit. Only had to go in and out 5 times, while I carefully measured and trimmed a hole for the bellhousing starter pocket. Fran supplies a billet plate to bolt in that forms a recess for the pocket. Only required if you have a zf transaxle. Then back in again with very careful positioning to measure and mark the holes for the engine mount frame brackets. Out again to drill and install and back in for the final time:
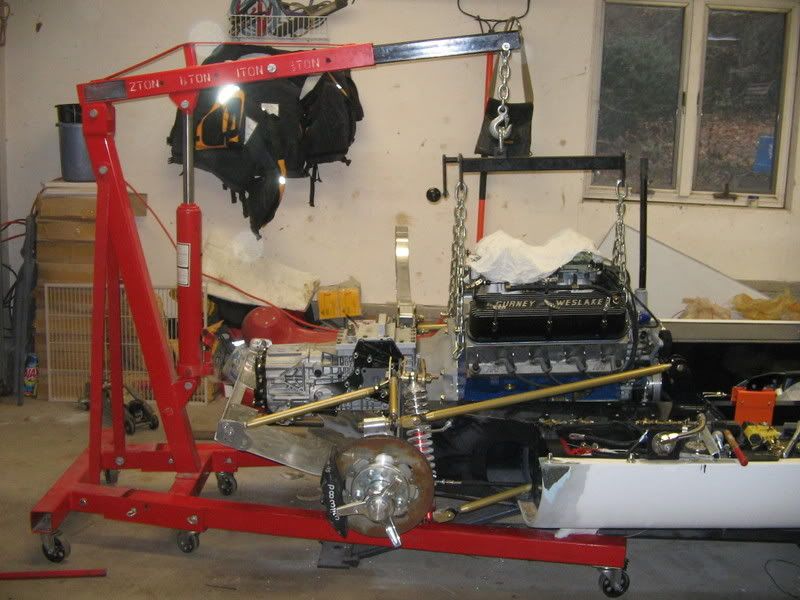
It was at this point that the wife came down and said, "Geez, that car is all engine!" It was at that point that I knew it was truly my dream car!
Tomorrow, the roll cage, firewall, and engine electrical work gets finished. Yee haw!
She's up, off the stand with motor mounts and frame brackets bolted on:
Before I go any farther, the roll cage and firewall have to come off:
Ah, a perfect fit. Only had to go in and out 5 times, while I carefully measured and trimmed a hole for the bellhousing starter pocket. Fran supplies a billet plate to bolt in that forms a recess for the pocket. Only required if you have a zf transaxle. Then back in again with very careful positioning to measure and mark the holes for the engine mount frame brackets. Out again to drill and install and back in for the final time:
It was at this point that the wife came down and said, "Geez, that car is all engine!" It was at that point that I knew it was truly my dream car!
Tomorrow, the roll cage, firewall, and engine electrical work gets finished. Yee haw!
Well done that man......!!!
Give me a call next week sometime....
Give me a call next week sometime....
")
Ron McCall
Supporter
Nice job,Brother!!
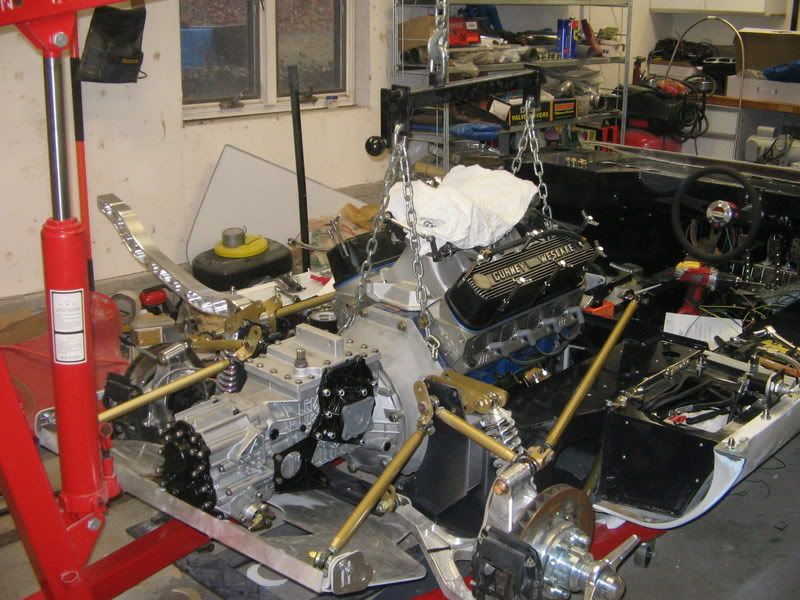
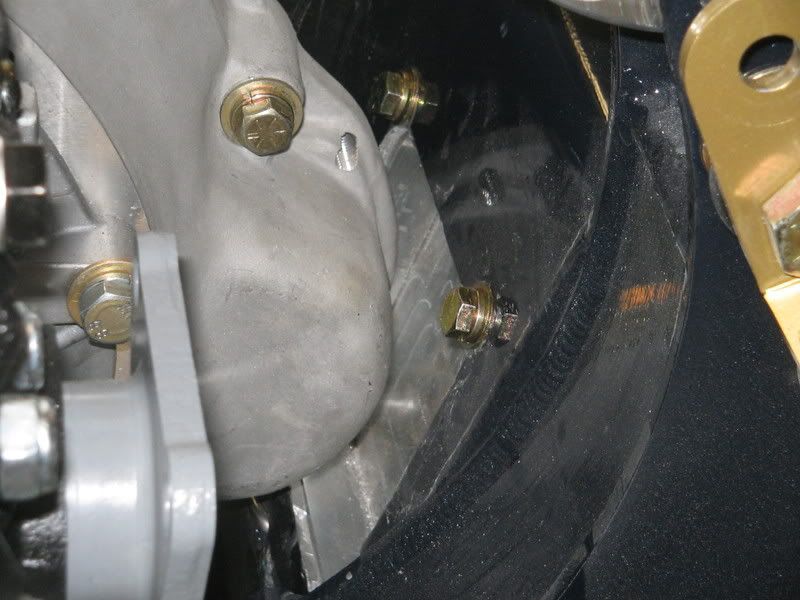
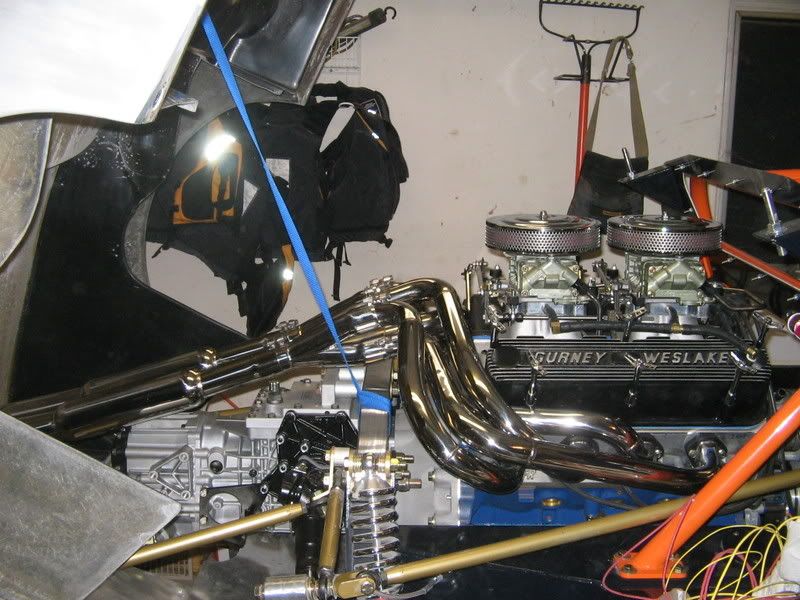
Okay, I'm kicking butt now! My 14 year old son Mike has been a real help. We finished the engine install by making up some spacers for the ZF. The length is determined by how far back your engine sits. My spacers ended up being 1 7/8":

I also made spacers for the upper control arm reinforcement (upper right in this picture) and bolted in the half-shafts. The bolts on the upper flange are just temporary until I get the correct 10mm bolts. The u-joint straps were a real pain! The 8mm bolts with dried locktite on them broke two 8mm 1/4" drive sockets! I finally got a 3/8" drive and drove them home, but my hands are killing me!
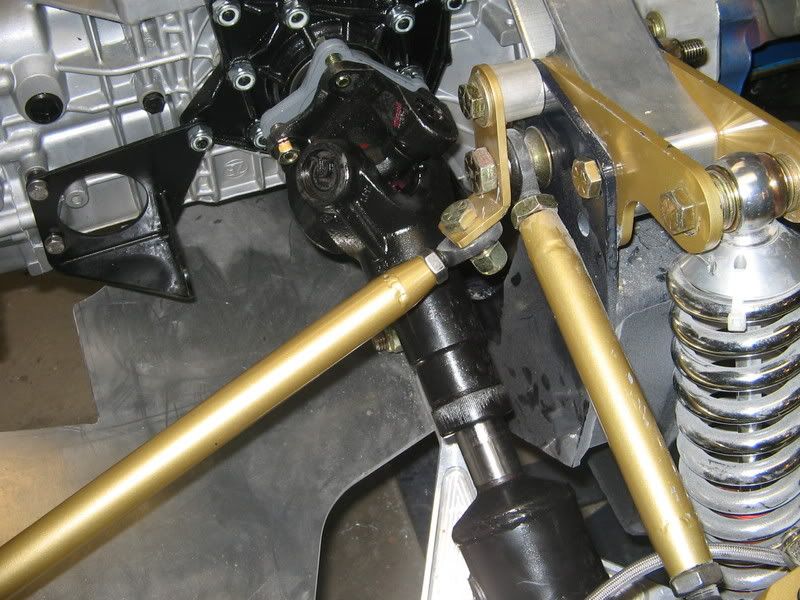
We also reinstalled the firewall and roll cage. I had a Karmic moment. My son who often rushes, had his rachet slip and knick the roll cage powder coating. I was giving him a hard time about rushing, when mine slipped and did the same thing! Oh, well the seat will cover it.
I got to go back down now and install these:
I also made spacers for the upper control arm reinforcement (upper right in this picture) and bolted in the half-shafts. The bolts on the upper flange are just temporary until I get the correct 10mm bolts. The u-joint straps were a real pain! The 8mm bolts with dried locktite on them broke two 8mm 1/4" drive sockets! I finally got a 3/8" drive and drove them home, but my hands are killing me!
We also reinstalled the firewall and roll cage. I had a Karmic moment. My son who often rushes, had his rachet slip and knick the roll cage powder coating. I was giving him a hard time about rushing, when mine slipped and did the same thing! Oh, well the seat will cover it.
I got to go back down now and install these:
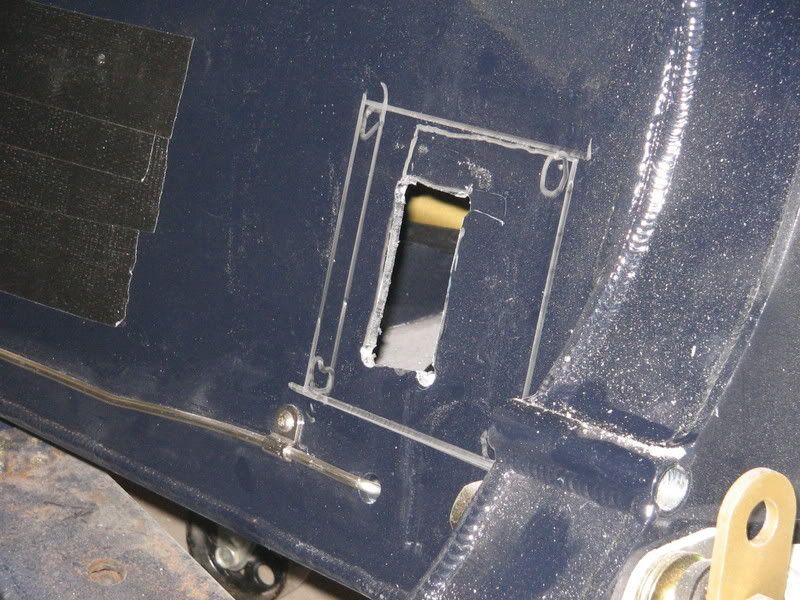
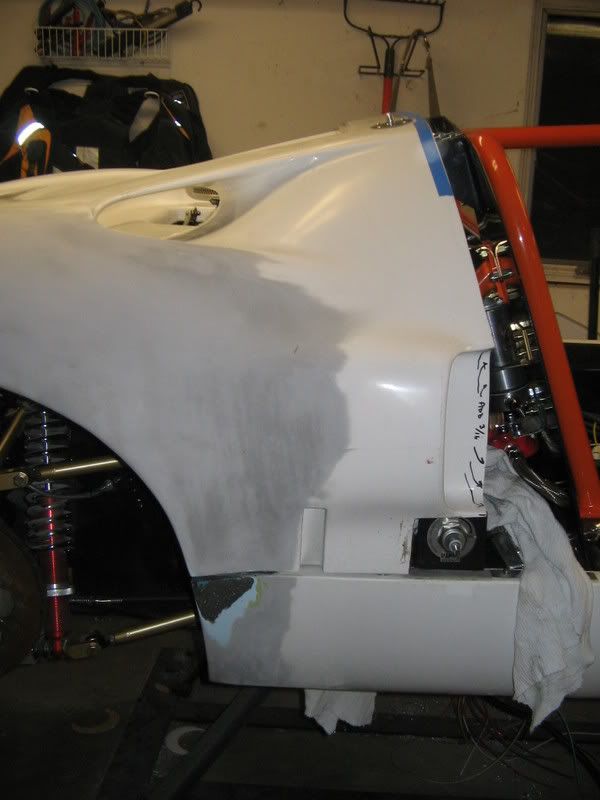
Oh, here are some other pictures that might help someone. I had the engine in and out a couple of times to ensure I cut the starter pocket correctly. Fran makes a great billet plate just for this and it has to be done by the builder based on your engine choice and position in the frame. It was very straight forward and covered in the build manual.
The offending piece:
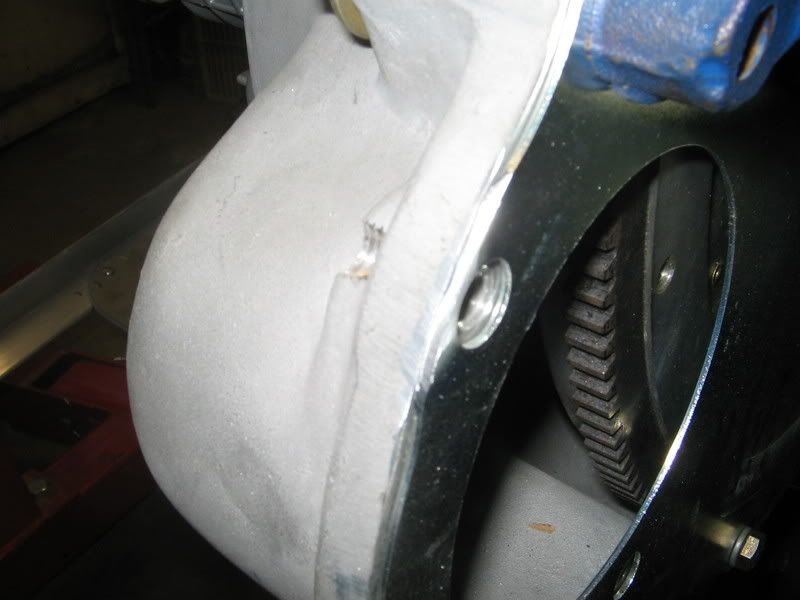
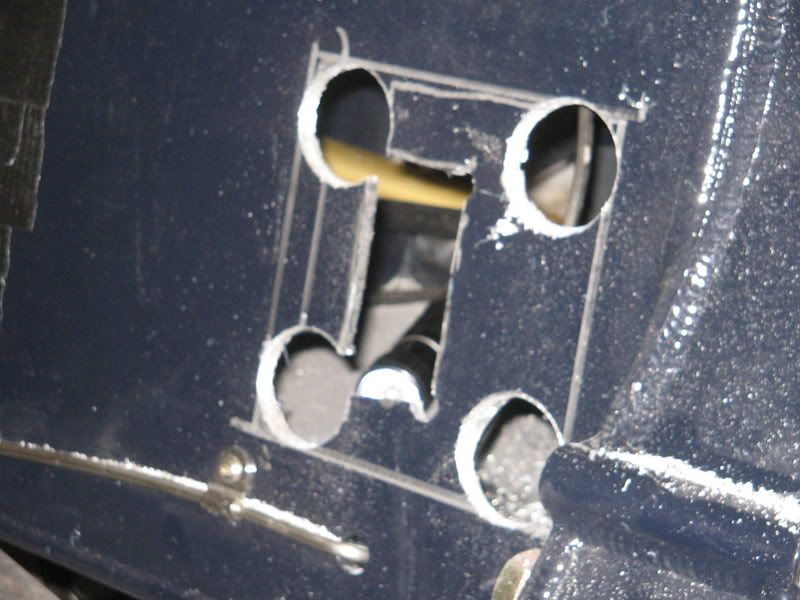
First trim and marking for total cut:
Cut the corners, but watch out the brake line is right behind the panel:
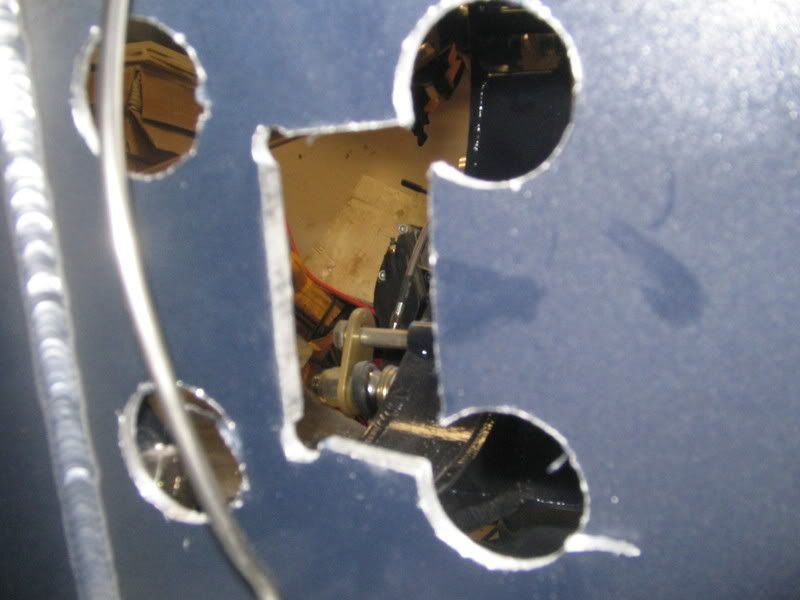
View from inside the chassis:
The offending piece:
First trim and marking for total cut:
Cut the corners, but watch out the brake line is right behind the panel:
View from inside the chassis:
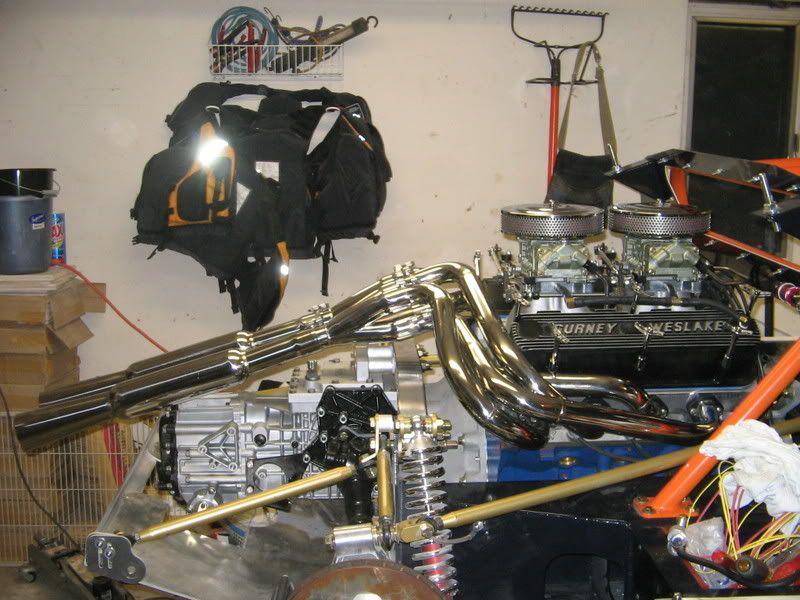
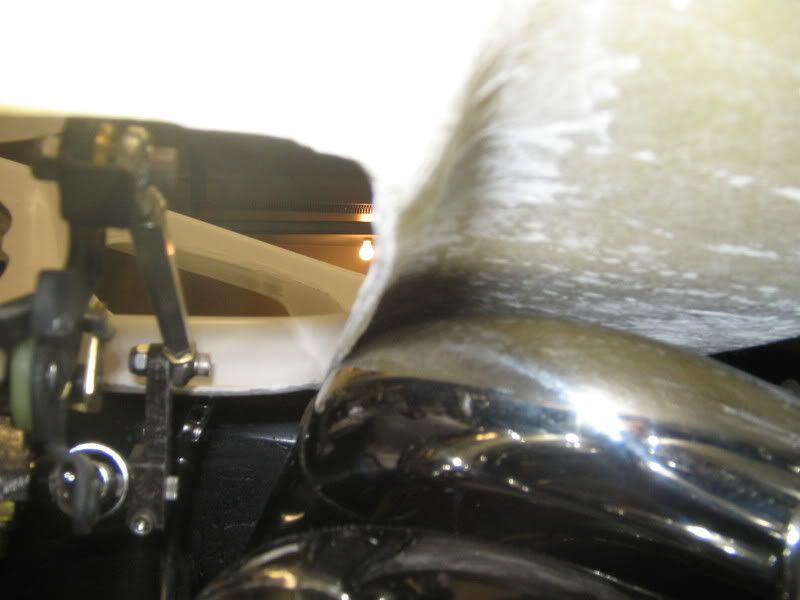
Mark, is your rear clip going to fit ok with that tall manifold?


Similar threads
- Replies
- 25
- Views
- 7K
- Replies
- 3
- Views
- 978