Renato's GT40 MkI Coyote

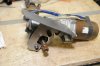
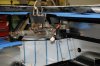
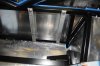
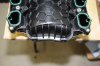
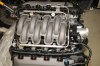
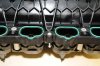
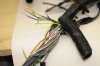
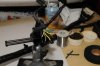
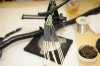
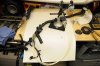
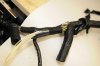
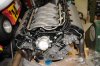
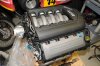
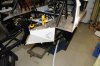
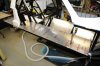
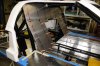
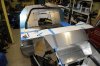
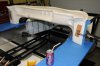
Hello very clean and neat work !
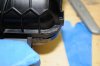
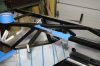
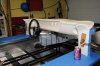
Don't know if you use this old "trick"
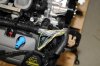
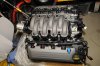
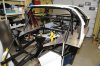
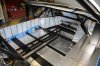
To clean easily too much seal first use water with soap to do neat line beams and then clean aluminium with white vinager (this prevent to use too much expensive cleaner as acetone) and leave alu with a not too bad aspect
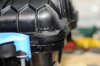
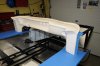
 

Renato

Lifetime Supporter
Hi Michel,

No, but I do now, thanks!
I'm a bit trigger happy and bad habits are hard to get rid of. It's not so bad to get the extra off but I'll rather spend my time on other things.

Renato
 

Renato

Lifetime Supporter
Engine

Here's how I did the reversal of the intake on the Coyote. The engine is from a 2012 Mustang and has the throttle body pointed to the front and in a mid-engine car that would be in to the cabin. I know it has been done so it is possible.
Here's a set of pictures showing how I did it. I used hi temp wire and soldered all connections. Double shrink tubing over that.
Not sure if I can reuse the cover or it will be in the way.

Renato

Part 1 pictures:
 

Attachments

  • Renato's GT40 Coyote Intake 02.jpg
    Renato's GT40 Coyote Intake 02.jpg
    204.7 KB · Views: 897
  • Renato's GT40 Coyote Intake 03.jpg
    Renato's GT40 Coyote Intake 03.jpg
    198.5 KB · Views: 803
  • Renato's GT40 Coyote Intake 05.jpg
    Renato's GT40 Coyote Intake 05.jpg
    83.1 KB · Views: 779
  • Renato's GT40 Coyote Intake 06.jpg
    Renato's GT40 Coyote Intake 06.jpg
    91.6 KB · Views: 722
  • Renato's GT40 Coyote Intake 07.jpg
    Renato's GT40 Coyote Intake 07.jpg
    134.1 KB · Views: 754
  • Renato's GT40 Coyote Intake 09.jpg
    Renato's GT40 Coyote Intake 09.jpg
    106.1 KB · Views: 715
  • Renato's GT40 Coyote Intake 10.jpg
    Renato's GT40 Coyote Intake 10.jpg
    110 KB · Views: 730
  • Renato's GT40 Coyote Intake 12.jpg
    Renato's GT40 Coyote Intake 12.jpg
    153.3 KB · Views: 702
  • Renato's GT40 Coyote Intake 13.jpg
    Renato's GT40 Coyote Intake 13.jpg
    90.6 KB · Views: 678
  • Renato's GT40 Coyote Intake 14.jpg
    Renato's GT40 Coyote Intake 14.jpg
    136.9 KB · Views: 673
  • Renato's GT40 Coyote Intake 15.jpg
    Renato's GT40 Coyote Intake 15.jpg
    198.2 KB · Views: 763
  • Renato's GT40 Coyote Intake 18.jpg
    Renato's GT40 Coyote Intake 18.jpg
    157.9 KB · Views: 715
  • Renato's GT40 Coyote Intake 19.jpg
    Renato's GT40 Coyote Intake 19.jpg
    93.9 KB · Views: 679
  • Renato's GT40 Coyote Intake 20.jpg
    Renato's GT40 Coyote Intake 20.jpg
    112.2 KB · Views: 670
  • Renato's GT40 Coyote Intake 22.jpg
    Renato's GT40 Coyote Intake 22.jpg
    198.2 KB · Views: 681

Renato

Lifetime Supporter
Engine

Part 2 pictures:
 

Attachments

  • Renato's GT40 Coyote Intake 25.jpg
    Renato's GT40 Coyote Intake 25.jpg
    100.6 KB · Views: 666
  • Renato's GT40 Coyote Intake 28.jpg
    Renato's GT40 Coyote Intake 28.jpg
    104.8 KB · Views: 662
  • Renato's GT40 Coyote Intake 29.jpg
    Renato's GT40 Coyote Intake 29.jpg
    159.9 KB · Views: 641
  • Renato's GT40 Coyote Intake 30.jpg
    Renato's GT40 Coyote Intake 30.jpg
    108 KB · Views: 608
  • Renato's GT40 Coyote Intake 32.jpg
    Renato's GT40 Coyote Intake 32.jpg
    148.1 KB · Views: 623
  • Renato's GT40 Coyote Intake 33.jpg
    Renato's GT40 Coyote Intake 33.jpg
    144.3 KB · Views: 633
  • Renato's GT40 Coyote Intake 35.jpg
    Renato's GT40 Coyote Intake 35.jpg
    136.8 KB · Views: 590
  • Renato's GT40 Coyote Intake 37.jpg
    Renato's GT40 Coyote Intake 37.jpg
    195.7 KB · Views: 662
  • Renato's GT40 Coyote Intake 38.jpg
    Renato's GT40 Coyote Intake 38.jpg
    182.4 KB · Views: 690
  • Renato's GT40 Coyote Intake 39.jpg
    Renato's GT40 Coyote Intake 39.jpg
    186.2 KB · Views: 665

Renato

Lifetime Supporter
Chassis

Cut panels for sills and engine compartment, interior and engine bay. Lots of drilling, cutting, fitting and riveting.
Started on firewall. Out of aluminum, more is on order.
My plan is to install double wall with insulation in between. I'll wait till I finish complete firewall before riveting.

Renato
 

Attachments

  • Renato's GT40 103.jpg
    Renato's GT40 103.jpg
    168.7 KB · Views: 721
  • Renato's GT40 104.jpg
    Renato's GT40 104.jpg
    159.7 KB · Views: 701
  • Renato's GT40 105.jpg
    Renato's GT40 105.jpg
    208.6 KB · Views: 704
  • Renato's GT40 106.jpg
    Renato's GT40 106.jpg
    172.2 KB · Views: 641
  • Renato's GT40 107.jpg
    Renato's GT40 107.jpg
    211.4 KB · Views: 758
  • Renato's GT40 109.jpg
    Renato's GT40 109.jpg
    166.2 KB · Views: 687
  • Renato's GT40 110.jpg
    Renato's GT40 110.jpg
    168.7 KB · Views: 775
  • Renato's GT40 113.jpg
    Renato's GT40 113.jpg
    169.7 KB · Views: 685

Renato

Lifetime Supporter
Steering

First fit of the dash. Had to cut part of the front steering column mount, it was hitting the fiberglass. I was going to redo that part anyway. The fiberglass is going to require work also.
On the other hand, steering column fitted good. I'm installing a quick disconnect so the steering wheel will come back another 3 inches. The steering shaft will pass nicely between clutch and brake pedal.

Renato
 

Attachments

  • Renato's GT40 116.jpg
    Renato's GT40 116.jpg
    116.8 KB · Views: 640
  • Renato's GT40 117.jpg
    Renato's GT40 117.jpg
    120.5 KB · Views: 655
  • Renato's GT40 119.jpg
    Renato's GT40 119.jpg
    127 KB · Views: 689
  • Renato's GT40 120.jpg
    Renato's GT40 120.jpg
    131.3 KB · Views: 706
Dear Renato,

it probably makes not much sense to fit the dashboard without the spider fittet properly.
Highly recommand to fit all other body parts before in order to find the final location for the spider and then fit the dashboard.

regarding the double firewall, i highly can recommand it. CHeck my build log, i have built such for my car.

BTW is a girl building this car ( Cherry coke ) ? :)

TOM
 

Renato

Lifetime Supporter
Hi Tom,

Yes, I agree with you. My goal with this test fit was to get a general feel for how much off is the dash and location of my steering. I actually put the spider back on last night to see how it all fits together. Of course, the spider is in approximate location also. I got it where the measurements say it should be but didn't fit the windshield or the doors yet to see if they match up. A lot of tweaking to do. I'm not doing too much fiberglass work till it gets warmer so I can do it outside.

BTW, your work on the GT40 is inspirational. Lots of great mods.
You are a master with fiberglass. Do you fancy a trip to New York... :laugh:

I see you noticed my sponsor... :laugh:
What can I say, I have a thing for Cherry Coke...

Regards,
Renato
 
Looking great Renato.
How are you cutting your ali? Ive had all my panels laser cut so far but I need to do some by hand now.
 

Renato

Lifetime Supporter
Hi Jayson,

Laser is the way to go.
I cut mine with power shears (look back at my posts), jig saw with aluminum blade or sheet metal notcher. Notcher leaves very clean cut and requires minimum finishing. Shears leave a small mark on top side, so if you cut with good side down, you're OK. Also, they don't do turns.
You probably already have a jig saw. Get a aluminum blade and use lubricant and you should be fine.
I read somewhere nibblers do a good job on aluminum sheets.Was tempted to buy one but went with shears.

Regards,
Renato
 

Renato

Lifetime Supporter
Steering

While waiting on aluminum sheets to arrive I started get the ball rolling in few other departments.
Fabricated the front and rear brackets for the steering column from 4130 alloy steel 1/8 thick. I had to cut both original welded brackets because they didn't fit my installation. Test fitted and left some room for final adjustment when the spider and dash are in permanent location. I have the U-joints and waiting on tubing to fabricate the steering shaft.

Renato
 

Attachments

  • Renato's GT40 128.jpg
    Renato's GT40 128.jpg
    199.2 KB · Views: 517
  • Renato's GT40 130.jpg
    Renato's GT40 130.jpg
    207 KB · Views: 519
  • Renato's GT40 131.jpg
    Renato's GT40 131.jpg
    124.9 KB · Views: 517
  • Renato's GT40 132.jpg
    Renato's GT40 132.jpg
    142.4 KB · Views: 590
  • Renato's GT40 134.jpg
    Renato's GT40 134.jpg
    149.9 KB · Views: 627

Renato

Lifetime Supporter
Suspension

Fabricated caliper mounting bracket.
Waiting on brake pads to position the final two holes.
I'm using stock 2012 Mustang parts and EBC Yellowstuff pads for now.
My plan for the car is primary street use with occasional track day.
This setup will allow me an easy upgrade in the future to a high performance brake kit.

Renato
 

Attachments

  • Renato's GT40 129.jpg
    Renato's GT40 129.jpg
    136.6 KB · Views: 593
  • Renato's GT40 138.jpg
    Renato's GT40 138.jpg
    150.6 KB · Views: 616
  • Renato's GT40 137.jpg
    Renato's GT40 137.jpg
    171.2 KB · Views: 542

Renato

Lifetime Supporter
HVAC

Well, its actually HV. I'm not planing to install an AC system (for now). I might regret it later, reading other posts, but I'm trying to stay in budget.
Fabricated two brackets and mounted the unit. I didn't plan out the routing of hoses or tubing for now.

Is there a need for fresh air intake? Right now it's just recirculating.

Renato
 

Attachments

  • Renato's GT40 139.jpg
    Renato's GT40 139.jpg
    182.2 KB · Views: 482
  • Renato's GT40 141.jpg
    Renato's GT40 141.jpg
    113.3 KB · Views: 547
  • Renato's GT40 142.jpg
    Renato's GT40 142.jpg
    135.7 KB · Views: 529
  • Renato's GT40 143.jpg
    Renato's GT40 143.jpg
    167.7 KB · Views: 539

Randy V

Moderator-Admin
Staff member
Admin
Lifetime Supporter
I think that fresh air will be a must have - at least for me.. I have too many times had windshields and windows fog up with the introduction of just a little moisture in the car (raining?) and know that unless you anti-fog the interior windows, you're asking for troubles.

I have routed the ducts on my front clip up to the tub and will implement air valves there to bring fresh air into the cabin.

Also, if there are any leaks from the engine compartment into the cabin, there is always the possibility of carbon monoxide...

Easier to address now at this stage than later...
 

Renato

Lifetime Supporter
Hi Randy,

That is a good point about defogging the windshield. Since I don't have an AC system to ring out the moisture my best bet is to take outside air and heat it.
Is the mid NACA inlet the on you used?
Do you have a switch/lever to switch between outside or recirculated air?

Regards,
Renato
 

Randy V

Moderator-Admin
Staff member
Admin
Lifetime Supporter
Hi Renato,

I am using the ducts to either side of the hood panel as show here on my build site:
GT-Forty.com

I have not yet got the air valves made or installed, that will be later this year.

The center duct I have opened up, but have not routed it anywhere yet. I am concerned about water entering via the ducts which is why I made water traps in my ducts and will provide drains for them as well.. The center duct does not lend itself to creating such a trap unless I did that inside the cabin and I did not like that idea very much.
So for now, while the center duct is opened up, it is the only duct on the car that is not truly functional.
 
Hi Renato, beautiful job on the build so far! I can say from experience that if there is any way you can figure in A.C. now into your build, you definately will not have any regrets. I restored a street version of a GT40 around 25 years ago for a gentleman,( chassis # 1044) while we were waitng for a new A.C. condenser, I took my wife for a test drive in the car and we got stuck in traffic on a warm spring day, while we were waiting for traffic to start moving we almost passed out from the heat in the car, not to mention the fumes coming in the car from lack of positive pressure in the car!! When I went to pick up my C.A.V, my first thought was that I hope the ac works really well in the car, thank god it does!! Keep up the good work and all the best, Neville Nesbitt.
 

Renato

Lifetime Supporter
Randy,

Nice work on the ducts. My first thought was to use mid NACA inlet for fresh air, but if I understood you correctly there is no room between body and chassis to make a water trap?
Your chassis is a bit different under the front clip but there is a good chance I can't make it work on mine either.

Regards,
Renato
 

Renato

Lifetime Supporter
Neville,

Thanks so much for the kind words. I was afraid that the responses are going to be like yours.
I'm going to see how much is an AC system costs and even if I don't make a decision now I'll prep things so it can be installed at any time.
One thing is sure, there is no way to avoid Long Island traffic!

Regards,
Renato
 

Renato

Lifetime Supporter
Steering

Fabricated an adapter for Grant steering wheel to NRG quick release. Not sure why the NRG didn't have 5 bolt pattern, maybe I ordered the wrong one. The adapter actually makes a nice transition.

NRG was suggested by few members on the forum and it is a well made product.
I purchased SRK-200BK and also SRK-120H hub adapter for Toyota (I'm using Toyota steering column).

Any suggestions on turn signal lever?

Renato
 

Attachments

  • Renato's GT40 147.jpg
    Renato's GT40 147.jpg
    177.4 KB · Views: 473
  • Renato's GT40 144.jpg
    Renato's GT40 144.jpg
    162.1 KB · Views: 493
  • Renato's GT40 148.jpg
    Renato's GT40 148.jpg
    131.4 KB · Views: 427
Back
Top