SLC 24 Howard Jones

Howard Jones

Supporter
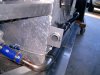
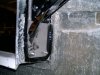
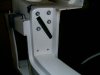
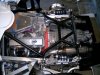
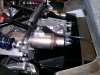
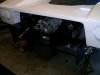
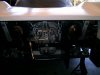
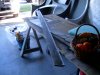
Bob, do you have a build log with pictures here? I would love to see pictures of your exaust system.

Heat in the engine room is an issue if you don't find a way to get good airflow through it and out the back of the car. I've been thinking about this as it relates to a track car. In that case the car doesn't spend much time with the engine running and stoped such as in traffic so I will have good airflow over the car 98% of the time.

So I think I want to try a full flat bottom and replace the air comming from the bottom with air inlet from the sides and wheel wells into the engine room. But for now I can only go with information from #1 that Fran has experianced. In the end I believe they ran the car with the bottom of the engine room open. It may have been that it was the first season and they may have ran out of development time, but I want to give a full flat bottom a try.

If I can get that to work then a proper difuser will follow. I really bought the car so that I could learn/play/develop a car for the track with a good areo package.
 

Fran Hall RCR

GT40s Sponsor
Hi Howard,

Front downforce is what you will need to optimise...fender louvres and openings on the hood to relieve front wheelwell pressure....a problem every race car has to deal with..

You can generate plenty of rear downforce wiothout the flat floor...the flat floor increases the engine bay heat considerably...we ran both with and without...we now run without ....but as with every serious race programme things are always being tried and tested and we do have a new floor and diffuser in the works but it may not see race use this season.

We spent 4 months (and lots of money) during the off season running masses of CFD profiles on cooling, downforce, aero balance etc ...so have a pretty good idea of what is valuable and whats is less so....my CFD guy worked with Mclaren so he's pretty dialed in...

FYI...we use stock LS7 exhaust manifolds , same as used on the LS9 without issue...they are doubled shielded and keep engine bay heat down..
 
Last edited:

Howard Jones

Supporter
Exhaust system complete. All in all it came out better than I believed it would, so for at least the time being I think I will use it at least until then car is basically setup and running.

I am pretty sure that if I was to do another header set it would come out much better but for now there's just too much other work to complete. The first picture is the passenger side head flange with the tubing cut off and assorted parts laying around. I did it pretty much like the drivers side and all in all the two sides are mirror images of each other with the one exception of the big 90 degree collector extension. It needed to be a 1" or so shorter because the passenger bank of cylinders is an inch displaced to the rear of the left side.

I also cut the top tear off the diffuser to allow of the exhaust pipe to be unobstructed. For now it's really just a rear body mount anyway. I will do something with a new one later that is more aerodynamically based and tied into the bottom of the car.
 

Attachments

  • HPIM1524.jpg
    HPIM1524.jpg
    209.1 KB · Views: 630
  • HPIM1525.jpg
    HPIM1525.jpg
    213.1 KB · Views: 669
  • HPIM1526.jpg
    HPIM1526.jpg
    184.5 KB · Views: 580
  • HPIM1527.jpg
    HPIM1527.jpg
    122.2 KB · Views: 602
  • HPIM1528.jpg
    HPIM1528.jpg
    115.4 KB · Views: 583
Last edited:
Howard~
Thank you for the hospitality and tour of your home and project! Really enjoyed meeting you, our discussion and of course seeing your cars.
I look forward to future updates!
As I said, we usually spend either XMAS or Thanksgiving just a few miles away. If you don't mind, I'll look you up again.

All-
Howard is doing an amazing job on his project. The color scheme he has in mind should be freaking awesome, too!

Cheers,

Doug
 

Howard Jones

Supporter
Doug, thanks for the beers. You are welcome to drop by anytime you are in town. When I get Francine going and add a seat you can expect a ride. Keep in touch.
 
Got to meet/hang out with Howard yesterday at Sears Point. It was the Shelby Mini-Nats event, & Howard had his GT40 out for some track time. We got to talk SLCs & look over his 40, nicely done car with lots of upgrades by Howard to make a great track day car. Don & I were there to support our friend Darrell Anderson, & his friend Filip, of Cortex racing suspension. Darrell is one of our lead drivers/supporters on the SLC race car. Good meeting a fellow SLCer & nice guy too, (we got to meet Rob a few weeks ago also). Now we just need Fran to get our cars out so we can get ready for the 25.
 

Howard Jones

Supporter
Betty came home yesterday hot, sweaty, and a bit sad, she knows she is going to be retired to the street at the end of this year. One more track day this year and then that's it. The new younger babe is takin over next year!

I better watch Betty, she just might poke some holes in that young babes tires in the dark of night out in the garage. Keep yer eyes open Francine!

I had a pretty good slide in 10 yesterday and I could just hear Betty saying under her breathy, What then hell do you want from me boss? I ain't got no friggin wings like that other bitch! Take it easy................ you scratch my makeup, I'll kill your fat ass, and you'll never get into that other home wrecker's pants you got in MY spot, out in MY garage!

Awwww....it's so hard to keep two women happy.....................
 

Howard Jones

Supporter
Here the bottom is off the car again. I have decided to make the bottom so that it is easy to change to open configuration if I have temp issues later. I opened up the bottom under the oil pan and made a cover out of the cut out section. It will serve as a template when I finish off the rest of the bottom under the trans axle. The final removable panel will be one piece and will extend from the chassis member that supports the engine mounts back to the last transverse chassis tube. This should allow for a complete flat bottom all the way back to the entrance to the diffuser when closed up and will expose the oil pan and transaxle if left open.
 

Attachments

  • HPIM1531.jpg
    HPIM1531.jpg
    145.4 KB · Views: 401
  • HPIM1532.jpg
    HPIM1532.jpg
    154.2 KB · Views: 393
  • HPIM1533.jpg
    HPIM1533.jpg
    176.1 KB · Views: 436
  • HPIM1534.jpg
    HPIM1534.jpg
    155.2 KB · Views: 418
Last edited:
I just got caught up on your build thread - WOW! You've done a lot of (awesome) work! It's looking like a race car :thumbsup:
 

Howard Jones

Supporter
I've been busy with work and was out of town for awhile on business and a short vacation to Canada. But now I'm back at it.

Since I am going for a complete flat bottom the alum belly pan extends to the end of the center section. This interferes with the molded areas of the side skirts and so I cut them out and fiberglassed them back in so that the skirt was completely flat. Then I sandwiched them in between the body and the chassis alum floor. Fits good now.
 

Attachments

  • HPIM1544.jpg
    HPIM1544.jpg
    173.4 KB · Views: 380
  • HPIM1545.jpg
    HPIM1545.jpg
    179.3 KB · Views: 403
  • HPIM1546.jpg
    HPIM1546.jpg
    177.3 KB · Views: 373
  • HPIM1547.jpg
    HPIM1547.jpg
    132.7 KB · Views: 392
  • HPIM1548.jpg
    HPIM1548.jpg
    125.2 KB · Views: 342
  • HPIM1549.jpg
    HPIM1549.jpg
    135.7 KB · Views: 364

Howard Jones

Supporter
You might remember the discussion about using a air to oil heat exchanger instead of a traditional oil cooler. Here's what I have done. All that was necessary was to shorten the water pipe and plum the exchanger in. Now all that left is make a couple of oil lines and run them over to the oil filter adapter plate on the other side of the car.

The other pictures are of the big fat conduit I will run all the electrical cables from the front of the car through to the rear. This type of conduit is very light weight and easy to use. It came from Mcmaster Car. Now I can run wires with the body back on the car. In fact the body can be removed without disturbing the electrical system at all.

I have a long list of body off tasks left including the doors to do and then we will nearing a turning point that should be all down hill from here.
 

Attachments

  • HPIM1551.jpg
    HPIM1551.jpg
    175.5 KB · Views: 341
  • HPIM1552.jpg
    HPIM1552.jpg
    171 KB · Views: 349
  • HPIM1550.jpg
    HPIM1550.jpg
    159.1 KB · Views: 377
  • HPIM1553.jpg
    HPIM1553.jpg
    133.3 KB · Views: 339
  • HPIM1554.jpg
    HPIM1554.jpg
    165.8 KB · Views: 351
  • HPIM1555.jpg
    HPIM1555.jpg
    188.7 KB · Views: 360
Last edited:

Howard Jones

Supporter
With the body off it's back to the doors. Here I bonded on a piece of .10 alum with a two part epoxy to add strenght to the door henge mount point. A little messy, but it can't be seen once the body is on for good.

This would be a hard area to fix once the car is complete if it cracked. (Like if somebody hit the door when open?) So I beefed it up after getting the idea from Mesa.
 

Attachments

  • HPIM1556.jpg
    HPIM1556.jpg
    146.2 KB · Views: 329
  • HPIM1558.jpg
    HPIM1558.jpg
    170.6 KB · Views: 303
  • HPIM1559.jpg
    HPIM1559.jpg
    87.6 KB · Views: 327
I'd suggest another plate inside the door, under the hinge nuts.
Also behind the striker

I agree - I've got a 3/16'' plate on the spyder (like above), plus a 3/16'' plate on the front of the door (where the studs go through) and a 3/16'' plate on the back of the door (where the studs nut down.

I don't think I would have bonded it in though, at least with that much epoxy - you're now comitted to that location and I know i moved mine around a few times until I got it just right.
 
Back
Top