SLC 24 Howard Jones

Howard Jones

Supporter
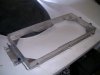
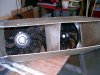
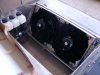
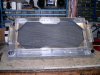
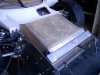
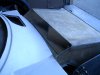
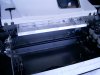
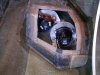
Agreed Fran. The bigger exhaust for the radiator should reduce restrictor in the airstream that is used for cooling the water. Ducting it inside the hood so that it all leaves the car at the cowl takes care of that segment of the total airflow over the front to the car. The other three, as I see it, are brake cooling, wheel well inflow and the portion that goes under the car.
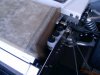
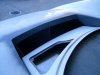
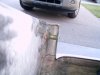
You guys seam to have addressed the wheel well issue with holes in the inter wheel humps and slots in the top of them. By the way how much $$$$$$$$ are the two fender slots? Also how much did the inboard holes on the fenders help. More than the slots? or less? I'm trying to access them as % of improvement in relation to the slots.

Brake cooling is what it is. In the end it may not be really necessary for 25 minute sessions. If so I'll duct them as everyone else does and deal with the added airflow into the wheel wells.

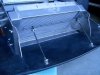
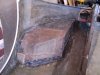
The bottom line is this will not be a race car as in wheel to wheel racing. Just a purpose built track car that I may convert to a street car in it's second life in a few years. So I need to be careful with modes that would ruin it for street use. That's why we put in removable roll cage elements for example and I have made the full flat bottom removable under the engine.
I won't be pushing the car like Ryan does either. But then you knew that. So do I.
 
I would like to see Ryan take your car out and push it to its limits, to see how your changes compare to the changes Fran has made for the factory race car. It would be interesting to have Ryan run a few different cars people have build and made changes to the Aero and see from one persons point of view, which works the best.

Reason, I say this is look at F1, they use tons of CFD and computers in there designs, but when the car hits the track, it does not always do as they figured it would.

So it would be nice to have one persons option on what they feel is the best mods that have been done. With Ryan, we all know he will be able to push them and be able to give us an equal assessment.


I do enjoy reading your updates and learning from your mods and ideas you have.
Best of luck on building your car.
 

Michael Fling

Supporter
Ditto on those comments. Howard- I have read through your entire build thread several times. Like a few other builders, you have a remarkable talent. Thanks for sharing everything. I intent to widen my rear side vents too. However, I am having side exhaust. It appears that may create an issue for adequate area for the exhaust plates? Do you have a contact at Mesa Design for a mock up? Thanks again!
 

Howard Jones

Supporter
ha ha ha .........mock up eh! There's no mockup! just mark 1 eyeball. Really I used the lower body line as a lower perimeter and cut out the old inlet bottom. Then I cut the body out fixed the old cut out lower inlet piece in place in place and glassed it back in. Once that was done I used the cut out body piece to fill the gap.

Once it all got hard I filled the part lines with body filler. Done. Fiberglass is easy. Just hack it out and go for it. My modo is "you can always grind it off and do it again".

My guess is Ryan would be so much faster that any setup comparison would be so different that it would be useless. AND I have NO budget for broken parts! That's not to say that Ryan breaks things, I just can't run my stuff that hard because I can't afford to break things. There is a difference.

Yes I have a contact at Mesa design. I help him and he helps me.....great deal really.
 

Michael Fling

Supporter
Sorry if i wasn't too clear- by "mock up" i meant the artist rendering. It is nice to have a nice rendering of the final scheme like you do. The white/black/red looks really nice. I would love to have that done si I could see the end product. I have read your thread regarding the inlet mod. Seems pretty straight forward. Because I am going with side exhaust, I questioned if there was enough room for the bracket/exhaust after the mod. I'll check it out when my time arrives- anyway- nice work.
 
Last edited:

Howard Jones

Supporter
Finished the hood pins. I tried a few different kinds and settled on these. They are not as big as the 1/2 inch diameter ones that have a much bigger pin. I thought they looked too big and not in the SLC style. I also tried the kind that the pin remains on the mount and slides forward and then is flipped over. I think they are chincy.

These meet my needs for a redundant system. In this case double redundancy at the front and triple at the rear if you count the doors need to be opened to lift the rear bodywork up.

As I said elsewhere these are hard to miss. In one you can see I trimmed the door top leading edges to clear the nose bodywork when it is opened. I also trimmed the front wheel well openings. I'm going to have to start sanding pretty soon to prep the body. I hate sanding!
 

Attachments

  • HPIM1630.JPG
    HPIM1630.JPG
    178.5 KB · Views: 421
  • HPIM1632.JPG
    HPIM1632.JPG
    98.7 KB · Views: 439
  • HPIM1633.JPG
    HPIM1633.JPG
    195.6 KB · Views: 390
  • HPIM1638.JPG
    HPIM1638.JPG
    130.9 KB · Views: 420
  • HPIM1637.JPG
    HPIM1637.JPG
    105.9 KB · Views: 440
  • HPIM1636.JPG
    HPIM1636.JPG
    111 KB · Views: 436
  • HPIM1634.JPG
    HPIM1634.JPG
    102.2 KB · Views: 373
  • HPIM1631.JPG
    HPIM1631.JPG
    162.4 KB · Views: 443
Last edited:

Fran Hall RCR

GT40s Sponsor
Highly unlikely the Aerocatches will fail as 95% of all pro race cars use them from Grand Am to Le Mans...and they seem to provide good long lasting service
 
Last edited:

Howard Jones

Supporter
Alex......alex.......alex............ No I don't expect ANYTHING to fail. I like to build things that suit my expected use. I am old and I don't re-learn things easily. I have had my GT40 on the road for more than 10 years and have run it about 20 weekends on track at least. I have learned how to do it without screwing my car or myself up and I don't want to change ingrained habits that I am pretty certain work.

I always look at the hood pins right before I get into the car and belt up. It's something that ALWAYS catches the mistake of leaving the pins out. Never have missed this. Many of the changes I have made on my car are because that's the way I do things. Not that my way is better but because it's my way. I am sure you have similar methods.

The Aero catches are really nice pieces, I don't see how they COULD fail unless you broke the bodywork around them in a crash. However where I would need to mount them on the car would be out of direct view up inside the scoops in the rear and in the wheel well exhausts ducts at the front. I don't want them there on my track car. They look better there as on a street car BUT I might miss them in my old man in a hurry state at the track.

So don't worry about them they work fine and are well made. OK
 

Howard Jones

Supporter
I have been taking about radiator ducting so here's my best shot. The idea again is to force all of the air that goes into the front of the car to pass through the radiator and then out of the car through the hood exhaust opening. This achieves a couple of things. First, prevents radiator exhaust airflow from ending up in the wheel wells and creating lift. And second using the airflow inside the duct to create down force.

I only needed one piece so I made the mold out of cardboard, covered it in wax and painted on PVA release. This worked pretty good except that if you do it this way you must be vary careful not to distort the cardboard form or the result will not be the correct shape. Mine was out of square about a 1/8 inch but it will work and that's all I really needed.

I used some leftover fiberglass decking mat. It was a bit of a chore to make conform to the 90 degree corners so I made it in pieces and bonded it all together before it fully set up. The bottom of the duct has a added honeycomb fabric imbedded in it to add strength.

The whole think weights about 2 pounds.

I also made the radiator fan tray again. The first one wouldn't work with the duct. It's aluminum and seals pretty good to the radiator. The other mount is across the foot box and incorporates a steering box mount.

Here's some pictures.
 

Attachments

  • HPIM1647.JPG
    HPIM1647.JPG
    185.8 KB · Views: 415
  • HPIM1646.JPG
    HPIM1646.JPG
    172.2 KB · Views: 408
  • HPIM1648.JPG
    HPIM1648.JPG
    185.1 KB · Views: 425
  • HPIM1651.JPG
    HPIM1651.JPG
    165.1 KB · Views: 404
  • HPIM1643.JPG
    HPIM1643.JPG
    106.6 KB · Views: 407
  • HPIM1642.JPG
    HPIM1642.JPG
    201 KB · Views: 413
  • HPIM1644.JPG
    HPIM1644.JPG
    220.8 KB · Views: 417
  • HPIM1645.JPG
    HPIM1645.JPG
    158.7 KB · Views: 458
  • HPIM1650.JPG
    HPIM1650.JPG
    189.8 KB · Views: 427
  • HPIM1649.JPG
    HPIM1649.JPG
    180.8 KB · Views: 401
  • HPIM1652.JPG
    HPIM1652.JPG
    159.5 KB · Views: 433
  • HPIM1653.JPG
    HPIM1653.JPG
    144.6 KB · Views: 467
  • HPIM1654.JPG
    HPIM1654.JPG
    160.4 KB · Views: 429
  • HPIM1658.JPG
    HPIM1658.JPG
    134.3 KB · Views: 526

Howard Jones

Supporter
Here's two I missed, steering box support/rear radiator duct mount and the debris screen.
 

Attachments

  • HPIM1659.JPG
    HPIM1659.JPG
    141.2 KB · Views: 393
  • HPIM1660.JPG
    HPIM1660.JPG
    175 KB · Views: 413

Howard Jones

Supporter
Front body nose catches. I made the bobbins that fit into the vertical nostril divider from behind out of some tubing and a couple of washers. The pin fits into the bobbin from one side and the other is threaded so that it can be fastened with a socket head screw. The whole thing was to avoid just running a bolt through the fiberglass with out any load bearing support on the inside.

The U thingies are pretty self explanatory. On to the headlights.
 

Attachments

  • HPIM1666.JPG
    HPIM1666.JPG
    184.2 KB · Views: 349
  • HPIM1665.JPG
    HPIM1665.JPG
    129.5 KB · Views: 346
  • HPIM1667.JPG
    HPIM1667.JPG
    115.5 KB · Views: 369
  • HPIM1668.JPG
    HPIM1668.JPG
    144.7 KB · Views: 345
  • HPIM1670.JPG
    HPIM1670.JPG
    167.6 KB · Views: 372
  • HPIM1671.JPG
    HPIM1671.JPG
    199 KB · Views: 325

Howard Jones

Supporter
Ok, here's the passenger side head light assembly. I made the aluminum pieces from some 6160 1/8" thick plate with a big hole saw, disk sander, and a sawsall. My version of a CNC machine.

The headlights are Hella's. I am using a 90MM high beam for the low beam element and the 60mm high beam for the high beam. I intend to wire them up so both are on in high beam mode using relays for both. If I ever do drive this thing at night I want people to SEE me coming.

I was going to bond the mounting system in place but I was thinking if I ever hit anything I want to be able to salvage the mounts if possible. The way they are bolted in place with 10-32 screws I can simply remove them. On to the drivers side and then fiberglass surround housings to keep them from being ruined from debris coming off the tires.
 

Attachments

  • HPIM1672.JPG
    HPIM1672.JPG
    169.6 KB · Views: 324
  • HPIM1673.JPG
    HPIM1673.JPG
    181.5 KB · Views: 292
  • HPIM1674.JPG
    HPIM1674.JPG
    167 KB · Views: 284
  • HPIM1675.JPG
    HPIM1675.JPG
    180.1 KB · Views: 302
  • HPIM1676.JPG
    HPIM1676.JPG
    169.5 KB · Views: 290
  • HPIM1677.JPG
    HPIM1677.JPG
    217.1 KB · Views: 313
  • HPIM1678.JPG
    HPIM1678.JPG
    216.7 KB · Views: 311
  • HPIM1679.JPG
    HPIM1679.JPG
    210.2 KB · Views: 321
  • HPIM1680.JPG
    HPIM1680.JPG
    143.1 KB · Views: 351
  • HPIM1681.JPG
    HPIM1681.JPG
    119.4 KB · Views: 327

Howard Jones

Supporter
So I'll catch up a bit. I have pretty much finished up all the stuff on the nose of the car I wanted to change. Lights in, Light enclosure, brake cooling duct, increased radiator exhaust opening, hood pins, and latches.

Here's the new pictures. The little screw thingies came from Aircraft Spruce. The turn lights came from Super Bright LEDs.

I made the bayonet plates for the turn lights.

Lots of cardboard went into this stuff. It works but it's only for a one time mold.
 

Attachments

  • HPIM1682.JPG
    HPIM1682.JPG
    161.7 KB · Views: 295
  • HPIM1683.JPG
    HPIM1683.JPG
    166.9 KB · Views: 326
  • HPIM1684.JPG
    HPIM1684.JPG
    154 KB · Views: 277
  • HPIM1686.JPG
    HPIM1686.JPG
    185 KB · Views: 272
  • HPIM1687.JPG
    HPIM1687.JPG
    177.2 KB · Views: 298
  • HPIM1688.JPG
    HPIM1688.JPG
    253.8 KB · Views: 288
  • HPIM1691.JPG
    HPIM1691.JPG
    166.7 KB · Views: 285
  • HPIM1693.JPG
    HPIM1693.JPG
    176.1 KB · Views: 272
  • HPIM1696.JPG
    HPIM1696.JPG
    76.8 KB · Views: 266
  • HPIM1697.JPG
    HPIM1697.JPG
    110 KB · Views: 282
  • HPIM1698.JPG
    HPIM1698.JPG
    120.6 KB · Views: 314
  • HPIM1699.JPG
    HPIM1699.JPG
    152.1 KB · Views: 296
  • HPIM1700.JPG
    HPIM1700.JPG
    136.3 KB · Views: 265
  • HPIM1702.JPG
    HPIM1702.JPG
    163.5 KB · Views: 307
  • HPIM1709.JPG
    HPIM1709.JPG
    212.4 KB · Views: 319
  • HPIM1705.JPG
    HPIM1705.JPG
    110.6 KB · Views: 299
  • HPIM1713.JPG
    HPIM1713.JPG
    194 KB · Views: 356
  • HPIM1708.JPG
    HPIM1708.JPG
    202 KB · Views: 280
Nice work, protecting the lights from road trash and moisture. Do you have a seal of any type on the cover panel?

Enjoy watching your progress.
 

Howard Jones

Supporter
Ya, I'll put a thin foam seal around the perimeter of the cover in the end. Still along way to go before final assembly, that's when I do stuff like that.

I will never drive it in the wet anyway.
 
Back
Top