
You are using an out of date browser. It may not display this or other websites correctly.
You should upgrade or use an alternative browser.
You should upgrade or use an alternative browser.
Toms RCR 40 Trackracer
- Thread starter EGLITOM
- Start date
- Status
- Not open for further replies.
") )
)Break/Engine Ducting
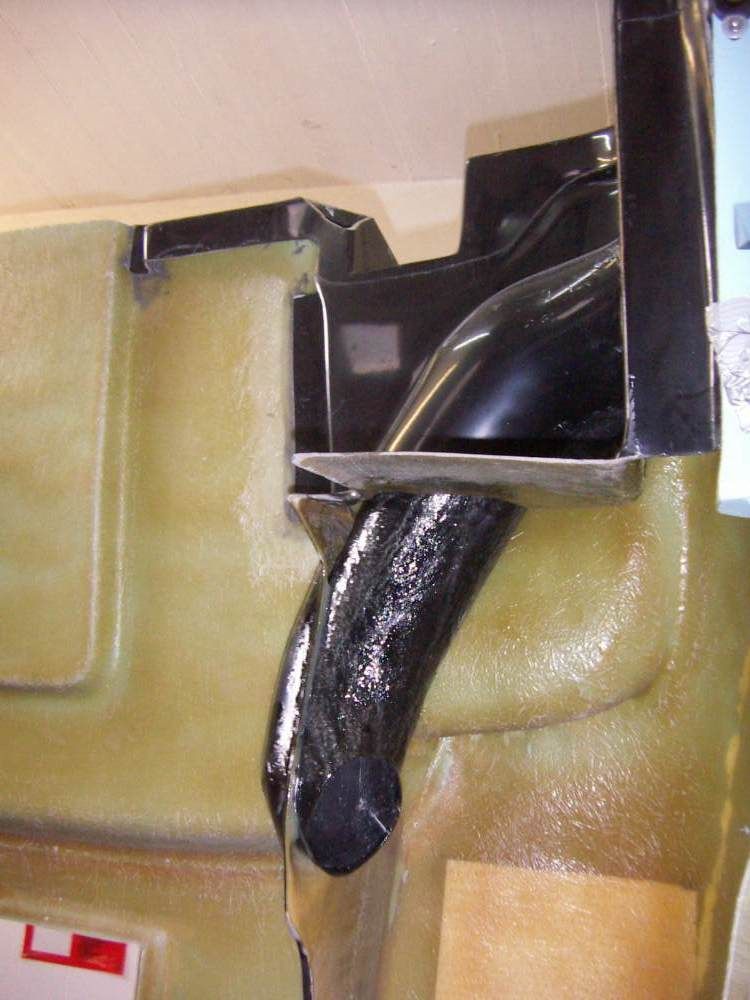
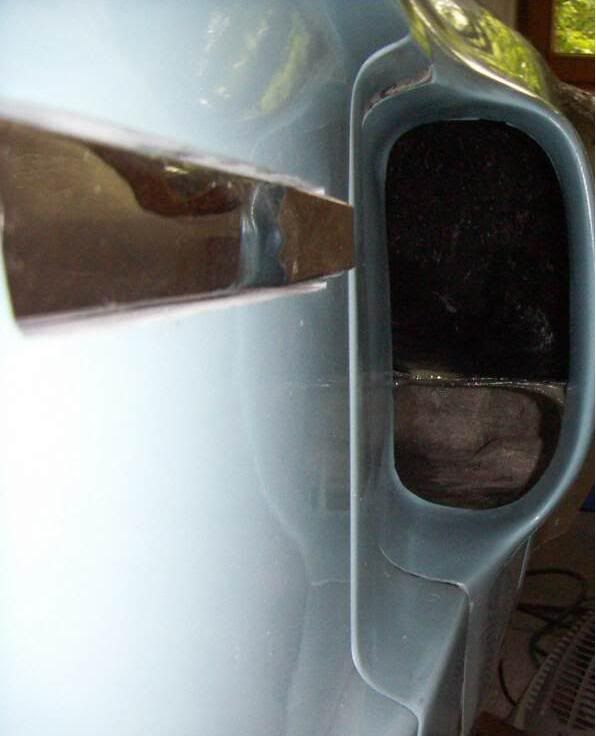
Finished installation of engine and brake ducting.
Bill Houghs brake ducts fit ok in the original style inner panels of RCR with some adaptations. One have to cut back the exit opening of the brake duct to clear the upper radius rod at full suspension travel. The ducts where glued in with the same high shere epoxy glue.
The intake opening of both ducts will be blended in with fiberglass to the opening of the rear clip to achieve a nice and smooth finish.
The rear brake ducts are improving the already high stability of the inner panels and the clip itself even further.
right hand side brake duct

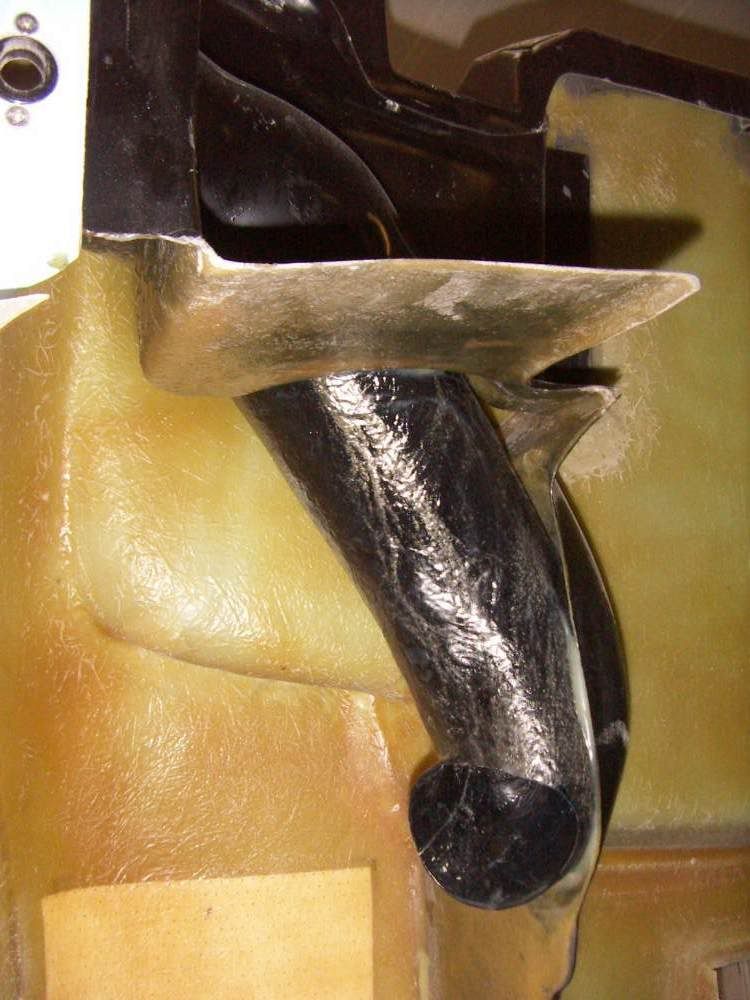
left hand side brake duct

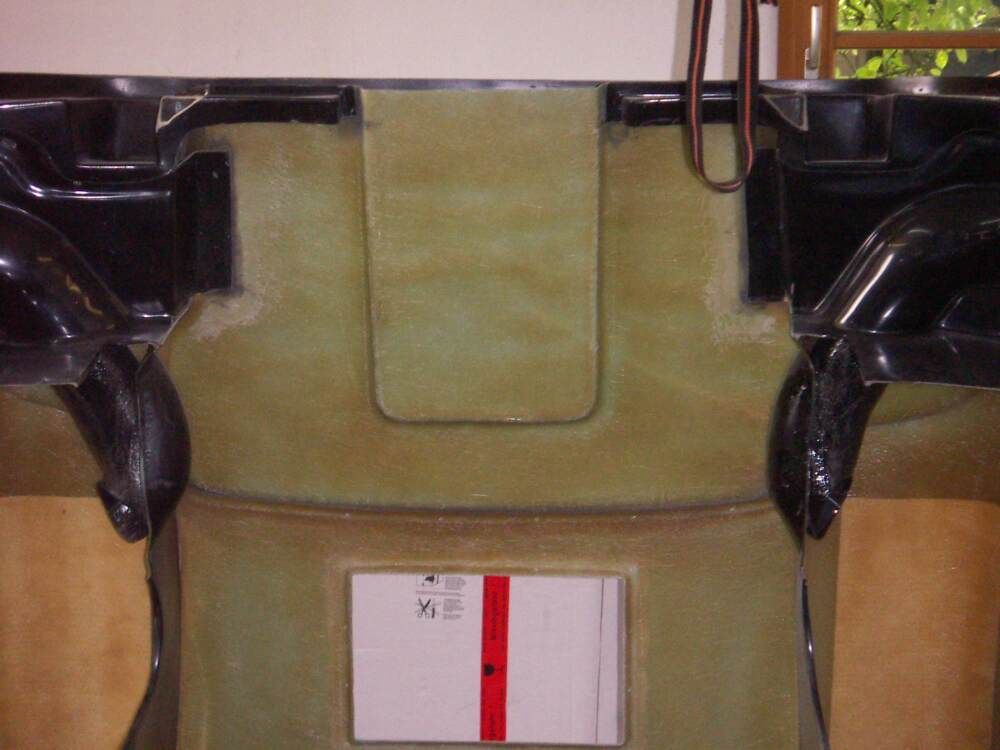
total inner view

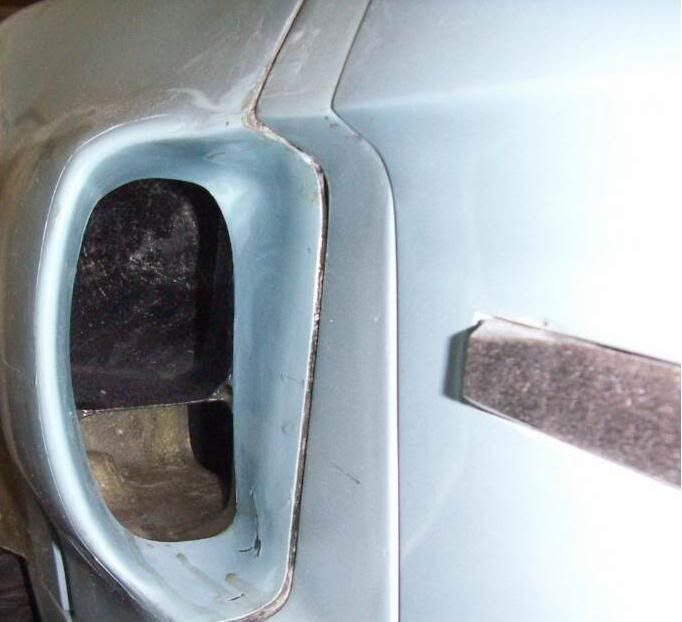
right side intake

left side intake

awh:132
TOM
Finished installation of engine and brake ducting.
Bill Houghs brake ducts fit ok in the original style inner panels of RCR with some adaptations. One have to cut back the exit opening of the brake duct to clear the upper radius rod at full suspension travel. The ducts where glued in with the same high shere epoxy glue.
The intake opening of both ducts will be blended in with fiberglass to the opening of the rear clip to achieve a nice and smooth finish.
The rear brake ducts are improving the already high stability of the inner panels and the clip itself even further.
right hand side brake duct
left hand side brake duct
total inner view
right side intake
left side intake
awh:132
TOM
custom flares
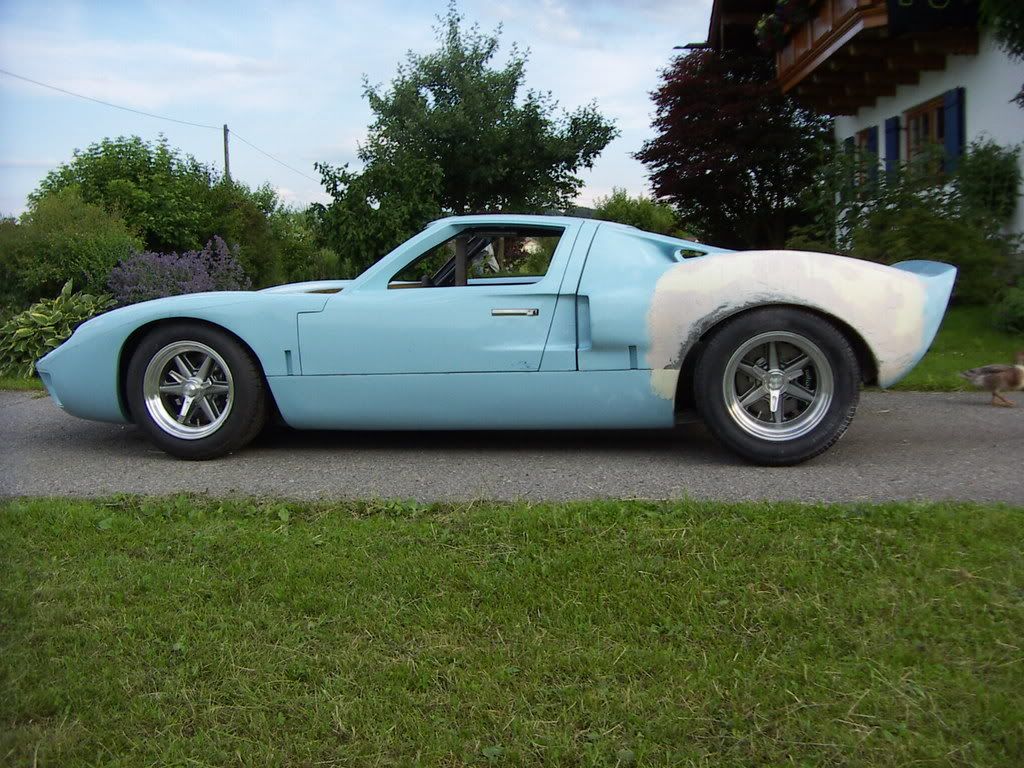
Started with my flares.
First i thried the original gulf flare, but with the originals having much bigger diameter tires it just was to big for my 345/35/15 and it looked to bulky in my opinion.
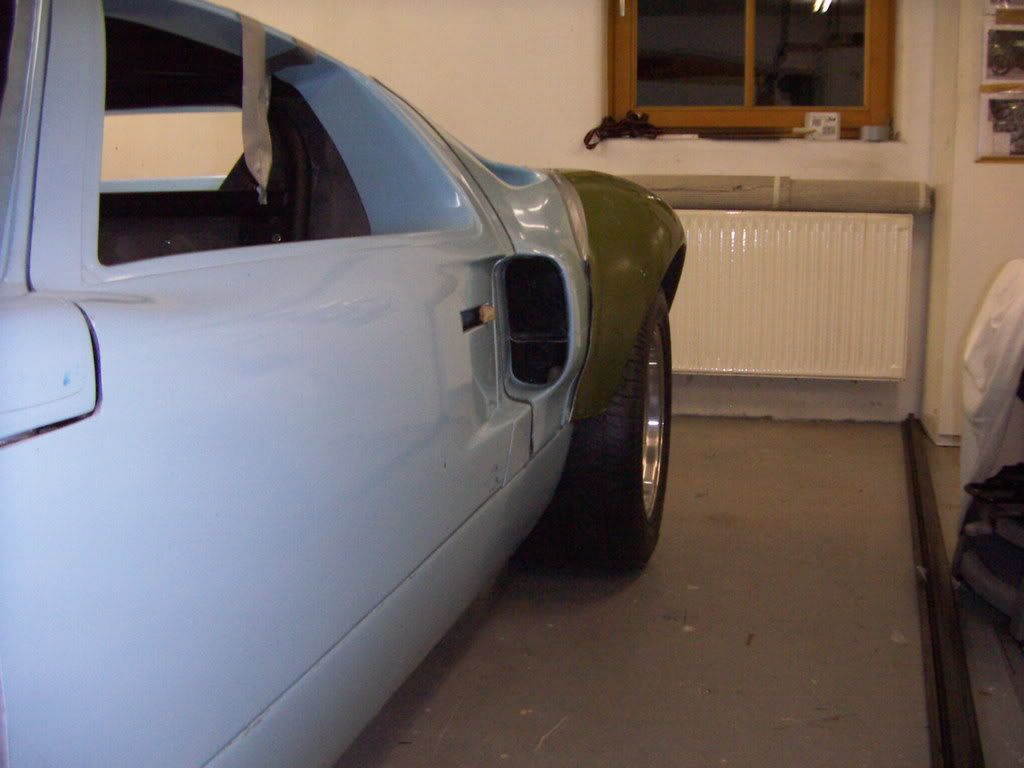
I discussed with Fran if his plus 2" would fit, but he thought it will be to close, because my tire is extending 3" over the stock narrow body. So to achieve the look i want i have to fabricate flares specific to my car.
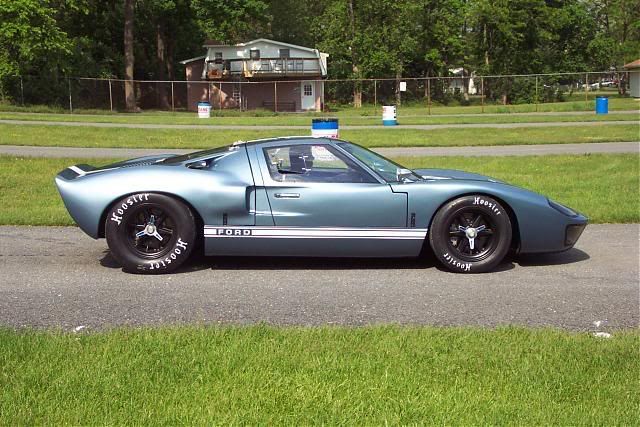
The look i wanted to have is this one

I had an old set of P.... RSR flare extension ( screw on) laying around. I used this to establish the wheel well line, but as much i tried i could not get the well so close to the wheel as in the above picture, without having interferance with the tire when it travels through its suspension move. The car above is probably very stiff springed to be able to run a design like this. Anyway i decided to let the "lip design" go and do something close to the gulf design, but less bulky with a lot of tire to see from the front and from the rear ( like above) and very tiny sill extensions. This is what i came up with. Using the RSR flares as a basis ( screwed and glued to the cut out body) i´m building the rough design with stringers made of balsawood and PU foam.
With the stringer design the shape is repeatable from right to left side, because i kept the cutoffs ( which will serve as a template for the other side). Intention is also to have a nice blending in with the existing body
Stringers and PU Foam
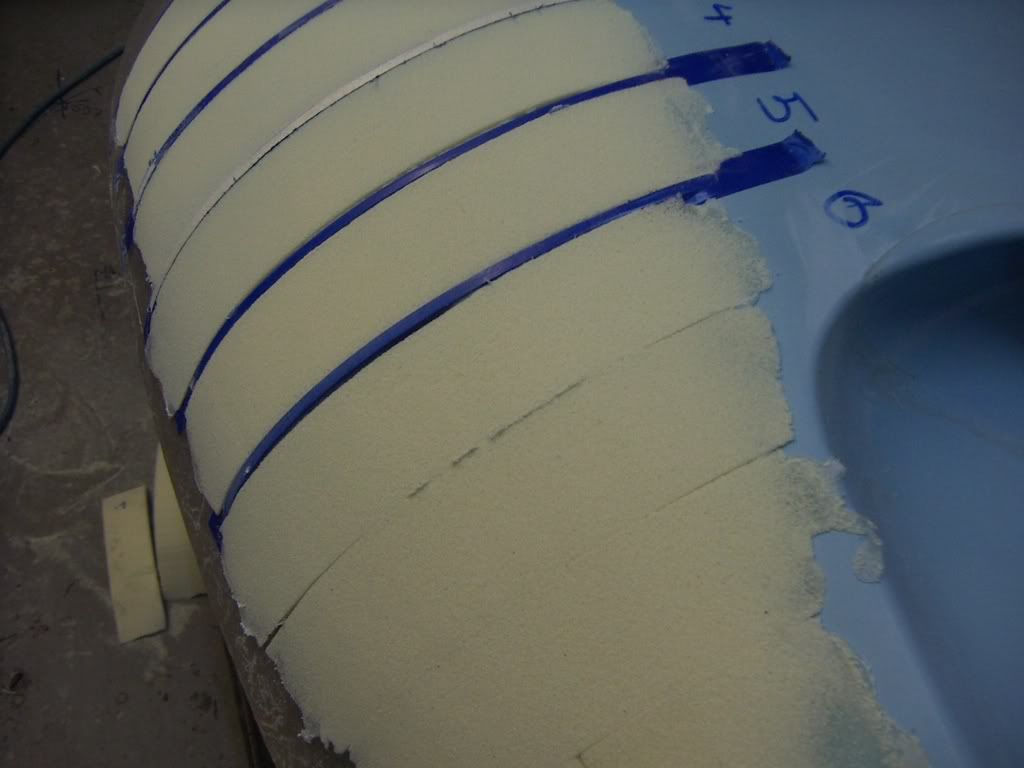
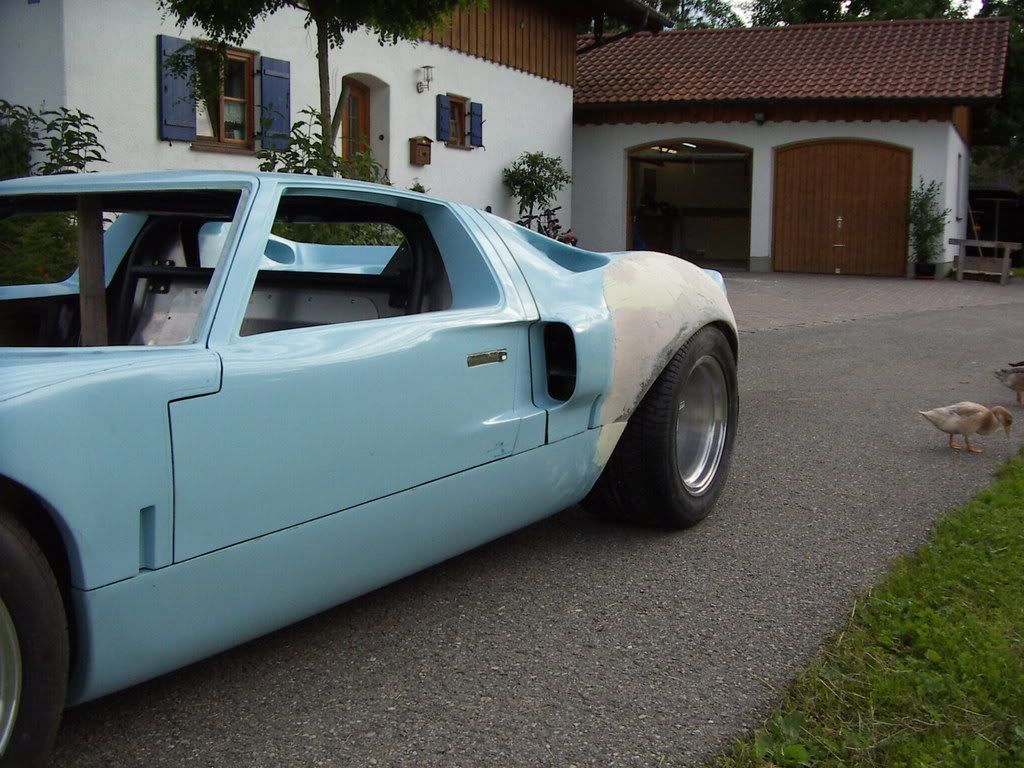
Rough design
A lot of tire to see , but still covered enough for the officials.
Rough design with wheel fully tucked in at full suspension travel
After finalising the rough shaping, i will cover it wíth a thin layer of glass and then filler it. After sanding smooth, a negative mould will be produced.
Finally the positive parts from this mould will be attached to the body, after all the " mould crap " would be cut of.
awh: 136
TOM
Started with my flares.
First i thried the original gulf flare, but with the originals having much bigger diameter tires it just was to big for my 345/35/15 and it looked to bulky in my opinion.
I discussed with Fran if his plus 2" would fit, but he thought it will be to close, because my tire is extending 3" over the stock narrow body. So to achieve the look i want i have to fabricate flares specific to my car.
The look i wanted to have is this one
I had an old set of P.... RSR flare extension ( screw on) laying around. I used this to establish the wheel well line, but as much i tried i could not get the well so close to the wheel as in the above picture, without having interferance with the tire when it travels through its suspension move. The car above is probably very stiff springed to be able to run a design like this. Anyway i decided to let the "lip design" go and do something close to the gulf design, but less bulky with a lot of tire to see from the front and from the rear ( like above) and very tiny sill extensions. This is what i came up with. Using the RSR flares as a basis ( screwed and glued to the cut out body) i´m building the rough design with stringers made of balsawood and PU foam.
With the stringer design the shape is repeatable from right to left side, because i kept the cutoffs ( which will serve as a template for the other side). Intention is also to have a nice blending in with the existing body
Stringers and PU Foam
Rough design
A lot of tire to see , but still covered enough for the officials.
Rough design with wheel fully tucked in at full suspension travel
After finalising the rough shaping, i will cover it wíth a thin layer of glass and then filler it. After sanding smooth, a negative mould will be produced.
Finally the positive parts from this mould will be attached to the body, after all the " mould crap " would be cut of.
awh: 136
TOM
Last edited:
Chris Kouba
Supporter
Tom-
Looking GREAT! Keep up the good work.
Looking GREAT! Keep up the good work.
John
The source for the brake ducts is Bill Hough. He is producing a lot of Original GT40 Glassfiber parts. . His User name is " FRPGUY" may no resin cure before it's time^
I needed to rework the left hand side one to fit, but other than that they are ok ( even if a new mould wouldn´t heart)
I contacted him via PM on the forum.
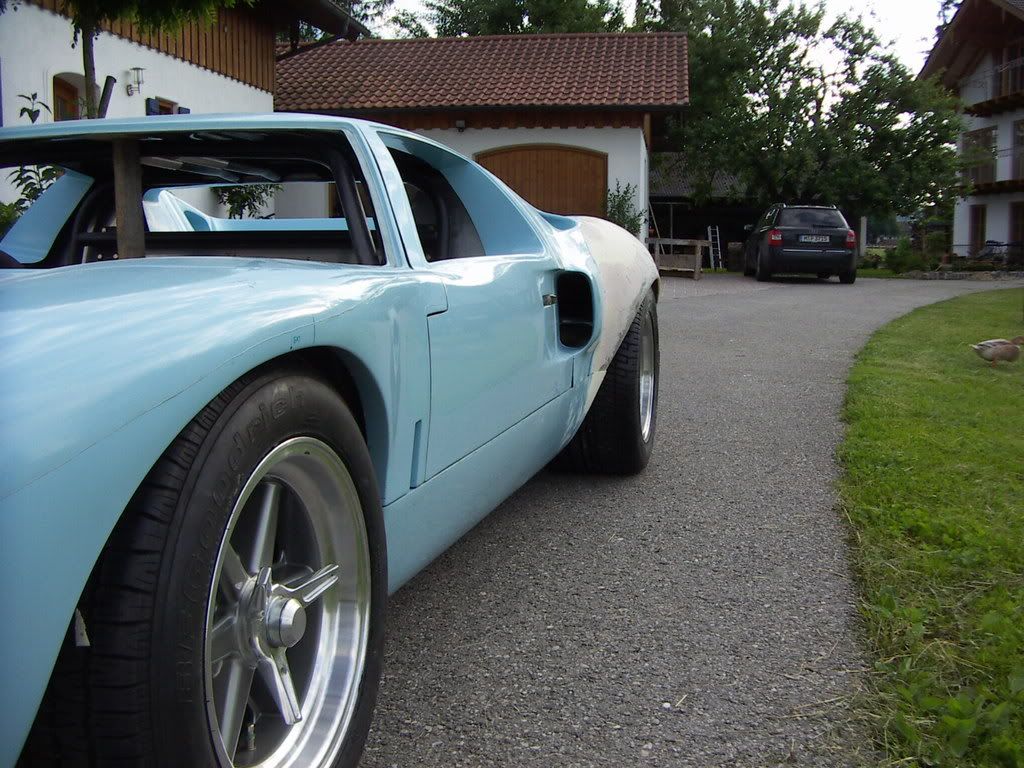
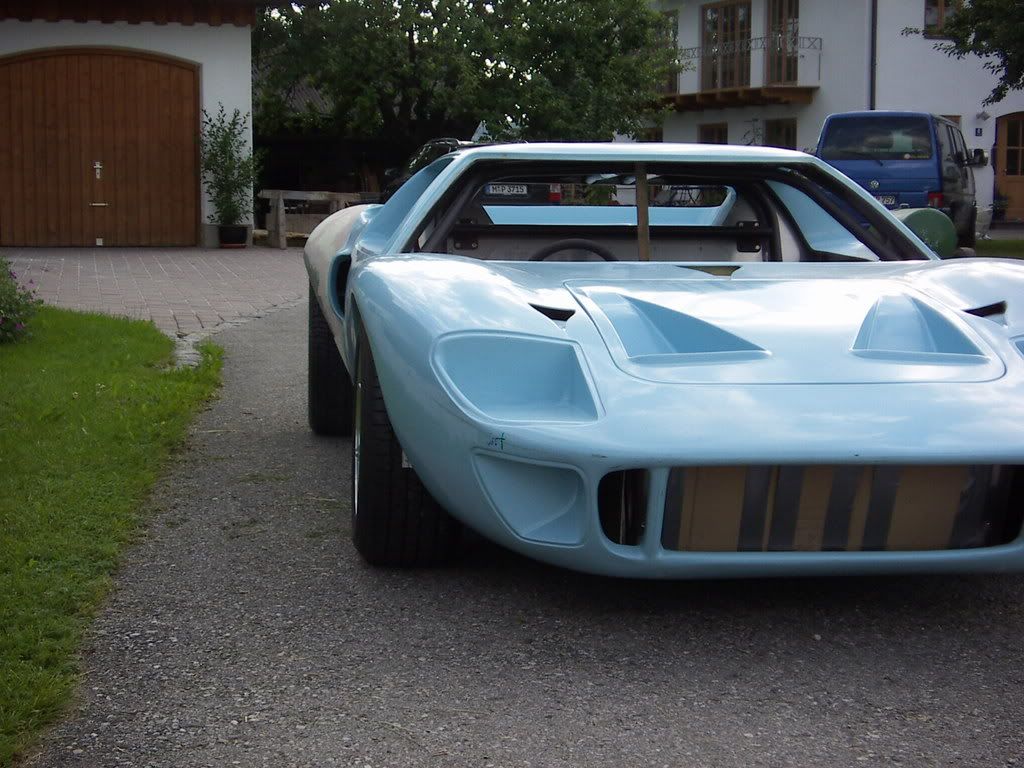
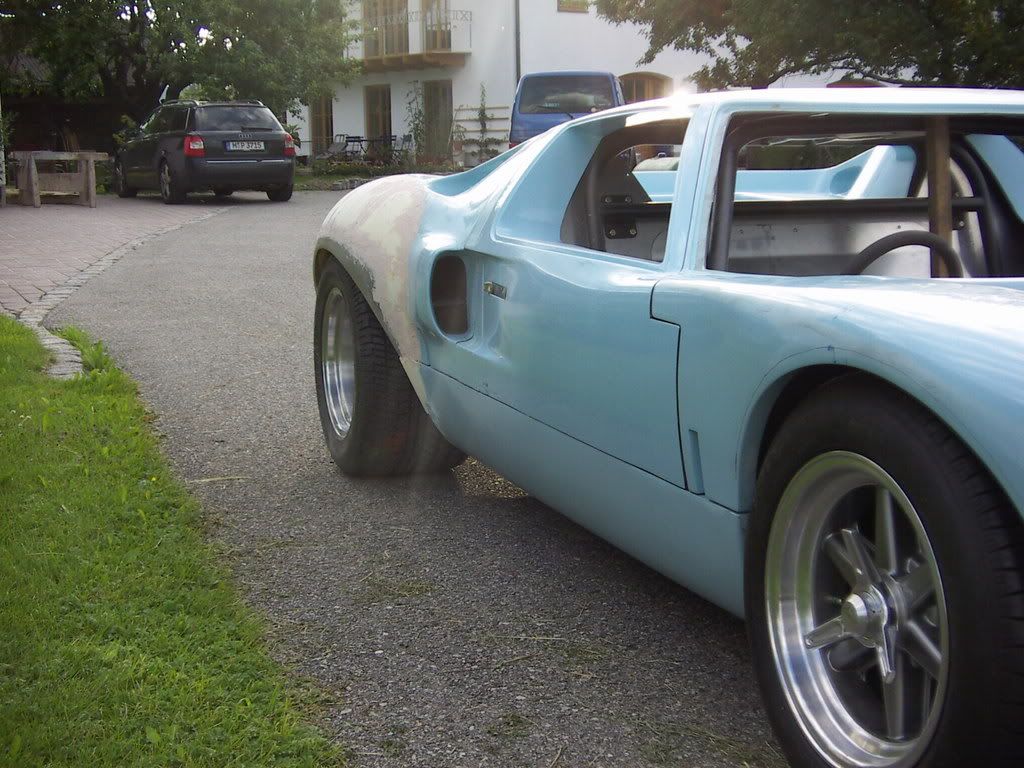
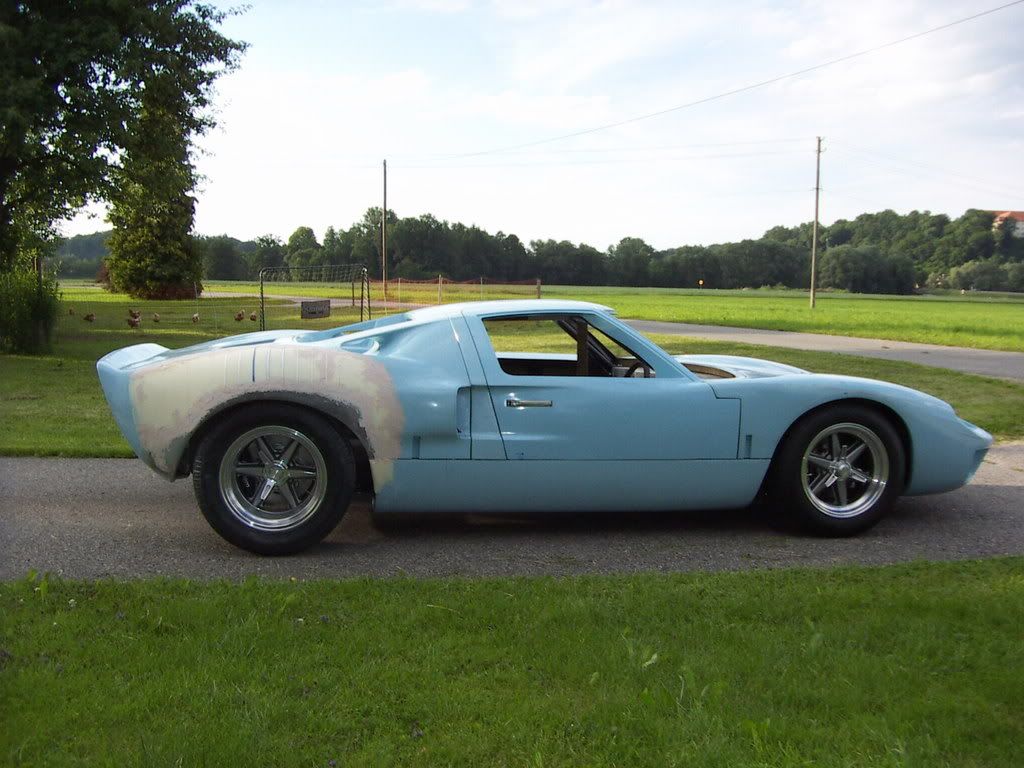
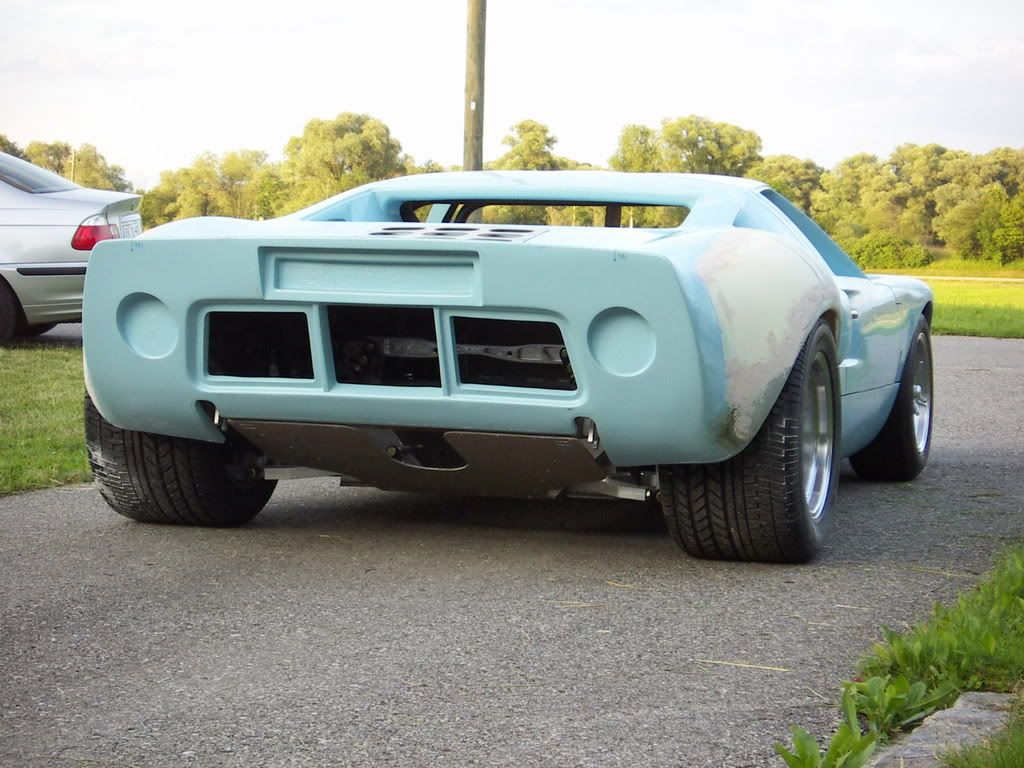
Flares roughly shaped
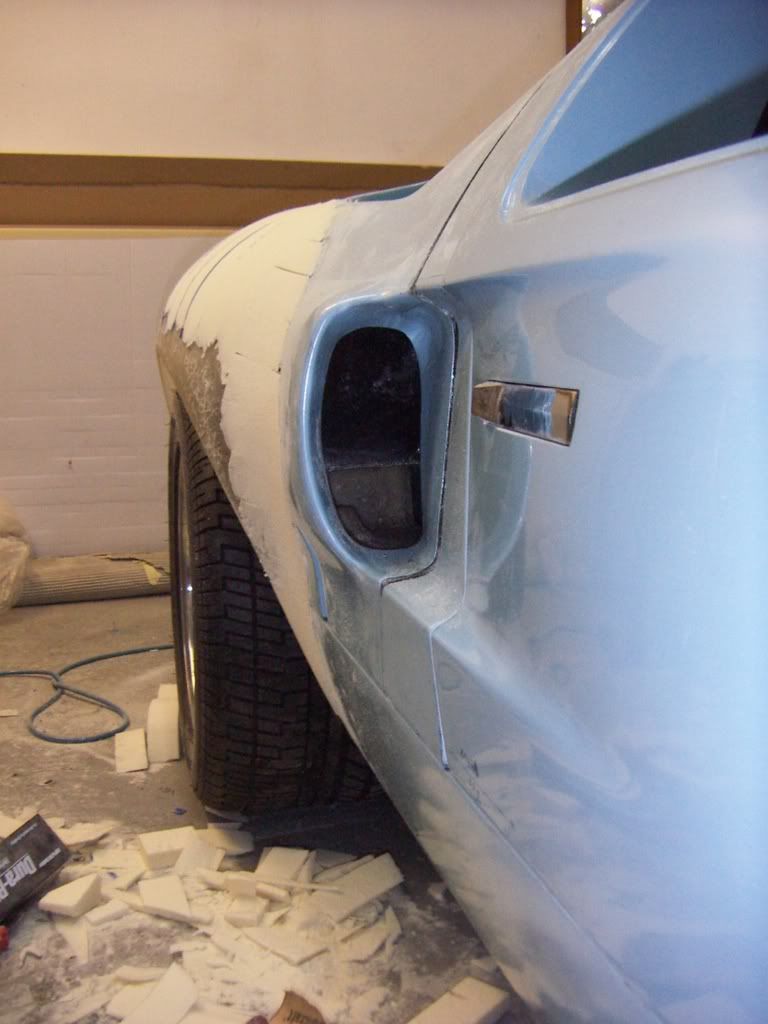
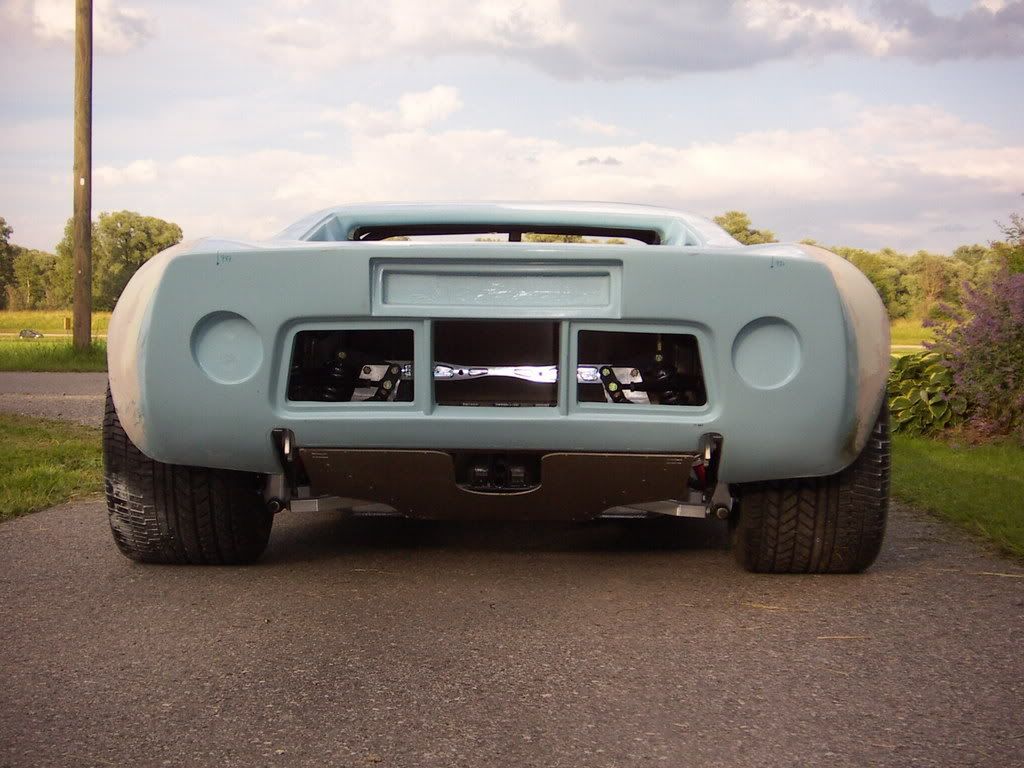
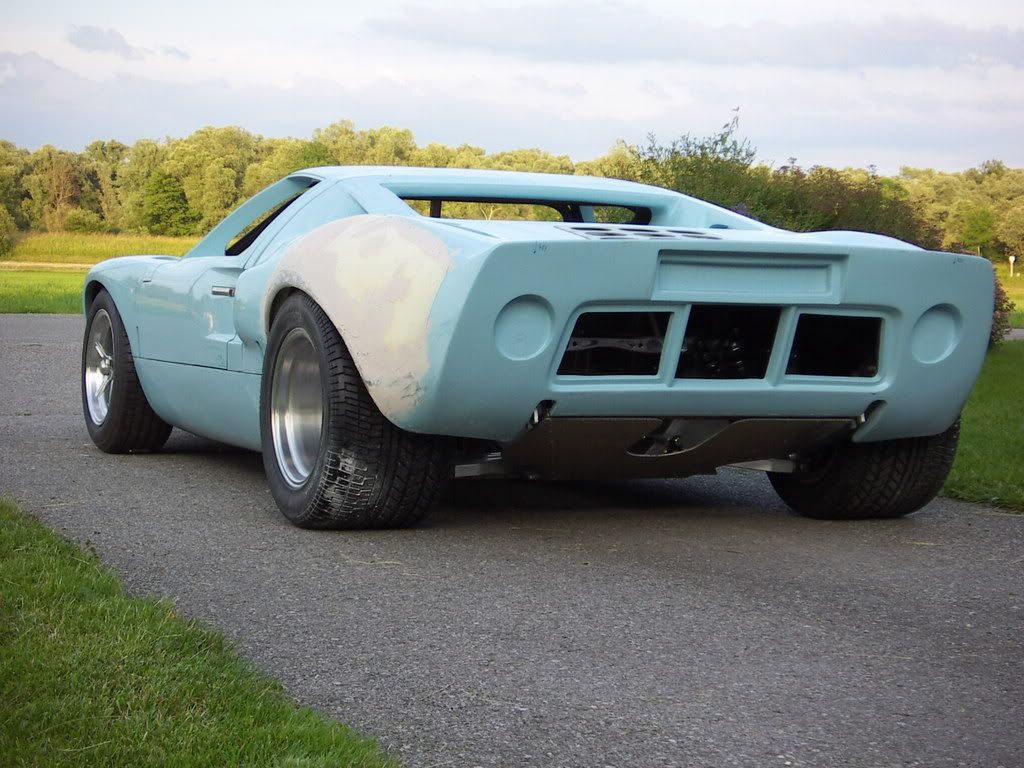
finalised the PU foaming and rough shaping of my flares. Took me around 10h to achieve what you see. Before laying the glasslayer on it ( as a base for further fine shaping) i would like to get your opinion on the design. As mentione i try to have a reminiscenc to the original gulf design, but with closer fit to the tires and more smooth blending in the orginal clip lines. Another target was to keep the ellipsoid shape of the narrow body wheel well, which in my opinion accounts a lot for the correct stance look.
I love this look like on RON´s car.
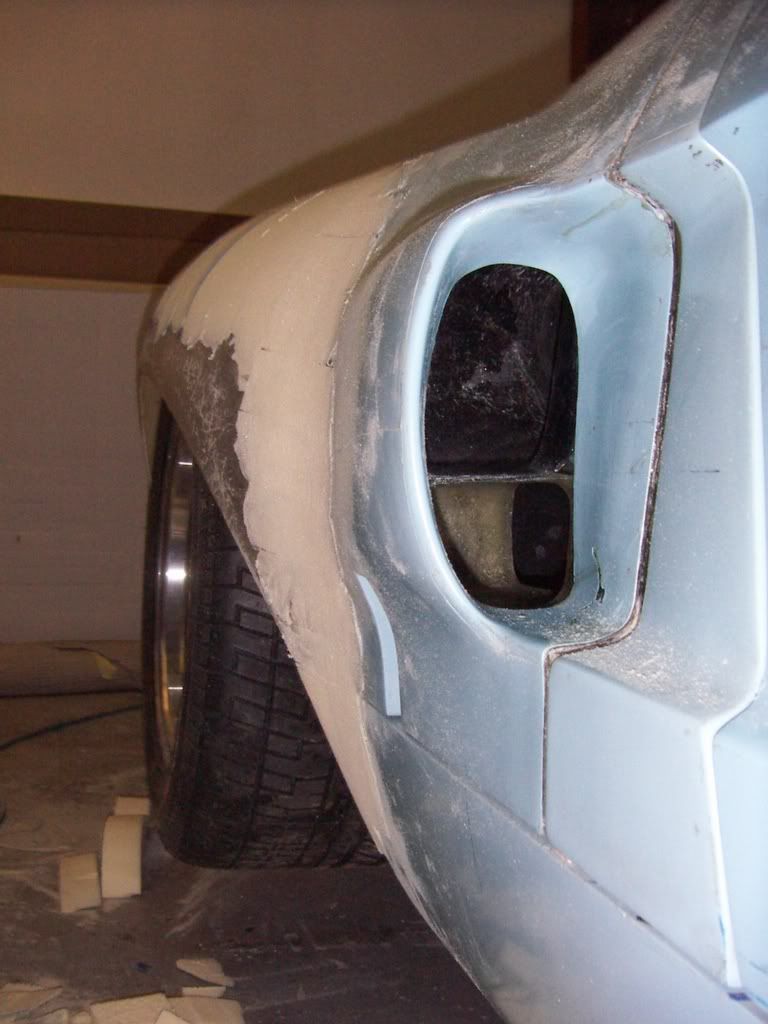
This is the current result. The car is sitting at "track" height ( 4 3/4 " in the rear and 4" in the front)
TOM
awh. 142
finalised the PU foaming and rough shaping of my flares. Took me around 10h to achieve what you see. Before laying the glasslayer on it ( as a base for further fine shaping) i would like to get your opinion on the design. As mentione i try to have a reminiscenc to the original gulf design, but with closer fit to the tires and more smooth blending in the orginal clip lines. Another target was to keep the ellipsoid shape of the narrow body wheel well, which in my opinion accounts a lot for the correct stance look.
I love this look like on RON´s car.
This is the current result. The car is sitting at "track" height ( 4 3/4 " in the rear and 4" in the front)
TOM
awh. 142
Tom:
I think you have captured the look very well.
The distance from the top of the wheel opening to the top of the fender looks greater than I would expect, but I suspect it is due to camera location and using a wider angle lens closer to the car. A shot standing further back with a bit of telephoto may cure what I assume is an optical illusion.
Really nice work. Where do you find the time?
Does the duck have a name?
Ron McCall
Supporter
Looks perfect Tom!!! Don;t change a thing! Not an easy thing to do working with such a short tire...
Keep up the great work.Everyting you have done so far is simply astonishing!
Do you have molds to make duplicates of these flares for other RCR customers????
Keep up the great work.Everyting you have done so far is simply astonishing!
Do you have molds to make duplicates of these flares for other RCR customers????
Chuck, Randy, as Ron mentioned in his build log, the day has 24 hours and need for sleep is overestimated ( currently i average 5h). Chuck it is not an optical illusion( you have an sharp eye as well). THe tirediameter is app 1 3/5 " smaller than for example the AVON CR6zz 295/50/15. (see tirelist onby) , so to close the gap towards the tire i had to extend the fender further down, but on the track i plan to use DUNLOP CR 82 or the MICHELIN TB5 and they are in a range of plus minus 1/2" in Diameter of the PIRELLI.
RON: Yes i will do negative moulds of this flares, because i intend to have a clean ligthweight solution, so i will cut away all the foam crap and fit nicely the positives out of the moulds. The moulds will be done in EPOXY resin, so the should be very rigid and less prone to shrink and distortion. The positive parts will be made with high quality woven glass, with a material incorporated to dampen stone chips ( and avoid there imprint on the outside) probably done with vinylester resin ( like the original RCR). They will be white gelcoated. The moulds i will makes by myself, but the positives will be laid up by a pro ( usually does prototypes and development for DAIMLER AEROSPACE and DAIMLER BENZ , guess where the SLR seats come from ?), so they will be very high quality and hopefully fit pretty good.
If any other RCR customer is interessted i would have him making copies for them as well. If more people are interessted i would talk to FRan if he would like to do it and send a set to him to copy.
TOM
Chuck BTW. We don´t give them names, because they will end up in a pan at xmas ;-)
Attachments
Last edited:
They look great, Tom. I'm equally amazed at the tight panel gaps you've achieved' I've been chasing mine around for days and i'm nowhere near that close - i realise you turned down your location pins, but even so they look close to CAV tolerances.
The xmas dinner doing a fair impression of a 40s rear end - or perhaps thats just me.
The xmas dinner doing a fair impression of a 40s rear end - or perhaps thats just me.
- Status
- Not open for further replies.
Similar threads
- Replies
- 46
- Views
- 9K