Tornado GT40 in Texas

Randy V

Moderator-Admin
Staff member
Admin
Lifetime Supporter
Bob - I think your solution is great.
I had built an oak framework out of 3/4” much like Dwights to support the sagging rear deck. That framework was also to be the mounting point for the 16g SS Shield I had planned.. I went looking on my old build thread here to post a link, but thanks to PhotoBucket’s attempt to HiJack the world of online forums, those embedded images were lost. I am attaching a pic here and can delete it if you prefer.
 

Attachments

  • 89B734CC-253D-437A-B75D-425CBC4F4356.jpeg
    89B734CC-253D-437A-B75D-425CBC4F4356.jpeg
    323.5 KB · Views: 718
Randy,

Thanks for that update. That is why I posted on this subject. You really need to think about heat before you finish the rear deck and paint it. Thanks for the photo. Of course the main problem is closer to the cutout for the "carbs" since that is where the hotter headers are.
 
Rear View Camera

I did what I thought was a very clever and well researched project on the rear view camera. There were several discussions starting on page 10 at post 192. https://www.gt40s.com/threads/tornado-gt40-in-texas.42186/page-10. There were several follow-up discussions such as 207 on page 11 and others.

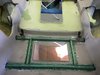
The camera was mounted in the upper part of the rear deck at the very top but underneath the rear window. There is a perfect space there for the curved "tag cameras". I mounted a 25:8 wide angle monitor in the cockpit on the roof by the front windshield.

All of this worked ok at night before the rear window was installed. However, . . .

With the rear window installed and in the daytime, the reflection of the eight air filters on the rear window totally overpowers ANY scene behind the car thus making it totally useless. Wasn't I clever in finding that great spot to mount the camera so high up to give a great view rearward!

I could mount the camera with the included mounting bars that attach to the license plate. That would probably be too low to use as a rearview camera but it might work ok as a backup camera; however, I wanted a rearview camera.

I could do that; however the second unanticipated major problem was that the surface of the screen of the monitor was so reflective that in the daytime, all I could see is the reflection of things inside the cockpit and I really couldn't see the TV scene on the monitor. Double foiled...

What I needed is a non-reflective screen on the monitor. If you have noticed the surface of the Samsung TVs don't reflect whereas most other TVs are more of a glass finish and reflect the room. I need that non-reflective screen that is that 25:8 format IF I wanted to mount the camera on the license plate.

A sad end to a long journey. I wanted to post this just to warn others. I'm sure we will find a good solution someday.
 
Bob,
Just came across your pot on the rear camera. I knew that the higher the camera the better the view. I added a small Sony camera that is just a computer chip and a lens. It does however come with an accessory cable and port that allows you to alter 10 to 15 perameters of the camera. It is also a 1080 P camera and gives great pictures of what is behind. I mounted it on a piece of Lexan bent at 90 degrees and attahed it to the roof of the car just at the seam of the cabin and the rear hatch. I am sure that a small bump could be made that would house the camera and blend in with the body. The camera is only 1 1/4" square and the lens sticks out about 1". I also invested about $40 apiece for two small cameras that record and can be placed with gimbals to change direction while you drive. These all are products of the RC industry for the drones. There are sites out there like Hobby King and others that supply all you need for the cameras. One note is that these cameras run on 5 volts or there about. Some cam handle as high as 36 volts. Most of all the minature cameras have 5 volt requirements and can be set up as monitors and cameras at the same time(I think). You need to check them out. I also got one of the monitors from Tadi Brothers (https://www.tadibrothers.com/products/7-monitor-with-wireless-mounted-rv-backup-camera)
Picture 134.jpg
Pan tilt electronics.jpg
that will display several cameras at once. They were the only company with these at the time I bought mine. Mine is a 4 camera setup that will display one, two, or all 4 at one time. Some of the cameras are quite small but can be mounted in a fabricated housing you can do yourself. It is one of several company's out there now. My key suggestion if you go this route is to get one with a FOV of 90 degrees or no larger that 120. When you start getting larger FOVs the images you see will be quite small until they are very close. When I set mine up I wanted to incorporate the Sony unit into their wiring. I tested their wiring and found that their cameras also operate at 5 volts, so I spliced the camera into their harness and it worked very well. The monitor has since died and I need to replace it this winter. They(Hobby King etc.) have all the wiring and connectors that will make the system workable. I wanted to incorporate the matchbox cameras and gimbals(mounted on suction cup mounts) into the setup and was able to do it with step down transformers(2) for the two cameras and/or gimbals(12 volts to 5 volts). I also utilized two servo testers(https://hobbyking.com/en_us/turnigy-servo-tester.html?___store=en_us) that would allow me to rotate the cameras as I drove along http://i282.photobucket.com/albums/kk242/Billmusarra/P3200092_zpstf9zggp3.jpg. These are cheap items and cost $10-30. Several types to choose from. Just look around on the site. Be aware that these are tiny and can be fiddly to work with. If you want to talk about them drop me a line and we can hook up and talk about it.Picture 134.jpg
 
I just replied to a question about Tornado parking brakes under "Tornado GT40 Handbrake Wilwood MC4 calipers. It gives a full analysis of the original Tornado braking system and the modifications I had to do to it to meet my satisfaction. Since I had to replace the original rear caliper that had an integrated parking brake, I had to install a separate parking brake using the MC4 parking brake caliper.

I have repeated the analysis here. Note that when you click on the pdf file, it opens it at the lower left of the screen and you have to click that one to see it.

-Bob Woods
 

Attachments

  • Braking System Modification Tornado GT40 in Texas.pdf
    547.4 KB · Views: 445
I have prepared a full report on the radiator, fans, and cooling on my GT40. Now that I see that I can attach a pdf, I have attached it here. It was too long to put into my build log individually.

It shows flow bench testing of the radiator, the radiator with the A/C condenser, and the radiator with and without a shroud. It also shows how much air the fan can pull through the various configurations of the radiator. It also shows how the airflow can be improved in front and behind the radiator by body modifications.

-Bob Woods
 

Attachments

  • GT40 Radiator and Fan Study.pdf
    1.2 MB · Views: 494
I have prepared a full report on the radiator, fans, and cooling on my GT40. Now that I see that I can attach a pdf, I have attached it here. It was too long to put into my build log individually.

It shows flow bench testing of the radiator, the radiator with the A/C condenser, and the radiator with and without a shroud. It also shows how much air the fan can pull through the various configurations of the radiator. It also shows how the airflow can be improved in front and behind the radiator by body modifications.

-Bob Woods

Excellent write up Bob

Clayton
 

Davidmgbv8

Supporter
I have prepared a full report on the radiator, fans, and cooling on my GT40. Now that I see that I can attach a pdf, I have attached it here. It was too long to put into my build log individually.

It shows flow bench testing of the radiator, the radiator with the A/C condenser, and the radiator with and without a shroud. It also shows how much air the fan can pull through the various configurations of the radiator. It also shows how the airflow can be improved in front and behind the radiator by body modifications.

-Bob Woods
Awsome job Bob
 

Dave Bilyk

Dave Bilyk
Supporter
Well done Bob, and very helpful for us. I don't have anything except the bottom panel in my Dax and have wondered about the effect of panelling. Never got round to providing a plenum for the fans, knew of the advantage but it's definitely on my list now. Some time ago I instrumented my cooling system with thermocouples, which gave the revelation that the temperature output from the block sensor was up to 15Cdeg lower than the outlet at the manifold, so all for these types of investigations steering erroneous conventional wisdom into measured fact, so all very useful thanks.
 
Love it.
Testing and factual evidence of results.

Shouldn't be any more overheating cars if people read, understand and implement what you have done.

Awesome effort.
 
Hi Bob,

An excellent report on the basics of cooling, all of which is common practice in the auto industry today. A couple of other points to look at are:
  • Air management on the exit of the cooling pack. Exit area should always be greater than the entry area. Exit air is at a lower pressure, so also needs careful attention
  • The fan shrouding is very beneficial, however the whole of the exit side of the radiator is generally shrouded and areas around the fans are fitted with 1-way flaps, so when under normal driving air is pushed through these flaps. However when the fans are running, these flaps are pulled closed and air is extracted over the whole radiator and not just in front of the fans, making the fan cooling more efficient
Regards,
Andy
 

Bill Kearley

Supporter
A reply to a old post Bob
I mounted a 180 deg. camera on the rear of the spider, It works great and a flip up screen on the corner of the dash.
Check posts 111 and 117 on my build thread.
 
Andy,

Thanks for your comments. I did something similar to the flaps. I sealed the edges of the shroud around the edge of the radiator and then I extended the center edge of the shroud down to touch the radiator (with a rubber seal). Thus, about 80% of the radiator is sealed under the shroud. A 20% area is fully open to ram air. I think it is critical that the fans pull through a sealed shroud over most of the radiator at low speeds. At higher speeds some ram air is unrestricted and most of it goes through the shrouds.

-Bob

David,

The suspension redesign is going quite well. It will should be finished before the end of the year. I'm planning to write a big report on it as soon as I can give comparison data. It is very interesting.

-Bob
 
Back
Top