
You are using an out of date browser. It may not display this or other websites correctly.
You should upgrade or use an alternative browser.
You should upgrade or use an alternative browser.
917 Scratch Build
- Thread starter MrNoo
- Start date
What did you hold the fences to the body with? It looks like latex caulk?
What did you hold the fences to the body with? It looks like latex caulk?
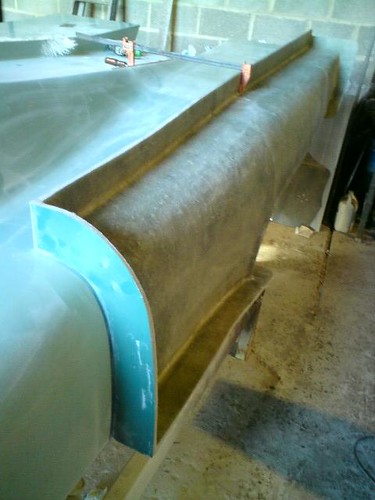
Hi Dave, I stuck Parcel tape where the fence supports were to go then made the supports from alloy 1.5mm, bent some flanges on them with the bender then just used poly filler and on they went, using filler`s gap filling properties meant that I didn`t have to radius all the fence supports to match the curves of the body down the length of the fence.
Well, I used 10 coats of high temp wax put on over a period of 2 days so I think it should come off ok when the time comes!! Be a right mess if it doesn`t!!!!:laugh:
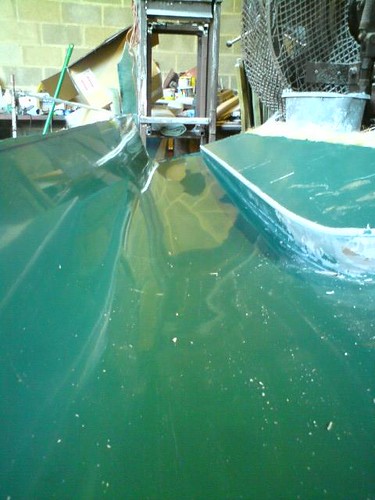
Just a quick update, managed to get both rear sides moulded and off, one hung slightly but the mould is ok, I wanted to leave them on but had to take them off in order to clean up the edges where the central mould will but up against the fences, some gel seeped through the clay I used to fill any gaps (obv not well enough!) Both moulds look great, will need a clean up before use mind.
You can see where it hung up, round the arch!!
Hope to get the central deck done next but suspect harvest will intervine and any work on the car will stop for a while!!:cry:
You can see where it hung up, round the arch!!
Hope to get the central deck done next but suspect harvest will intervine and any work on the car will stop for a while!!:cry:
Thanks Randy!
Darnel, I used plywood stuck using fibre glass filler and then skinned it with Eastsand body filler. If I ever did it again, I would use a steel frame/formers and infills as the wood moves too much, depending on the weather and results in the formers sinking (we have had no rain here for nearly a month!) but this will be easily fixed in the moulds.
regards Chris
What material were the fences made from? It looks like aluminum?? Very nice work btw.
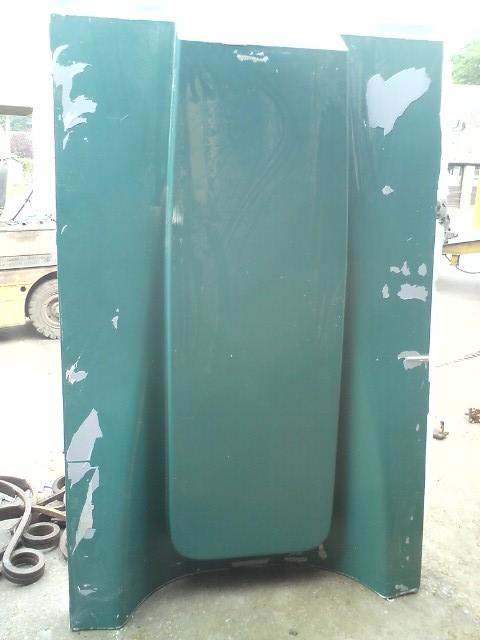
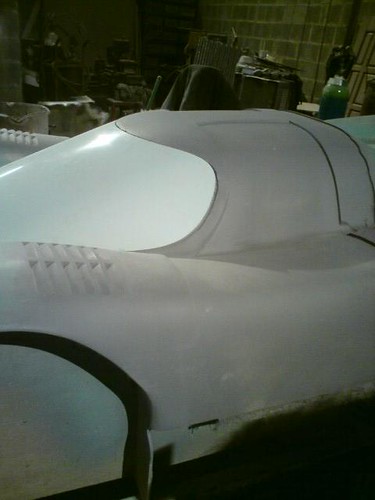
Update, well the moment of truth came today, time to pop the central mould off the back of the buck! It came off ok, with some wooden wedges hammered in, eventually a loud crack and off it came, it did bring off some primer/filler in a couple of areas mind but will clean up easily, very happy with it, just got to find somewhere to store it now!
More photos at http://www.flickr.com/photos/47153142@N03/sets/72157623861979360/
More photos at http://www.flickr.com/photos/47153142@N03/sets/72157623861979360/
Last edited:
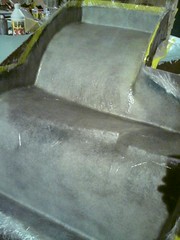
With harvest/drilling now doen I have beeen able to spend a bit of time on the old girl. Thought I`d do a door mold (to keep Fred company!)

First pic, of door with window/door edges scribed in and guide coat ready for a final flat/polish/wax
Second shows glass going on, I used some cheap ply covered with tape for the fences this time instead of expensive ally, seemed to work fine.
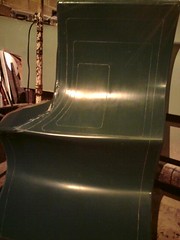
And how it came off this morning, edges need trimming and a good flat down and polish up then I can take molds for the side window/hatch and then using 4mm wax in the mold to make the recesses for the side window, from that I will make a door and then take a mold from that for the final version, quite a long drawn out process, but worth it me thinks.
regards Chris
First pic, of door with window/door edges scribed in and guide coat ready for a final flat/polish/wax
Second shows glass going on, I used some cheap ply covered with tape for the fences this time instead of expensive ally, seemed to work fine.
And how it came off this morning, edges need trimming and a good flat down and polish up then I can take molds for the side window/hatch and then using 4mm wax in the mold to make the recesses for the side window, from that I will make a door and then take a mold from that for the final version, quite a long drawn out process, but worth it me thinks.
regards Chris
")
Hi all, another quick update, have done the door molds and taken splash`s and inserted to provide the door recess for the seals to clip onto, also done all the wheel arch vents and taken a splash from the screen to provide the shape for the recess for the screen, anyone know what sort of clearance there should be?? ( it will be bonded in, without a seal, so needs to be flush and fitting well) I though 2mm around the edges and 2mm allowance for the bonding agent between body/screen.
And a frontal photo, NASA duct needs some work and screen splash needs trimming/fitting but am happy with the way it is going so far!!
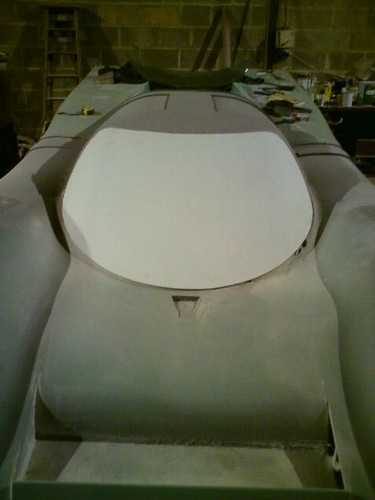
Next on the "To Do" list is get the front hatch sorted/cleaned up and do a mold from that, then light covers!!
And a frontal photo, NASA duct needs some work and screen splash needs trimming/fitting but am happy with the way it is going so far!!
Next on the "To Do" list is get the front hatch sorted/cleaned up and do a mold from that, then light covers!!
Chris,
Awsome work! I believe 4mm - 6mm should be sufficient for a windscreen recess. If in doubt, make it slightly deeper. The windscreen may be dry-fit flush by using small neoprene rubber spacers and when you are satisfied with the fitting, glue the small spacers into place. Fill the resulting void with the urethane windscreen sealant
when attaching the widnscreen.
Chris,
Awsome work! I believe 4mm - 6mm should be sufficient for a windscreen recess. If in doubt, make it slightly deeper. The windscreen may be dry-fit flush by using small neoprene rubber spacers and when you are satisfied with the fitting, glue the small spacers into place. Fill the resulting void with the urethane windscreen sealant
when attaching the widnscreen.
Thanks Molleur, will aim for 5mm and see how we go
regards Chris
Similar threads
- Replies
- 13
- Views
- 3K
- Replies
- 5
- Views
- 2K
- Replies
- 14
- Views
- 5K