- Forums
- GT40 Replica Manufacturers' Corner
- RCR Forum - RCR40/SLC/917/Superlite Aero
- The SLC Clubhouse
You are using an out of date browser. It may not display this or other websites correctly.
You should upgrade or use an alternative browser.
You should upgrade or use an alternative browser.

Thanks Joel! I think I enjoy doing all of this more than driving it, lol.
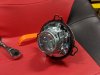
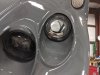
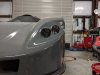
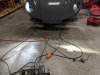
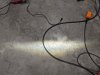
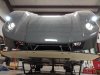
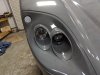
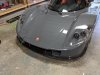
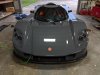
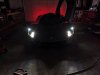
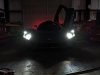
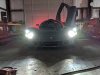
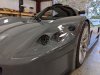
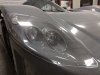
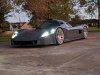
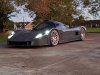
Night #4 was a success, for most part. JW Speaker LED low beams are a direct swap for the Hella high beams (and I'm sure projector low beams as well). Hard to get good output pictures in the shop, but the JW lights are way more concentrated than the HIDs in the projectors. I'll be curious to see how it well they perform on the road.
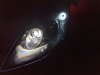
I took the Hella projector apart thinking I could easily remove the shroud so I could paint it black, but it's molded into the Hella. I had some light smoke vinyl laying around so cut out a 3" circle and put on the lens to darken it up a bit to match the black housings of the JW lights. Obviously the tint will diminish the output of the, now, projector high beams, but I don't foresee myself on back roads at night anytime soon. I had no plans to upgrade them to matching JW high beams, but considering it now so they all match. I would like to get another set of JW low beams (to run quad low or use 2nd set for highs), but since they would need to be rotated they probably would look funny both when they're turned on or off.
I went to install the H-D signals, but they're too big...as are the smoked signals. Not totally sure what I'm going to do yet about making them to be darker to match the headlights. First idea was to use VHT Nightshades over the bare 5mm LED signals I have now, but may draw a lens in CAD and get it 3D printed in some sort of translucent material and then I can apply the VHT to it... hide the bare LEDs and make it look more like a turn signal.
Night #4 was a success, for most part. JW Speaker LED low beams are a direct swap for the Hella high beams (and I'm sure projector low beams as well). Hard to get good output pictures in the shop, but the JW lights are way more concentrated than the HIDs in the projectors. I'll be curious to see how it well they perform on the road.
I took the Hella projector apart thinking I could easily remove the shroud so I could paint it black, but it's molded into the Hella. I had some light smoke vinyl laying around so cut out a 3" circle and put on the lens to darken it up a bit to match the black housings of the JW lights. Obviously the tint will diminish the output of the, now, projector high beams, but I don't foresee myself on back roads at night anytime soon. I had no plans to upgrade them to matching JW high beams, but considering it now so they all match. I would like to get another set of JW low beams (to run quad low or use 2nd set for highs), but since they would need to be rotated they probably would look funny both when they're turned on or off.
I went to install the H-D signals, but they're too big...as are the smoked signals. Not totally sure what I'm going to do yet about making them to be darker to match the headlights. First idea was to use VHT Nightshades over the bare 5mm LED signals I have now, but may draw a lens in CAD and get it 3D printed in some sort of translucent material and then I can apply the VHT to it... hide the bare LEDs and make it look more like a turn signal.
Attachments
-
 IMG_20191017_195534.jpg171.4 KB · Views: 489
 -
 IMG_20191017_201614.jpg181 KB · Views: 429
 -
 IMG_20191017_201618.jpg169 KB · Views: 408
 -
 IMG_20191017_211123.jpg179.9 KB · Views: 414
 -
 IMG_20191017_211125.jpg181.4 KB · Views: 458
 -
 IMG_20191017_212235.jpg192.5 KB · Views: 419
 -
 IMG_20191017_212404.jpg174.7 KB · Views: 414
More pics
Attachments
-
 IMG_20191017_214454.jpg196.5 KB · Views: 450
 -
 IMG_20191017_214517.jpg175.9 KB · Views: 425
 -
 IMG_20191017_214519.jpg184.5 KB · Views: 463
 -
 IMG_20191017_214524.jpg183.6 KB · Views: 441
 -
 IMG_20191017_214529.jpg187.9 KB · Views: 410
 -
 IMG_20191017_215224.jpg239.8 KB · Views: 401
 -
 IMG_20191017_215255.jpg238.6 KB · Views: 424
 -
 IMG_20191017_215256.jpg266.4 KB · Views: 456
 -
 IMG_20191017_215257.jpg135.2 KB · Views: 386
Well, my full 7 day week of working on the SLC is over, wife starts her class tonight. It will be slower paced class, so should have some evening I'll be able to get out to the shop at least. I got about 90% of the stuff I wanted to do done. I ended up not going out there Friday so we could watch a movie in the movie room after the kid was in bed.
I still need to remove my emblems and the 3M emblem tape off of them as it's a little too thick so with the car being so low, you can see the gap between emblem and body. This time around I'll use 3M 468MP. I'll reinstall the SLC IR/8 emblems, plus add the fender emblems (finally) as well as the nose emblem. I have a SLC emblem for above the android screen, still can't decide if I want body color or orange.... Opinions?
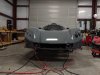
Was able to wash the car for the first time since it was delivered. Sadly it took me 4 months to actually do, but it's been low on the priority list as it never looked "that" dirty. After removing the headlight lens, I realized how bad it really was so it got moved to the top. I was sort of surprised how easy it was to wash and quickly learned not to put much water or soap by the windows as it'll get inside. I still plan to get them tinted, 35%, so maybe with some tint I can use something to seal the windows up and the tint will hide it. Figure worse case I'll sketch and draw a frit for them and get it cut out of vinyl to apply after the tint, may do this either way.
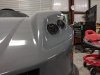
H-D LED signal boards DO actually fit, at least with the cheap clear lens I bought. The lens had a LED board inside them, but a good buddy was able to mill that junk out so all that was left was the lens. I sanded/grinded the outside ring of of the H-D LED boards down and just so happen to fit perfectly inside the lens so everything can be flush mounted. I still plan to replace those lenses with some 3D printed ones that have the rounded edges so they match the profile of the 4 headlights. Really no point, but I like to have things match if it's possible. I did attempt to tint the clear lenses for now with VHT Nightshades, but didn't come out as I expected. I was going to wet sand and polish them, but dont' think I'll waste the time since I'm making new ones. The H-D signal board running lights are pretty bright compared to the headlights unless you're below the cutoff, the tint will tone them down a bit when I install them. Soldered the wiring for the signals when I installed them.
Looking forward to Black Friday in a month, I'm hoping TRS has their big 20-25% off entire website sale and if so I'll suck it up and get the matching JW high beams. Again to keep things looking the same.
Before washing the car, while it was out of the shop I was able to officially test the range of the Viper keyless entry with the foil around the antenna. Works the same distance as it did in the shop, so think I'm good! Sucks I can't use the full range, but better safe than sorry.
I still need to remove my emblems and the 3M emblem tape off of them as it's a little too thick so with the car being so low, you can see the gap between emblem and body. This time around I'll use 3M 468MP. I'll reinstall the SLC IR/8 emblems, plus add the fender emblems (finally) as well as the nose emblem. I have a SLC emblem for above the android screen, still can't decide if I want body color or orange.... Opinions?
Was able to wash the car for the first time since it was delivered. Sadly it took me 4 months to actually do, but it's been low on the priority list as it never looked "that" dirty. After removing the headlight lens, I realized how bad it really was so it got moved to the top. I was sort of surprised how easy it was to wash and quickly learned not to put much water or soap by the windows as it'll get inside. I still plan to get them tinted, 35%, so maybe with some tint I can use something to seal the windows up and the tint will hide it. Figure worse case I'll sketch and draw a frit for them and get it cut out of vinyl to apply after the tint, may do this either way.
H-D LED signal boards DO actually fit, at least with the cheap clear lens I bought. The lens had a LED board inside them, but a good buddy was able to mill that junk out so all that was left was the lens. I sanded/grinded the outside ring of of the H-D LED boards down and just so happen to fit perfectly inside the lens so everything can be flush mounted. I still plan to replace those lenses with some 3D printed ones that have the rounded edges so they match the profile of the 4 headlights. Really no point, but I like to have things match if it's possible. I did attempt to tint the clear lenses for now with VHT Nightshades, but didn't come out as I expected. I was going to wet sand and polish them, but dont' think I'll waste the time since I'm making new ones. The H-D signal board running lights are pretty bright compared to the headlights unless you're below the cutoff, the tint will tone them down a bit when I install them. Soldered the wiring for the signals when I installed them.
Looking forward to Black Friday in a month, I'm hoping TRS has their big 20-25% off entire website sale and if so I'll suck it up and get the matching JW high beams. Again to keep things looking the same.
Before washing the car, while it was out of the shop I was able to officially test the range of the Viper keyless entry with the foil around the antenna. Works the same distance as it did in the shop, so think I'm good! Sucks I can't use the full range, but better safe than sorry.
Attachments
-
 IMG_20191019_193446.jpg167.6 KB · Views: 418
 -
 IMG_20191019_193430.jpg155 KB · Views: 362
 -
 IMG_20191019_193448.jpg177.7 KB · Views: 359
 -
 IMG_20191019_213746.jpg242.3 KB · Views: 354
 -
 IMG_20191019_220429.jpg186.9 KB · Views: 361
 -
 IMG_20191019_220438.jpg178.8 KB · Views: 406
 -
 IMG_20191019_220524.jpg180.3 KB · Views: 376
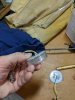
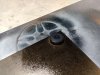
Extra pictures, next to last one is the PLA 3D printed lens... Just guessed on dimensions and fit snugly around the 5mm LEDs, but not the whole board.
Attachments
-
 IMG_20191019_220529.jpg191.5 KB · Views: 390
 -
 IMG_20191019_220640.jpg180.2 KB · Views: 376
 -
 IMG_20191019_220649.jpg182.7 KB · Views: 391
 -
 IMG_20191019_221254.jpg279.7 KB · Views: 370
 -
 IMG_20191020_174711.jpg229 KB · Views: 428
 -
 IMG_20191020_220050.jpg223.1 KB · Views: 433
 -
 IMG_20191020_220051.jpg160.6 KB · Views: 427
 -
 IMG_20191020_220052.jpg160 KB · Views: 413
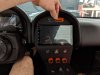
Are those Restomod Air controls?
They're Vintage Air brand knobs.
Thanks Joel! I think I enjoy doing all of this more than driving it, lol.
You wrench, I'll drive. Deal?
You wrench, I'll drive. Deal?
Done! lol
Good Morning Del. I noticed you deleted your windshield wiper stalk. Is that a functional knob in its place? If so, how did you do that. Where did you get that knob?
Good Morning Del. I noticed you deleted your windshield wiper stalk. Is that a functional knob in its place? If so, how did you do that. Where did you get that knob?
Good morning sir! That is correct, all thanks to Scott for designing the housing for the wiper rotary switch. Send him a PM to inquire about getting one. It's a perfect fit for the column and new swtich, also pretty easy to install. Life is so much better without the stalk, I'm sure easier to pull/replace the dash too.
S2's Build Thread
I have had great service and quality from New Image Coatings.. Their ceramic coatings have been extremely tough and priced reasonably... New Image Coatings - 651-784-7055
www.gt40s.com
Is it weird that I keep thinking about how I plan to do with my front signals since I want to make my own lens for them?
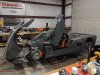
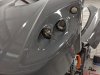
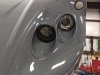
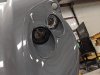
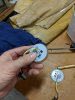
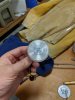
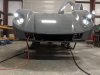
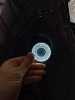
Last night I decided to walk out to the shop to dig in my headlight surplus bins for kicks/motivation and came across these mini H4 projectors I was tinkering with when I had the WS6... I'm thinking about removing the projector lens and incorporating it into the signal lens I'm drawing.
Of course there is absolutely zero point in having a projector lens on a signal, but this is my attempt to think outside the box. Doing this would allow me to paint the 3D printed part body color (and wouldn't have to be translucent material) so they'd blend in with the paint and with a projector lens, I wouldn't reduce any light output.
Attachments

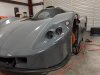
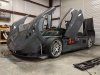
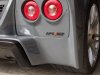
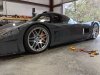
Had awesome weather yesterday so left work a couple hours early to get the signals together, installed and covers back on. Also installed all my emblems finally with the 3M 468MP tape. This tape is awesome, emblems are secure and sit flush now. Took forever to get my templates cut, aligned and finally install the emblems. Doing stuff like this sucks with shaky hands, I'm glad templates are easy to make because I went through a couple of them trying to get it right.
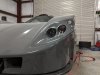
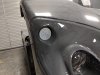
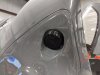
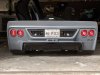
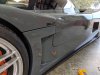
Couldn't find the ideal spot for fender emblems, I wanted to center them above the vent but with the body line not being level with the ground, they'd look crooked so put them in a corner instead. Also moved my IR/8 emblem to below the tail lights. Never was 100% content with it on the ducktail so trying something different. After looking at pics from ground level the SLC looks too low, but yesterday looks fine when walking around the car so may need to redo it.
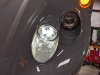
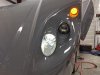
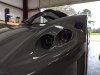
I have a real carbon fiber emblem for the nose, but really dig this laser etched anodized emblem my buddy made for me. After sleeping on it, I think I need to apply a layer of light smoke vinyl on top of it so it blends in with the new light setup. I'll give it a shot this weekend and see how it looks.
Didn't expect the JW headlights to be more of a 4300K color temp so it doesn't match the parking lights as I expected. I think I have an idea for when I make the new lens that will allow them to match better.
Couldn't find the ideal spot for fender emblems, I wanted to center them above the vent but with the body line not being level with the ground, they'd look crooked so put them in a corner instead. Also moved my IR/8 emblem to below the tail lights. Never was 100% content with it on the ducktail so trying something different. After looking at pics from ground level the SLC looks too low, but yesterday looks fine when walking around the car so may need to redo it.
I have a real carbon fiber emblem for the nose, but really dig this laser etched anodized emblem my buddy made for me. After sleeping on it, I think I need to apply a layer of light smoke vinyl on top of it so it blends in with the new light setup. I'll give it a shot this weekend and see how it looks.
Didn't expect the JW headlights to be more of a 4300K color temp so it doesn't match the parking lights as I expected. I think I have an idea for when I make the new lens that will allow them to match better.
Attachments
-
 IMG_20191024_151247.jpg198.2 KB · Views: 385
 -
 IMG_20191024_151514.jpg96 KB · Views: 404
 -
 IMG_20191024_151310.jpg171.9 KB · Views: 370
 -
 IMG_20191024_155125.jpg176.1 KB · Views: 367
 -
 IMG_20191024_161945.jpg177.5 KB · Views: 331
 -
 IMG_20191024_161958.jpg198.7 KB · Views: 336
 -
 IMG_20191024_173135.jpg241 KB · Views: 364
 -
 IMG_20191024_173159.jpg187.2 KB · Views: 385
 -
 IMG_20191024_173233.jpg191 KB · Views: 362
 -
 IMG_20191024_173250.jpg188.7 KB · Views: 335
More pics
Attachments
-
 IMG_20191024_175223.jpg212.4 KB · Views: 356
 -
 IMG_20191024_175243.jpg185.9 KB · Views: 311
 -
 IMG_20191024_175327.jpg198.7 KB · Views: 326
 -
 IMG_20191024_175522.jpg97.5 KB · Views: 366
 -
 IMG_20191024_175630.jpg131.1 KB · Views: 336
 -
 IMG_20191024_175643.jpg150 KB · Views: 316
 -
 IMG_20191025_061020.jpg143.4 KB · Views: 333
 -
 IMG_20191025_061026.jpg130.1 KB · Views: 324
 -
 IMG_20191025_061029.jpg191.1 KB · Views: 372
 -
 IMG_20191025_061047.jpg162.6 KB · Views: 333
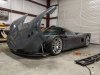
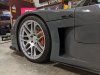
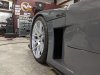
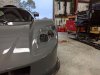
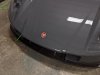
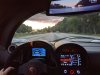
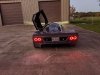
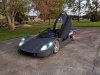
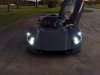
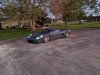
Just more random pictures.... I seem to share alot of pictures, even though most are useless, haha. Made my first actual venture away from home in the car, 70-75 mile round trip to go visit my grandparents and show them the car. Then off to a buddy's house that lives around there to take him for a spin and show him it in person. Lots of kids in his subdivision came by to check it out, one of them told me it's not as cool as a Lamborghini, haha. Gotta love the honesty of kids, although when I opened the automatic door he thought it was awesome so had to tell him bet a Lambo can't do that, lol. Same kid went and grabbed his dad's phone and laughed when he was taking a picture of the rear and read the plate.
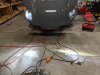
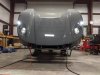
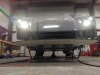
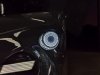
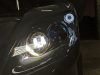
While I was able to make it back home before it was completely dark, I was able to use the new headlights a little. I need to adjust them higher, but that should be fairly easy. Attached a pic of the cutoff.
Even on short drives, I find it pretty comfy with my left leg propped up since there's no dead pedal. Went on a notorious part of I-10 in my area where it sucks in a regular vehicle, so was a little concerned how well the SLC would take it....actually better than expected.
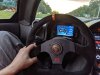
I really need to take the time to adjust my mirrors properly. Alan had them setup right out the gate, but when I removed to get PC I jacked them up. Anyone know a more efficient way to adjust them by yourself, other than get in the car, then out, etc? I think I my get some nylon spacers to put between the end of arms and the housing so they sit higher and can be snugged down. I believe this would make it easier for me to adjust and snug down, but could be wrong.
While I was able to make it back home before it was completely dark, I was able to use the new headlights a little. I need to adjust them higher, but that should be fairly easy. Attached a pic of the cutoff.
Even on short drives, I find it pretty comfy with my left leg propped up since there's no dead pedal. Went on a notorious part of I-10 in my area where it sucks in a regular vehicle, so was a little concerned how well the SLC would take it....actually better than expected.
I really need to take the time to adjust my mirrors properly. Alan had them setup right out the gate, but when I removed to get PC I jacked them up. Anyone know a more efficient way to adjust them by yourself, other than get in the car, then out, etc? I think I my get some nylon spacers to put between the end of arms and the housing so they sit higher and can be snugged down. I believe this would make it easier for me to adjust and snug down, but could be wrong.
Attachments
-
 IMG_20191027_183030.jpg190.1 KB · Views: 370
 -
 IMG_20191027_183035.jpg206.1 KB · Views: 361
 -
 IMG_20191027_184717.jpg220.8 KB · Views: 363
 -
 IMG_20191027_184746.jpg274.3 KB · Views: 373
 -
 IMG_20191027_184753.jpg189.7 KB · Views: 377
 -
 IMG_20191027_184806.jpg282.7 KB · Views: 355
 -
 IMG_20191027_184826.jpg265.2 KB · Views: 406
 -
 IMG_20191027_184833.jpg259.1 KB · Views: 368
 -
 IMG_20191027_185148.jpg129.3 KB · Views: 349
 -
 IMG_20191027_185157.jpg165.1 KB · Views: 364
you could try placing a laser level where you want to see and adjust the mirror to shine the laser on your head position. just thought of it. never tried. but it might cut down a few iterations.
awesome car btw.
awesome car btw.
you could try placing a laser level where you want to see and adjust the mirror to shine the laser on your head position. just thought of it. never tried. but it might cut down a few iterations.
awesome car btw.
Thanks x2! That is a fantastic idea, I'm disappointed I didn't think of it. I'm with you, it should get me pretty close to where they need to be. I'll report back on how it works out.
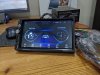
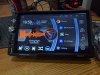
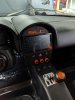
Forgot one picture.... New, even cheaper ($65 shipped), shallow mounted android screen. More I drive the car, more I realize the touch buttons for the volume are kind of aggravating to use when out driving. Not horrible, but a knob would be nice so been looking around for something I liked with a knob. Bonus is this one has a microSD slot, a USB port on the face and even comes with a steering wheel remote (won't use). I'll find a USB port cover for it. I believe the rear plugs are identical to the one I have now, so should be plug & play when I pull the dash out.
If anyone else is looking for something similar they have several headunits that have the same internal hardware, just different button layouts. Like my old one, it comes with it's own launcher (apparently with an Adel song), but I don't care for it. I installed CarWebGuru again, really dig how it looks, ease of use and kind of cool you can add your own logo. I attached my PNG file for my logo if anyone wants it. I can change colors of it if someone wants something different.
I'll donate the old headunit to my cousin for his beater Civic, he's fixing to order a Charger Hellcat widebody so just making sure I get the keys to drive it.")
If anyone else is looking for something similar they have several headunits that have the same internal hardware, just different button layouts. Like my old one, it comes with it's own launcher (apparently with an Adel song), but I don't care for it. I installed CarWebGuru again, really dig how it looks, ease of use and kind of cool you can add your own logo. I attached my PNG file for my logo if anyone wants it. I can change colors of it if someone wants something different.
I'll donate the old headunit to my cousin for his beater Civic, he's fixing to order a Charger Hellcat widebody so just making sure I get the keys to drive it.