
Randy Folsom
Supporter
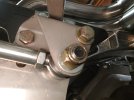
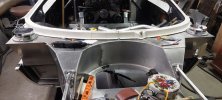
Interesting suspension modification. I am not aware of anyone else changing the upper shock mount location on an RCR40. I wonder if the original design was based on the original cars and/or the Koni shocks that were used in the past. BTW, if you are planning to use the Stance Lift kit, moving it up will disallow placing the 110mm cup on the top of the shock.Working on front suspension, checking travel. Found it has more extension from ride height than compression with two limiting factors, The coilover and the travel on the upper ball joint- tie rod end, plus the coilover would bottom out with no stop. To increase the compression and lessen the extension I moved the upper coilover mount forward 1" and up 3/4". Put the travel closer to a 60/40 split instead of 40/60. Also now there is room for a bumper stop on the coilover to help it from destroying itself. Will determine thickness of bumper when I get the mount brackets back fron the platers. Wheel wells will finished in bedliner. Next comes fuel tanks while waiting for brackets.

")