Thanks Scott. this was very helpful. I am going to just ask Fran about the placement of the radiator. He may want to also put my radiator in the rear. I don't believe I will have any intercoolersBrian, clearance inside the nose varies widely. Some builders have relocated the radiator to the tail and have nothing except a trunk in the nose (e.g. Mesa and Rumbles) and others have everything but the kitchen sink;
Weight is biased to the rear so my strategy was to put as much as possible in the nose. With the exception of the power brake booster (I don't have one), I located everything above in the nose.
- Nose frame stiffeners
- Battery
- Hydraulic lift pump
- Hydraulic lift pump reservoir
- Brake and clutch reservoirs
- A/C dryer
- Shock reservoirs
- Fan shroud
- Horn
- Power brake booster
- Etc.
My scan isn't of use to anyone because the only part forward of the monocoque that hasn't been completely replaced is the splitter. The only reason that I did the scan was to ensure that the duct cleared the top cross bar in the custom cage and the Penske shock reservoirs that are mounted to it -- I'm not aware of anyone with that configuration. I haven't also haven't made a final decision on the battery which could potentially interfere with the bottom of the duct.
Your best bet is to have someone measure the distance between the vertical plates that support the radiator and the distance from the front of the splitter to the tube that stiffens those plates in front of the footbox. The OD of your vent needs to fit inside of those plates and clear anything that's mounted to them. Unless you reengineer the nose box, your outlet will need to be narrower than the Ferrari's. You also need to consider the ratio of the inlet, radiator core and outlet. That Ferrari appears to have an inlet that's much larger than the SL-C's. The Ultima RS has a similar, but narrower outlet.
View attachment 108874
View attachment 108875
View attachment 108876

- Forums
- GT40 Replica Manufacturers' Corner
- RCR Forum - RCR40/SLC/917/Superlite Aero
- The SLC Clubhouse
You are using an out of date browser. It may not display this or other websites correctly.
You should upgrade or use an alternative browser.
You should upgrade or use an alternative browser.
S2's Build Thread
- Thread starter sswartz
- Start date
Scott
Lifetime Supporter
Brian, to my knowledge only two builders have put the radiator in the rear. They did so because they wanted storage in the nose. IMO, the best place for the radiator and condenser is the stock location in the nose. In any event, if you moved the radiator/condenser to the rear you wouldn't have a need for the radiator outlet that you're looking to design.
Brian, to my knowledge only two builders have put the radiator in the rear. They did so because they wanted storage in the nose. IMO, the best place for the radiator and condenser is the stock location in the nose. In any event, if you moved the radiator/condenser to the rear you wouldn't have a need for the radiator outlet that you're looking to design.
 Laughing at myself for overlooking that little detail of why the vent is there in the first place. I was so focused on the aesthetics of the front hood I forgot about the Purpose of the vent. So.... I will ask Fran to see what options we have.
Scott
Lifetime Supporter
I attended the Performance Racing Industry (PRI) show in December and enjoyed walking the floor and hanging out with Mesa, builder of the first SL-C, and Hill McCarty, owner of Agile Automotive. I spent a lot of time looking at, photographing and actuating the sliding pedal box in the AP Racing booth to figure out how it worked. It was a nice design, but it would raise the pedals too high so I wasn’t able to apply their approach to my design for the SL-C. I think the sales guy was convinced that I was going to pay the booth a late-night visit and steal it.
I was tempted to purchase one of the CNC mills in Machinery Row, but NFW would something that big go unnoticed by my better half! I resisted all major purchases until the afternoon of the final day… and WHAM-O a bodacious booth babe caught my eye… slender, curved in all of the right places and lots of billet!

The Albins ST6-M was one of those things that I couldn’t unsee. I called Hill to ask him about it and he agreed to meet me at the booth. Apparently he’s had great success running them in several endurance SL-Cs.
After purchasing a ST6-M from Agile, Hill moved to the top of my wife’s shit list and she’s trying to introduce me to some new friends who aren’t into building cars. I sent the deposit just as Covid was beginning to spike outside of China, so I don’t have a good idea as to when mine is going to arrive.
You don’t see sequential transaxles in many street cars because the straight-cut gears whine, they’re not cheap and they often only shift well when aggressively driven, something only an idiot would do on the street with a high-powered SL-C. Hill indicated that, if properly tuned, shifts can be smooth even on the street.
I was concerned about how loud the gear whine would be so I flew down to Maryland to listen to Raver Motorsports’ SL-C running on the dyno. It has a loud race exhaust which would make it difficult to judge how noticeable the gear whine would be on a street car. To address that issue I brought a couple of street mufflers and Hill used V-band clamps to attach them to the tips of the race exhaust. Guess what, the exhaust was still pretty loud ;-)
Smartphone videos never seem to capture the sound properly…
I invited Pnut to the audition and his opinion was that the sound wasn’t nearly as loud as he thought it would be and that it would be “fine” on a street, but that ear plugs might be a good idea for a long drive. He thought we were doing some automotive-buddy-bonding, which we were, but I had a second, unspoken, and nefarious motive which I can summarize in two words — plausible deniability. When my wife goes for the first ride and asks WTF that noise is I will tell her “Pnut suggested that I go to PRI, thought that the Albins would be a good idea and certified that it wouldn’t be too loud”… I think that might move Pnut from #2 on her list to #1.
The Albins has a bunch of benefits:

Albins stocks a range of drop gears, but I’ll start with two, one for the street and one for the track.

Hill had a damaged front case left over from a 130 MPH crash — the SL-C did it’s job and the driver walked away. He sent it to me for fitment purposes and it’s downright skinny compared to the Ricardo. Note that the starter flange is inboard of the hole in the stock adapter plate bracket. This provides a lot more space for the exhaust. While not apparent in the picture, the ST6-M sits further above the bottom of the car than most transaxles which, with proper heat shielding, provides enough clearance for a 3” round X-pipe between the bellhousing and the rear billet cross member. If I were racing the car the combination of the Daily Engineering dry sump pan and the Albins would allow the engine to be dropped about an inch.

It is a bit long and I estimate that it will project about 1/4” past the “SL-C” logo molded into the street tail (I only have the front half of the transaxle, so I won’t know for sure until I get it). This isn’t a big deal for me because I’m completely reshaping that section of the tail.
I’m going with paddle shifters and a pneumatic shift servo. More about that later.
I was tempted to purchase one of the CNC mills in Machinery Row, but NFW would something that big go unnoticed by my better half! I resisted all major purchases until the afternoon of the final day… and WHAM-O a bodacious booth babe caught my eye… slender, curved in all of the right places and lots of billet!
The Albins ST6-M was one of those things that I couldn’t unsee. I called Hill to ask him about it and he agreed to meet me at the booth. Apparently he’s had great success running them in several endurance SL-Cs.
After purchasing a ST6-M from Agile, Hill moved to the top of my wife’s shit list and she’s trying to introduce me to some new friends who aren’t into building cars. I sent the deposit just as Covid was beginning to spike outside of China, so I don’t have a good idea as to when mine is going to arrive.
You don’t see sequential transaxles in many street cars because the straight-cut gears whine, they’re not cheap and they often only shift well when aggressively driven, something only an idiot would do on the street with a high-powered SL-C. Hill indicated that, if properly tuned, shifts can be smooth even on the street.
I was concerned about how loud the gear whine would be so I flew down to Maryland to listen to Raver Motorsports’ SL-C running on the dyno. It has a loud race exhaust which would make it difficult to judge how noticeable the gear whine would be on a street car. To address that issue I brought a couple of street mufflers and Hill used V-band clamps to attach them to the tips of the race exhaust. Guess what, the exhaust was still pretty loud ;-)
Smartphone videos never seem to capture the sound properly…
I invited Pnut to the audition and his opinion was that the sound wasn’t nearly as loud as he thought it would be and that it would be “fine” on a street, but that ear plugs might be a good idea for a long drive. He thought we were doing some automotive-buddy-bonding, which we were, but I had a second, unspoken, and nefarious motive which I can summarize in two words — plausible deniability. When my wife goes for the first ride and asks WTF that noise is I will tell her “Pnut suggested that I go to PRI, thought that the Albins would be a good idea and certified that it wouldn’t be too loud”… I think that might move Pnut from #2 on her list to #1.
The Albins has a bunch of benefits:
- Lightweight — it only weighs 180 pounds which to my understanding is 27 pounds lighter than a Graziano, 87 pounds lighter than a Ricardo and 161 pounds lighter than the C8's transaxle. Reducing weight in this area helps balance the car. The only worst place to have excess weight would be to bolt something to the duck tail.
- Lightning fast gear shifts, particularly when actuated by a pneumatic shift servo. The Raver Motorsports SL-C is tuned to shift in 40ms. I’ll have a more mild tune for the street and a similar aggressive tune for the track.
- Roller Barrel Selector Mechanism which is pretty much the gold standard for motorsport gearbox change mechanisms.
- Drop gears can be easily changed in less than 10 minutes. Simply jack the rear of the car up to prevent the oil from draining out, remove the 10 nuts on the rear cover plate and swap the gear out. The plate is sealed with an O-ring so there is no messing around with sealants or gaskets.
- Robust: Albins keeps upping the torque specs, but their current rating is 1,100NM of continuous torque in off-road racing (i.e., extended WOT runs, jumping, etc.). I’m also aware of several 2,000+ HP twin turbo cars in the works, so I don’t expect any issues.
- Eight large inspection ports enable monitoring of the shifting gears, ring gear, differential and pinion. Each inspection port is held in place with a single screw and is sealed with an O-ring.
- It can be rebuilt while installed in the car. Everything is splined and easy to remove/install without a press, puller or any special tools. The only exception is the pinion bearing which is an interference fit and requires heating of the housing to remove, but it’s not part of a standard rebuild.
- The drive flanges align well with the SL-Cs wheel hubs. This, combined with the narrow case, results in long axles which reduce the angle of the CV joint. The puts less stress on the CV joints compared to the Ricardo and the Graziano, especially the asymmetric right side which is shorter to accommodate the front-wheel driveshaft which isn’t used in the SL-C.
- Integrated oil pump.
Albins stocks a range of drop gears, but I’ll start with two, one for the street and one for the track.
Hill had a damaged front case left over from a 130 MPH crash — the SL-C did it’s job and the driver walked away. He sent it to me for fitment purposes and it’s downright skinny compared to the Ricardo. Note that the starter flange is inboard of the hole in the stock adapter plate bracket. This provides a lot more space for the exhaust. While not apparent in the picture, the ST6-M sits further above the bottom of the car than most transaxles which, with proper heat shielding, provides enough clearance for a 3” round X-pipe between the bellhousing and the rear billet cross member. If I were racing the car the combination of the Daily Engineering dry sump pan and the Albins would allow the engine to be dropped about an inch.
It is a bit long and I estimate that it will project about 1/4” past the “SL-C” logo molded into the street tail (I only have the front half of the transaxle, so I won’t know for sure until I get it). This isn’t a big deal for me because I’m completely reshaping that section of the tail.
I’m going with paddle shifters and a pneumatic shift servo. More about that later.
Last edited:
Scott,
Nice purchase. I personally like the “gear whine” sound. I ran gear cam drives on the last two Harley’s I owned. They weren’t very loud but you got a little taste of the gear whine sound.
If the tranny is too loud you can always open up the exhaust to drown it out a little!
Nice purchase. I personally like the “gear whine” sound. I ran gear cam drives on the last two Harley’s I owned. They weren’t very loud but you got a little taste of the gear whine sound.
If the tranny is too loud you can always open up the exhaust to drown it out a little!
Glad to hear that the Albins is working out, freeing up space for the exhaust is a big plus.
I look forward to the results of your research on the paddle shift system. I think the whine is not too bad from the video. But, the amount of sound deadening material can make a huge difference on long drives.
I look forward to the results of your research on the paddle shift system. I think the whine is not too bad from the video. But, the amount of sound deadening material can make a huge difference on long drives.
Scott
Lifetime Supporter
The Albins ST6-M has a roller barrel selector mechanism which is pretty much the gold standard for gear change mechanisms in motorsports. The following video does a great job demonstrating how it works on EX-Jordan F1 gearbox. The gear change section starts at 5:15.
Advantages
The disadvantages primary stem from the fact that there is no synchronizing mechanism to assist in equalizing the speed of the gears.
Advantages
- Few moving parts.
- Excellent reliability.
- Direct linkage between the selector forks provides optimally timed movement of each gear’s dog ring.
- Simplifies the movement of the shift actuator into linear motion.
- Ability to withstand loads generated by very fast gear changes .
- Ability to withstand very aggressive shifting (lots of force on the gear change mechanism).
- The clutch is only used when moving from neutral to first gear or from neutral to reverse.
The disadvantages primary stem from the fact that there is no synchronizing mechanism to assist in equalizing the speed of the gears.
- Greater wear on the gears. Race teams view this as the cost of doing business.
- Requires greater skill to downshift because the throttle must be bliped to match speed. This isn’t an issue if you have paddle shifters and a Gear Control Unit (GCU) does it for you.
- Shifts are more abrupt.
Scott
Lifetime Supporter
Chris, I don't really have an idea.... my strategy here is "it will be whatever it will be" LOL
Albins seems to publish very conservative numbers. I know that the Raver Motorsports SL-C has gone way beyond 3,000 miles without needing a rebuild. My car will be primarily driven on the street with some track so one would assume I'd have less wear. That said, you shouldn't drive a dog box like a syncro and vice versa. A dog box wants to be shifted fast and hard. Not doing so won't allow the dogs to fully engage which will increase wear.
I don't want jerky shifts on the street so I will have two GCU tunes, one for relaxed driving and one for aggressive driving. I upgraded my ECU from a M130 to a M150 with GPRP. It has a key advantage over having an Engine ECU and a separate GCU... one device provides tight integration of fuel, ignition, throttle, and the pneumatic actuator. Agile has been able to tune smooth shifts (I think with Cosworth) and I assume that MoTeC has similar good transmission control strategies.
The plan for the relaxed tune is to lengthen the torque cut and make it more gradual prior to the shift and then elongate and smooth the torque reinstate once the shift is complete.
Scott
Lifetime Supporter
To support paddle shifting I considered a standalone Gear Control Unit (GCU), but decided to upgrade my MoTeC ECU from a M130 to a M150 with GPRP because a single device simplifies wiring and provides tighter integration of fuel, ignition, throttle, and the shift actuator. An example configuration is shown below.

I considered MoTeC’s Paddle Shift Auxiliary Kit, but the solution from Shiftec is better. Their Air Power Source (APS) combines the relay, pump, pump-to-accumulator hose, accumulator and pressure sensor into a single motorsport-quality device. This increases reliability while reducing weight and complexity. There are only two connections; a -4 JIC for air and a motorsport connector for power and CAN communication. The pneumatic shift actuator is compact and seems well made.

Pneumatic Shift Servo and Air Power Source (APS)
The paddle shifters provide a fantastic tactile experience. I have always loved pushing buttons and flipping switches and these are the coolest switches I have ever used. I was playing with it in the garage and I was having so much fun I brought it upstairs. It didn’t take long for me to annoy everyone with constant clicking so I put it down. My son tired it and he was instantly addicted. My wife asked “What’s wrong with you two?” The best I could explain it was that it is was similar to the ridiculous way she acts around a cute baby — it’s just wired into our DNA.
The shifter’s body is anodized CNC aluminum, no surprises there. The lever actuates a micro switch which is rated for two million cycles. I’m not sure how many cycles my son and I have used so far, but if I don’t speed up the build I might have to replace the micro switch LOL.
There are no springs… so what type of sorcery is in the shifter?
The magic is simple, two high-strength magnets (I assume neodymium). Magnetic force is the inverse square with distance so it’s takes some force to break the magnets apart at which point the resistance disappears. When you release the tension in your fingers the billet lever exponentially accelerates and smashes into the billet body. This type of auditory and tactical experience wouldn’t be possible with a spring. I’ve driven a number of paddle shifted cars before (e.g., BMW, Porsche, Lamborghini, Ferrari, etc.) and their paddle shifters all feel like a game console in comparison. It’s a small thing, but it gives me a smile every time I use it.
I considered MoTeC’s Paddle Shift Auxiliary Kit, but the solution from Shiftec is better. Their Air Power Source (APS) combines the relay, pump, pump-to-accumulator hose, accumulator and pressure sensor into a single motorsport-quality device. This increases reliability while reducing weight and complexity. There are only two connections; a -4 JIC for air and a motorsport connector for power and CAN communication. The pneumatic shift actuator is compact and seems well made.
Pneumatic Shift Servo and Air Power Source (APS)
The paddle shifters provide a fantastic tactile experience. I have always loved pushing buttons and flipping switches and these are the coolest switches I have ever used. I was playing with it in the garage and I was having so much fun I brought it upstairs. It didn’t take long for me to annoy everyone with constant clicking so I put it down. My son tired it and he was instantly addicted. My wife asked “What’s wrong with you two?” The best I could explain it was that it is was similar to the ridiculous way she acts around a cute baby — it’s just wired into our DNA.
The shifter’s body is anodized CNC aluminum, no surprises there. The lever actuates a micro switch which is rated for two million cycles. I’m not sure how many cycles my son and I have used so far, but if I don’t speed up the build I might have to replace the micro switch LOL.
There are no springs… so what type of sorcery is in the shifter?
The magic is simple, two high-strength magnets (I assume neodymium). Magnetic force is the inverse square with distance so it’s takes some force to break the magnets apart at which point the resistance disappears. When you release the tension in your fingers the billet lever exponentially accelerates and smashes into the billet body. This type of auditory and tactical experience wouldn’t be possible with a spring. I’ve driven a number of paddle shifted cars before (e.g., BMW, Porsche, Lamborghini, Ferrari, etc.) and their paddle shifters all feel like a game console in comparison. It’s a small thing, but it gives me a smile every time I use it.
Scott,
That thing is going to be freaking awesome. Everything is so well thought out, and then implemented. I can hardly wait to read each update.
Keep up the fantastic work !!
Regards Brian
That thing is going to be freaking awesome. Everything is so well thought out, and then implemented. I can hardly wait to read each update.
Keep up the fantastic work !!
Regards Brian
Very nice but keep in mind that everything added to a build is a potential point of failure. The more sophisticated the system the more likely a failure will be a major problem. Being stranded in the middle of no where is no fun, especially at night or if it is raining. Balancing simplicity with sophistication is an individual judgement, though. Everyone to their own choice.
Don’t worry about The naysayers Scott. You have a fantastic well thought out and carried out build going. There are people out there with the tried and proven SBC that have failures also.
Please keep up the excellent build and build diary.
Regards e
Please keep up the excellent build and build diary.
Regards e
Scott
Lifetime Supporter
Neil, I understand your point. I have a cobra which is brutally simple so the plan for this car is to pack it with tech. Time will tell if putting a
dog box sequential trans in a street/track car was a good idea or not from a streetability point of view. However, the Albins ST6-M is a study in elegant simplicity, the electronics are in a single MoTeC ECU, the harness will be custom made by a motorsport professional and the other parts are what the Raver endurance team bought after their other stuff broke. They're all unapologetic, motorsport-quality, purpose-built parts. For example, the shift actuator is pneumatic and only moves forwards and backwards. There's a reason motorsport and industrial applications use this design pattern. This is quite different than buying an H-pattern transaxle, adding an automated shifter that performs a complex motion that was never intended to be automated, modifying a harness and tightly integrating an ECU and a GCU from two different manufacturers. There's nothing wrong with that approach, but it would likely be less robust.
dog box sequential trans in a street/track car was a good idea or not from a streetability point of view. However, the Albins ST6-M is a study in elegant simplicity, the electronics are in a single MoTeC ECU, the harness will be custom made by a motorsport professional and the other parts are what the Raver endurance team bought after their other stuff broke. They're all unapologetic, motorsport-quality, purpose-built parts. For example, the shift actuator is pneumatic and only moves forwards and backwards. There's a reason motorsport and industrial applications use this design pattern. This is quite different than buying an H-pattern transaxle, adding an automated shifter that performs a complex motion that was never intended to be automated, modifying a harness and tightly integrating an ECU and a GCU from two different manufacturers. There's nothing wrong with that approach, but it would likely be less robust.
Scott
Lifetime Supporter
The brake and clutch hard lines are finished
The beautiful CNC-bent brake lines that came with the kit went in the trash. While the lines in the engine compartment were OK (until I changed everything), nothing in the front half of the car was even close to fitting and both the rear brake line and clutch line had unions in the middle of the side pod. This is the worst possible location for a union because a leak would go unnoticed and fixing it would require removing the spider. At this point, the only parts of the stock brake system that I’m using are the Tilton pedals and the upgraded Brembo GT calipers and rotors.
All of the hard lines are 3/16” stainless steel with 45-degree double flares. It would have been easier to use something softer than stainless steel, but IMO stainless is the most durable and looks the best. I wanted to use 37-degree single flares, but there has been some debate that they wouldn’t meet Department of Transportation (DOT) regulations. I asked around and read all of the DOT specs that I could find and I didn’t find a single mention of flares. However, I didn’t want to run the chance of getting into a debate with some inspector, so I went with the double flare which is a real pain in the ass on stainless steel. Nothing like spending hours bending the perfect line and then f’ing it up on the final flare! The solution to this problem is having the correct tool. If you’re going to do stainless double flares, you need the Eastwood Professional Brake Line and Flaring Tool:
That solved the lines. The next step was to figure out the best way to mount them. Several years ago I bought several different types of brake line mounting tabs and all of them developed surface rust. So I tweaked the nicest design by lowering the mounting hole so that the brake line would sit closer to the chassis and I Wazer’d a bunch out of 0.090” stainless steel.

Custom stainless steel mounting tabs

I don’t like wrenching on brake lines when they’re not firmly fixed. I was unable to find mountable single or double stainless steel unions so I Wazer’d mounting tabs out of 0.090” stainless steel and had Abe weld stainless unions to them.

Custom single-union bracket

Custom double-union bracket and brake line mounting tab
I used clamps from Made4You for the brake lines. They make single and double clamps for 3/16” line, but no triple clamps so I designed and 3D printed one.

3D-printed triple brake line clamp
The residual pressure valves (RPVs) that come with the brake kit are junk. I’m aware of builders that have had them leak, had them cause the brakes to drag and had the embossed flow arrow pointed the wrong way! They were replaced with ones from Wilwood.

Wilwood residual pressure valves

Rear brake split. The clip on the left will be finished the next time the oil reservoir is removed.

Rear bake line on the left, clutch line on the right and other rear brake line in the background
The beautiful CNC-bent brake lines that came with the kit went in the trash. While the lines in the engine compartment were OK (until I changed everything), nothing in the front half of the car was even close to fitting and both the rear brake line and clutch line had unions in the middle of the side pod. This is the worst possible location for a union because a leak would go unnoticed and fixing it would require removing the spider. At this point, the only parts of the stock brake system that I’m using are the Tilton pedals and the upgraded Brembo GT calipers and rotors.
All of the hard lines are 3/16” stainless steel with 45-degree double flares. It would have been easier to use something softer than stainless steel, but IMO stainless is the most durable and looks the best. I wanted to use 37-degree single flares, but there has been some debate that they wouldn’t meet Department of Transportation (DOT) regulations. I asked around and read all of the DOT specs that I could find and I didn’t find a single mention of flares. However, I didn’t want to run the chance of getting into a debate with some inspector, so I went with the double flare which is a real pain in the ass on stainless steel. Nothing like spending hours bending the perfect line and then f’ing it up on the final flare! The solution to this problem is having the correct tool. If you’re going to do stainless double flares, you need the Eastwood Professional Brake Line and Flaring Tool:
That solved the lines. The next step was to figure out the best way to mount them. Several years ago I bought several different types of brake line mounting tabs and all of them developed surface rust. So I tweaked the nicest design by lowering the mounting hole so that the brake line would sit closer to the chassis and I Wazer’d a bunch out of 0.090” stainless steel.
Custom stainless steel mounting tabs
I don’t like wrenching on brake lines when they’re not firmly fixed. I was unable to find mountable single or double stainless steel unions so I Wazer’d mounting tabs out of 0.090” stainless steel and had Abe weld stainless unions to them.
Custom single-union bracket
Custom double-union bracket and brake line mounting tab
I used clamps from Made4You for the brake lines. They make single and double clamps for 3/16” line, but no triple clamps so I designed and 3D printed one.
3D-printed triple brake line clamp
The residual pressure valves (RPVs) that come with the brake kit are junk. I’m aware of builders that have had them leak, had them cause the brakes to drag and had the embossed flow arrow pointed the wrong way! They were replaced with ones from Wilwood.
Wilwood residual pressure valves
Rear brake split. The clip on the left will be finished the next time the oil reservoir is removed.
Rear bake line on the left, clutch line on the right and other rear brake line in the background
Scott
Lifetime Supporter
The combination of the Daily Engineering dry sump and a remote electric water pump means that I need to completely redesign the serpentine system. The dry sump is located where the A/C compressor usually sits and it replaces the serpentine pulley behind the super damper with a cogged one. This means that the compressor needs to be moved to the other side of the engine. I knew that before I had the engine built.
However, I didn’t realize the impact of removing the mechanical water pump until I pulled the engine and removed the pump. In the picture below the automatic tensioner, idler and water pump (obviously) pulleys are mounted to the water pump. I now understand why there are multiple companies offering direct-replacement electric water pumps. They replace the water pump pulley with an idler with the same OD and maintain all of the mounting holes. This means you can use the same belt and pullies without any engineering or fabrication. That said, I’m glad I went with the remote pump discussed in a previous post because it’s superior to direct-replacement pumps and it’s extremely easy to service. I’d have to pull the engine to service a direct-replacement pump.
I also learned that unlike the left side of the engine (right side when viewed from the front) which has three M10-1.5mm mounting holes, the right side has none.

Engine as delivered had a dry sump, a mechanical water pump and no provision for accessories
The first step was to figure out the location of mounting holes; three on the block, four on the right head and five on the left head. I spent a lot of time looking for a simple dimensioned drawing to no avail. I found a CAD model of an entire LS3 on GrabCAD (I have an LS7 block, but the relevant mounting holes seem to be the same). After removing the accessories, the exhaust and the crank pulley, I was able to determine the location of the mounting holes relative to the crank. They seem to be accurate, but if anyone has actual dimensions I’d love to have them.
There will be three layers of belts, from back to front:

Left (supercharger belt in black and accessory belt in orange) and Right (base plate)
I designed three mounting plates:

Base and accessory plates; center plate not mocked… pretty naked without the water pump

All three plates installed

Spacers printed in Onyx for mocking purposes
I know that significant engineering goes into designing a proper serpentine system, but I only have a rudimentary understanding — watch the amount of wrap, tensioners on the slack side, etc. — and I haven’t been able to find a resource that discusses serpentine design. If anyone knows of a good book, article, post, consultant, etc. please let me know.
I stumbled into Design IQ, a downloadable free program from Gates. The video below provides a quick overview.
As can be seen below, I entered the information for the accessory system into the application. It calculates the Effective Belt Length (top middle of black background) which is useful. It also calculates the wrap angle of each pulley, but I’m not sure if 259.26 degrees is too much for the drive pulley or if 47.93 degrees is too little for the tensioner. I’m also not sure how to orient the tensioner’s arc nor how to determine where to place the mounting holes so that the tensioner applies the correct amount of pretension to the belt while providing the maximum amount of adjustability. If anyone has any pointers, please let me know.

Accessory belt entered into Design IQ
However, I didn’t realize the impact of removing the mechanical water pump until I pulled the engine and removed the pump. In the picture below the automatic tensioner, idler and water pump (obviously) pulleys are mounted to the water pump. I now understand why there are multiple companies offering direct-replacement electric water pumps. They replace the water pump pulley with an idler with the same OD and maintain all of the mounting holes. This means you can use the same belt and pullies without any engineering or fabrication. That said, I’m glad I went with the remote pump discussed in a previous post because it’s superior to direct-replacement pumps and it’s extremely easy to service. I’d have to pull the engine to service a direct-replacement pump.
I also learned that unlike the left side of the engine (right side when viewed from the front) which has three M10-1.5mm mounting holes, the right side has none.
Engine as delivered had a dry sump, a mechanical water pump and no provision for accessories
The first step was to figure out the location of mounting holes; three on the block, four on the right head and five on the left head. I spent a lot of time looking for a simple dimensioned drawing to no avail. I found a CAD model of an entire LS3 on GrabCAD (I have an LS7 block, but the relevant mounting holes seem to be the same). After removing the accessories, the exhaust and the crank pulley, I was able to determine the location of the mounting holes relative to the crank. They seem to be accurate, but if anyone has actual dimensions I’d love to have them.
There will be three layers of belts, from back to front:
- Dry sump: cogged belt
- Supercharger: serpentine belt running on the super damper
- A/C compressor and Alternator: serpentine belt running on a pulley mounted to the front of the super damper
Left (supercharger belt in black and accessory belt in orange) and Right (base plate)
I designed three mounting plates:
- Base Plate: spans the majority of the block, supports the other two plates and the rear mounting points for the compressor and alternator
- Center Plate: replaces the mechanical water pump’s mounting points
- Accessory Plate: supports the idler and the front mounting points for the compressor and alternator
Base and accessory plates; center plate not mocked… pretty naked without the water pump
All three plates installed
Spacers printed in Onyx for mocking purposes
I know that significant engineering goes into designing a proper serpentine system, but I only have a rudimentary understanding — watch the amount of wrap, tensioners on the slack side, etc. — and I haven’t been able to find a resource that discusses serpentine design. If anyone knows of a good book, article, post, consultant, etc. please let me know.
I stumbled into Design IQ, a downloadable free program from Gates. The video below provides a quick overview.
As can be seen below, I entered the information for the accessory system into the application. It calculates the Effective Belt Length (top middle of black background) which is useful. It also calculates the wrap angle of each pulley, but I’m not sure if 259.26 degrees is too much for the drive pulley or if 47.93 degrees is too little for the tensioner. I’m also not sure how to orient the tensioner’s arc nor how to determine where to place the mounting holes so that the tensioner applies the correct amount of pretension to the belt while providing the maximum amount of adjustability. If anyone has any pointers, please let me know.
Accessory belt entered into Design IQ
Scott
Lifetime Supporter
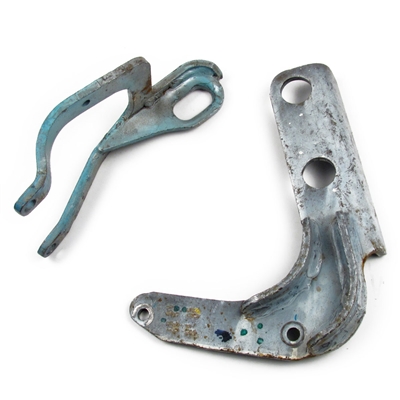
When I went to pull the engine to work on the serpentine system, I couldn’t attach the left lift bracket because the coolant expansion tank was in the way. That’s the first proof-positive problem that I’ve had! When the engine went in the engine compartment was naked, but now it’s full of stuff… so the problem demonstrates progress, right?

The solution was to cut the lift bracket and drill a new hole for the clevis. This was a bit of a chore because they’re Kent-Moore J-41798 brackets which were used on the OEM assembly line and are made from 1/4’’ steel. They list for $500+, but you can find used ones on eBay for around $100. If you have an LS, I highly recommend that you pick up a set.
You simply remove the left-front and right-rear coil packs and attach each bracket with the provided bolts. There is no need to stuff rags between the chains and the engine because the brackets are stout enough to keep the chains clear of everything. That said, I do use a towel on top of the supercharger to prevent scratches while I’m connecting everything.
The engine can now be easily removed/installed without removing the coolant expansion tank. A big thanks to Ken who brought these to my attention.

The painted gray edge is the chop line
The solution was to cut the lift bracket and drill a new hole for the clevis. This was a bit of a chore because they’re Kent-Moore J-41798 brackets which were used on the OEM assembly line and are made from 1/4’’ steel. They list for $500+, but you can find used ones on eBay for around $100. If you have an LS, I highly recommend that you pick up a set.
You simply remove the left-front and right-rear coil packs and attach each bracket with the provided bolts. There is no need to stuff rags between the chains and the engine because the brackets are stout enough to keep the chains clear of everything. That said, I do use a towel on top of the supercharger to prevent scratches while I’m connecting everything.
The engine can now be easily removed/installed without removing the coolant expansion tank. A big thanks to Ken who brought these to my attention.
The painted gray edge is the chop line
Ken Roberts
Supporter
Same ones I use Scott. Here is another set right off the old LS production line....a slightly different style but really good deal! Thirteen sets still in stock.
Factory Surplus Production Line LSX Engine Lift Hooks - SMC Performance and Auto Parts
Factory Surplus Production Line LSX Engine Lift Hooks. Available at SMC Performance and Auto Parts.
www.smcautoparts.com
Similar threads
- Replies
- 10
- Views
- 10K
- Replies
- 4
- Views
- 5K