Sean's RCR GT40 build

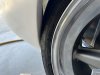
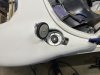
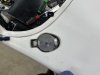
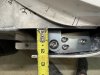
Sorry, my question was worded wrong. I was wondering if the ball that attaches to the strut was standard so I can mount it. I ordered a generic set of ball mounts off Amazon...and they seem to work perfectly!


Hi Trevor,

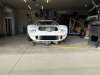
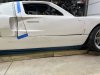
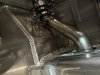
I'm not sure I understand the question. If you mean standard on these cars, no they re not. The normal mount for the nose is bobbins than allow the front to slide off. I like the look of the flip nose better and decided to go that route.

Regards,

Sean
 

Sean S.

Supporter
Still working on body fitment, things are starting to get close. I haven’t sanded any of the gaps yet, all the lines are looking pretty close. A little more tweaking to the nose and I think I’ll be able to fasten the spider to the chassis.

I swapped the windshield wiper provision to the drivers side. Also started the lights cutouts. It’s starting to look like an actual car now.
 

Attachments

  • BF409B73-E120-4B7C-BEDC-E06FDDCD51EE.jpeg
    BF409B73-E120-4B7C-BEDC-E06FDDCD51EE.jpeg
    515.7 KB · Views: 476
  • B315849A-FADF-49C5-9616-C98DFBE3ABB9.jpeg
    B315849A-FADF-49C5-9616-C98DFBE3ABB9.jpeg
    566.7 KB · Views: 464
  • 2C3B352C-5460-4B6C-8C57-F33E4FD0D1AC.jpeg
    2C3B352C-5460-4B6C-8C57-F33E4FD0D1AC.jpeg
    508.1 KB · Views: 397
  • 1258EA3E-04A9-4F78-AAF1-5E625B8ACCF1.jpeg
    1258EA3E-04A9-4F78-AAF1-5E625B8ACCF1.jpeg
    228.9 KB · Views: 390
  • DADF3B66-266A-4B75-AC3E-C23C7711E707.jpeg
    DADF3B66-266A-4B75-AC3E-C23C7711E707.jpeg
    571.1 KB · Views: 389
  • 8DDD53F6-72F7-4962-8531-85F41189ADF5.jpeg
    8DDD53F6-72F7-4962-8531-85F41189ADF5.jpeg
    321.9 KB · Views: 389
  • 88756CCA-837B-42C4-B620-22F359ACE9C4.jpeg
    88756CCA-837B-42C4-B620-22F359ACE9C4.jpeg
    504.3 KB · Views: 381
  • F089883D-E3B2-45DF-B31B-B60949DCDB0F.jpeg
    F089883D-E3B2-45DF-B31B-B60949DCDB0F.jpeg
    405.3 KB · Views: 438
Last edited:

Randy V

Moderator-Admin
Staff member
Admin
Lifetime Supporter
Looking good Sean!
Make sure you get the rear suspension dialed in with a pretty fair alignment and have the suspension set to ride height. I do this by having the car on jack stands or dolly, disconnect the coil-over shocks and then jack up and support the suspension with jack stands or 2x4 lumber. The lower control arms need to be level to the ground.
once you have that done, you can center the rear wheel arches over the wheels/tires and establish your rear clip mounting position - then work your way forward.
I wrote another post about this in the body forum..
A number of people have done it differently - some got lucky - some did not. Some were very disappointed.
 

Sean S.

Supporter
Looking good Sean!
Make sure you get the rear suspension dialed in with a pretty fair alignment and have the suspension set to ride height. I do this by having the car on jack stands or dolly, disconnect the coil-over shocks and then jack up and support the suspension with jack stands or 2x4 lumber. The lower control arms need to be level to the ground.
once you have that done, you can center the rear wheel arches over the wheels/tires and establish your rear clip mounting position - then work your way forward.
I wrote another post about this in the body forum..
A number of people have done it differently - some got lucky - some did not. Some were very disappointed.

Thanks Randy.

I did put a lot of time into both the front and back suspension alignment. Fran suggested the same to me before getting started on the body, he said to make sure suspension was right and then match the wheel wells to the tires to make it look right. I do suggest getting an electronic alignment tool for this. I got one from longacre racing. It’s a lot easier than levels and squares to dail it in, especially with a suspension as adjustable as this one.

I started by getting the rear clamshell centered and adjusted to match the wheels. I then moved to the front leaving the spider floating. The front took a lot of attention, I think mainly because of the flip nose. But it is finally dailed in now. The front of the nose at the radiator opening will need a bit of work as it isn’t straight where the lips on the opening roll back. It gives it the appearance that it is on crooked. Took me a bit to find it wasn’t straight there. I believe I am going to have to take a little off of the inner fender to clear the front tires when steering. I thought about lower profile tires, but I’m not sure I would like how they would look. I am still trying to figure out options here. If anyone has seen the same tire rub issues, please let me know what you did to correct it.
 

Attachments

  • image.jpg
    image.jpg
    524.4 KB · Views: 343
  • F758A41D-793E-4B3A-B4C7-D549CD9102EA.jpeg
    F758A41D-793E-4B3A-B4C7-D549CD9102EA.jpeg
    454.6 KB · Views: 338
  • 1FE6988B-35EA-4228-9E62-88F686414A3E.jpeg
    1FE6988B-35EA-4228-9E62-88F686414A3E.jpeg
    258.2 KB · Views: 327
  • 1F87833D-5749-4123-A8C5-DFB7611FC364.jpeg
    1F87833D-5749-4123-A8C5-DFB7611FC364.jpeg
    254.8 KB · Views: 314
  • 2A3A0965-5DEA-46C3-802B-4FE1670F8D7A.jpeg
    2A3A0965-5DEA-46C3-802B-4FE1670F8D7A.jpeg
    280.6 KB · Views: 344

Randy V

Moderator-Admin
Staff member
Admin
Lifetime Supporter
With the stock (from RCR) 205-60-15 tires on front, it was close to the sill lip when turning. I changed tires to 225-50-15 and had to trim a very small amount from the sill when I turned the wheel. What size wheels and tires are you using?
 

Sean S.

Supporter
With the stock (from RCR) 205-60-15 tires on front, it was close to the sill lip when turning. I changed tires to 225-50-15 and had to trim a very small amount from the sill when I turned the wheel. What size wheels and tires are you using?

I have 225/45 zr17 on the front and 315/35 zr17 on the rear.
 

Randy V

Moderator-Admin
Staff member
Admin
Lifetime Supporter
I have 225/45 zr17 on the front and 315/35 zr17 on the rear.
Presuming that the front suspension is at ride height (lower control arms level to ground) and interference occurs only when turning, you may need to trim the inner lip down on the front clip as well as the sil….
 

Sean S.

Supporter
Things are starting to move quickly now that the body’s fitment is dailed in. Once I mounted the spider. I got the fuel fillers mounted. They mount almost 1” off from side to side. This is due to they are not symmetrical on the front clip.
 

Attachments

  • 00A9AE8C-A328-4747-9CE2-7CD7192F343F.jpeg
    00A9AE8C-A328-4747-9CE2-7CD7192F343F.jpeg
    307.4 KB · Views: 288
  • D16149BA-D177-4689-A038-8A7067D3E9C3.jpeg
    D16149BA-D177-4689-A038-8A7067D3E9C3.jpeg
    486.2 KB · Views: 283
  • 8B76079D-BD32-44EF-9A73-4FB8231958F2.jpeg
    8B76079D-BD32-44EF-9A73-4FB8231958F2.jpeg
    283.7 KB · Views: 285
  • B4248FAD-CBA1-4E46-BA11-E940C82971BA.jpeg
    B4248FAD-CBA1-4E46-BA11-E940C82971BA.jpeg
    435.2 KB · Views: 268
  • 062765A3-8BBD-4201-AEF9-07E8A7651C35.jpeg
    062765A3-8BBD-4201-AEF9-07E8A7651C35.jpeg
    429.3 KB · Views: 272
  • C00B9FB2-B8D9-46CB-B95F-FD3DD95A92DE.jpeg
    C00B9FB2-B8D9-46CB-B95F-FD3DD95A92DE.jpeg
    283.7 KB · Views: 291

Sean S.

Supporter
Next I moved on to the door hinges. All the body lines line up pretty good. The only exception is the bottom of the door towards the front angles up. Not a big deal to fix though.
The only thing I have clearanced is the front of the door next to the hinge. It was about 1/2” longer than it needed to be.

the door hinges need spacers made to ensure the pivot of the hinge was centered in the door. The driver side required a 1/4” hinge and the passenger side required 1/2”
 

Attachments

  • F0E03B15-9108-4C74-A84D-92524516D62C.jpeg
    F0E03B15-9108-4C74-A84D-92524516D62C.jpeg
    238.5 KB · Views: 284
  • 8DCDA3D7-A7A8-4358-88BD-19C5DDE2AEAF.jpeg
    8DCDA3D7-A7A8-4358-88BD-19C5DDE2AEAF.jpeg
    331.2 KB · Views: 290
  • 9733F526-0514-436B-9EFE-0285174C006D.jpeg
    9733F526-0514-436B-9EFE-0285174C006D.jpeg
    272 KB · Views: 282
  • 091079F1-C1AB-440C-B44E-DF337BFF1251.jpeg
    091079F1-C1AB-440C-B44E-DF337BFF1251.jpeg
    303.7 KB · Views: 281
  • 519BA559-0101-4B23-84B1-A44F9CAD2A56.jpeg
    519BA559-0101-4B23-84B1-A44F9CAD2A56.jpeg
    374.1 KB · Views: 283
  • A892B982-3B2D-443F-83B1-C0743F153364.jpeg
    A892B982-3B2D-443F-83B1-C0743F153364.jpeg
    341.6 KB · Views: 284
  • 2FC913E7-06BC-4068-8155-F7DF2328B162.jpeg
    2FC913E7-06BC-4068-8155-F7DF2328B162.jpeg
    447.9 KB · Views: 287
  • A202004F-4061-4F81-B123-EF7240D9AA1B.jpeg
    A202004F-4061-4F81-B123-EF7240D9AA1B.jpeg
    519.2 KB · Views: 278
  • F0FBDF79-70C9-4891-B395-AA5F5BE88C3A.jpeg
    F0FBDF79-70C9-4891-B395-AA5F5BE88C3A.jpeg
    541.3 KB · Views: 269
  • 190CFAFD-8A09-4C2C-84BD-DC73EDDCBDF5.jpeg
    190CFAFD-8A09-4C2C-84BD-DC73EDDCBDF5.jpeg
    552.1 KB · Views: 315
what kind of gas cap is that? I like, is that an additional plate that accepts gas cap? I don’t have that and like to purchase.
thanks
Joe
 

Sean S.

Supporter
what kind of gas cap is that? I like, is that an additional plate that accepts gas cap? I don’t have that and like to purchase.
thanks
Joe
[/QUOT

hi Joe

The cap itself is just a generic fuel cap. The filler neck was machined by RCR. Both were provided with the kit. You could possibly reach out to Fran if you are interested in purchasing them.
Sean
 

Sean S.

Supporter
Sean,

Make sure you install your door seals (weatherstripping) before finalizing your panel gaps. It will alter how things fit together and it's a job that I'm sure you'd rather only do once.

Chris

Thanks Chris, very good advice.

Does anyone have suggestions on what to use for weatherstripping for the doors and rear clam shell? RCRs manual's links don't work for what to use here.

Thanks in advance,

Sean
 
Thanks Chris, very good advice.

Does anyone have suggestions on what to use for weatherstripping for the doors and rear clam shell? RCRs manual's links don't work for what to use here.

Thanks in advance,

Sean
Sean,
I have post 227 in Chuck and Ryan's build bookmarked for when we get to the weatherstripping on our build. He goes over their trials of different weatherstripping in that post. https://www.gt40s.com/threads/chuck-and-ryans-rcr-build.22083/post-226191

Josh
 
Hey Sean, What wall thickness did you use on your fuel filler pipe? I'm getting ready to do the same on my GT-R. Debating wether I weld of bend the pipe. Looks like you may have done both. Loooking great by the way. Love the progress.
 

Sean S.

Supporter
Hey Sean, What wall thickness did you use on your fuel filler pipe? I'm getting ready to do the same on my GT-R. Debating wether I weld of bend the pipe. Looks like you may have done both. Loooking great by the way. Love the progress.

hi Rob

I bought some 45 deg mandrel bends from performance tube bending. They are 16 gauge (.065”). I cut them to the length needed and welded them out.
Sean
 
Back
Top