
You are using an out of date browser. It may not display this or other websites correctly.
You should upgrade or use an alternative browser.
You should upgrade or use an alternative browser.
Way to go Steve
Well done Steve
Steven Lobel
Supporter
All this time off.....
Between yesterday and today:


Between yesterday and today:
- Install shifter gate- 1/4-20 thread, 3 bolts.
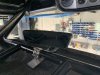
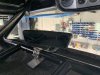
- Install mirrors. Race Mirrors from Pegasus. https://www.pegasusautoracing.com/productdetails.asp?RecID=28686. Made backing plates out of 3/16 aluminum instead of washers.
- Hang wires under dash on passenger side Added some insulted clamps to firewall and zip tied everything up out of the way.
- Label sub panel. Voltmeter, fuel pump, mirror. Stickers that came with subpanel were for a boat. Bilge pump is fused.
- Rear view camera/mirror. Fab a plate, use rollbar clamps.
- Need to wrap and run to back and tap reverse lights.
- Run and seal ac drains. From VA unti through bottom of floor. Hang down 1 "
- Put on aluminum centering rings on all 4 wheels before driving.
- Wire trinary switch. Blues go ground. Blacks to blue from AC compressor and grey from switch in dash.
- Wire third brake light and license plate lights.- simple soldering
- Tire pressure- max psi 50, they were all at 20.
- Torque everything again. And mark it with orange paint. Duh.
- Bleed brakes. Maybe replace valves? Push on peddle, kinda slow down a little. Might be lack of power assist, or might need to be bled again. I have not hit them with harder pressure or gotten on to them yet, as I am not driving fast. No title, no reg, no insurance.
- Check brake light/tail light wiring (might be reversed)- not getting double lights when pushing on brakes.
- Install harnesses. I need H to make me a harness bar behind the seats. Just making brackets and drilling through firewall does not put the harness straps exactly where needed.
- Replace pan gasket at oil change. I have a few drops coming off the front right and rear left of the pan. Retorquing did not help.
- Tow hooks front and rear. I will need to see how others did this.
- Front wells- Made by H, when I am done messing around and nothing leaking, they bolt in.
- Front dam- again, just to button it up when I feel like it will not need to come off in the next hours worth of work.
- AC charging/leak test
- Corner balance
- Dyno tune
Attachments
Steven Lobel
Supporter
And now the real work begins....
Test driving and noticed the following:
Brakes: if you do not bleed the inner ports at any corner, the brakes really suck. Will rebleed all 4 corners the right way and see if it helps.
Steering: Running H-Craft modified. Car is at max height for now. If I turn too far left or right the turnbuckle on the steering rod adjuster hits the rim. Will talk to H and see if the heim joint can go under the knuckle or if new pieces can be made to move the joint inboard of the knuckle instead of sitting on top.
Engine: LS7 with Dailey dry sump. Outlet hose on rear driver's side of block has a -10AN male. I had a -10 to -12 adapter and a -12 line running to remote oil filter on rail right behind driver's seat in engine compartment. While test driving the line blew apart. I dumped 14 qts of oil. Shut it down when I saw smoke and the engine got a bit noisy. Pulled pan and drained remaining oil, had about 2-3 qts left. No metal or sparkle in pan. Bottom end looks great. Still nervous. Got a new gasket installed and ordered parts for a new line. The hose I was using was all nylon braided. I will show pics of the fitting but the line ripped in half inside the fitting. I think I may have twisted it while tightening to the engine. Pics to follow.
Fingers crossed when oil goes in, the noise goes away. Shut down engine with 15 psi remaining.
Before it blew, it was faster than my old Nissan GT-R. Can spin in any gear.
Steven Lobel
Supporter
Love this community. Got a call from H today. He must have read my posts. He provided a lot of helpful insight over the phone. Lucky for me he is close enough by where anything I screw ip can be done right by the man.
Steven Lobel
Supporter
Got my replacement hose and fitting from bottom of block to filter. 18 fresh qts of oil, replaced pan gasket and inspected pan for junk (none). Angle grinder for front shaft off transaxle to get Dailey dry sump pan off easier. Recommend anyone doing this build to do this ahead of mating the engine to transaxle. Needs 1cm hacked off end. Can do with car assembled, but would be easier and faster with Graziano on a bench.

Added 5 qts through valve cover and filled the rest into the 3 gallon tank. Primed pump using air ratchet (only thing that fits on 7/16 bolt in the space). Would love to buy a spare HTD belt and then could use it on a pulley in a drill to spin the pump.
Here is the carnage:

I have not done AN assembly before this build, but in the fitting above, you can see rubber all the way around. I think I built it right, but when tightening, I was spinning the hose putting tension on the rubber inside the fitting. Thoughts?
Here is the hose:

The hose was still all inside the fitting, but this is where the 15qts came out while I was driving.
Got it all buttoned back up and went to start it, but I left it in Acc on the keyed ignition, so it is on the charger until tonight. Fingers crossed.
Added 5 qts through valve cover and filled the rest into the 3 gallon tank. Primed pump using air ratchet (only thing that fits on 7/16 bolt in the space). Would love to buy a spare HTD belt and then could use it on a pulley in a drill to spin the pump.
Here is the carnage:
I have not done AN assembly before this build, but in the fitting above, you can see rubber all the way around. I think I built it right, but when tightening, I was spinning the hose putting tension on the rubber inside the fitting. Thoughts?
Here is the hose:
The hose was still all inside the fitting, but this is where the 15qts came out while I was driving.
Got it all buttoned back up and went to start it, but I left it in Acc on the keyed ignition, so it is on the charger until tonight. Fingers crossed.
good luck with things! Regarding the failed hose, any reason you didn't use a steel reinforced one? I'm paranoid about any pressurized hose, especially one carrying flammable liquid. Secondarily, I know hose assembly is standard mechanical stuff, but I personally hate doing it. Especially when places like ANPlumbing.com will build crimp style hoses for free.
Steven Lobel
Supporter
good luck with things! Regarding the failed hose, any reason you didn't use a steel reinforced one? I'm paranoid about any pressurized hose, especially one carrying flammable liquid. Secondarily, I know hose assembly is standard mechanical stuff, but I personally hate doing it. Especially when places like ANPlumbing.com will build crimp style hoses for free.
Thanks. The replacement is stainless braided over the rubber. All of the hoses are pressure rated for far more than an oil, fuel, or coolant system needs. But I did buy a pre-assembled 48" -10 hose from Summit as the replacement.
Ron McCall
Supporter
Steve,
Most builders ( especially with LS powerplants) opt to have drop gears installed into their Graziano transaxles . When I perform this procedure, I completely remove the 4wd parts from the trans making the shortening of the shaft a non-issue. This also removes roughly 5 lbs of rotating mass from the unit.
Ron
Steven Lobel
Supporter
Great news: Motor is fine. And hold 15 qts of oil. I have the 3 extra qts on my garage floor. Was leaking out the fill cap on my Peterson 3 gallon tank. Oh well.
Got to re-bleed clutch and reset the linkage. Adjusted steering at uprights as it was hitting the rim at full turn. Lowered and flipped suspension and this helps a lot. Now need some nice weather to adjust clutch.
Got to re-bleed clutch and reset the linkage. Adjusted steering at uprights as it was hitting the rim at full turn. Lowered and flipped suspension and this helps a lot. Now need some nice weather to adjust clutch.
Steven Lobel
Supporter
Graziano axle boots are same for inners and outers. BT -367
Replacements at driveshaft shop are $31.
So how did I rip the right side completely apart in 14mi? Ugh.
In other news, going to try a third turn signal/hazard combo to go with my Speedway harness kit. This one is from Speedway. Hope it works.
Also, got a mount fabbed up for a Sabelt strap for the next time I need towing.
You mean you fitted the tie rods on the underside of the upright bracket? If so the bump steer will be horrendous and possibly dangerous at speed.Great news: Motor is fine. And hold 15 qts of oil. I have the 3 extra qts on my garage floor. Was leaking out the fill cap on my Peterson 3 gallon tank. Oh well.
Got to re-bleed clutch and reset the linkage. Adjusted steering at uprights as it was hitting the rim at full turn. Lowered and flipped suspension and this helps a lot. Now need some nice weather to adjust clutch.
Steven Lobel
Supporter
You mean you fitted the tie rods on the underside of the upright bracket? If so the bump steer will be horrendous and possibly dangerous at speed.
I put them back on top. Will use smaller spacers to get them as low as possible, set ride height lower, and should not rub.
Thanks. Coming back to you soon....my H-list is growing.
Steven Lobel
Supporter
3 day weekend.
Plans:


Plans:
- Bleed Ramlift, replaced plugs with
 WIL-220-0063
Brake Bleeder Screws, Repair Kit, 1/8-27 NPT Thread, Front/Rear, Universal, Each
(Mfr. #: 220-0063) - check that front suspension is tight, torque everything that doesn't get undone with corner balance and alignment.
- Half shaft boots. Remove axle bolt, remove hub. Hammer/press out wheel studs-change to ARP100-7708, Lisle 22800 install tool. Unsure why both of my half shaft boots got torn in 14 miles of test driving. $31 for full kit with grease from driveshaft shop. I bought 4 so I have spares. BT-367-10 Low Profile 108mm CV Black Inner/Outer Boot Kit. While the half shaft and hub are out for changing wheel studs, I am going to shorten the stub shafts so I can put on the Forgestar hubcaps. Stub shaft in vice, 4" angle grinder to hack them off. Did it with nut in place so I can make sure it threads off and on again. Dan Carter had this problem and went with longer hub caps. https://www.gt40s.com/threads/dans-build.47402/post-486015
- Battery disconnect from summit. New terminal ends from knuz. Need to mount when wheel off, space under the reservoir is perfect.
- Speedway switch- got a replacement for defective hazard component. Mounting to roll bar in footwell. https://www.speedwaymotors.com/Speedway-Heavy-Duty-Turn-Signal-Switch,30566.html Works perfectly with my harness.
- Grease zerks
- Fire extinguisher mount to floor
Ken Roberts
Supporter
What brand of grease did they give you with the axle boot kit Steve?
Steven Lobel
Supporter
What brand of grease did they give you with the axle boot kit Steve?
8 tubes of driveshaft shop grease. Size of medium toothpaste. Black grease. Will post pics after my Zoom meeting in 3-2-1.....
Similar threads
- Replies
- 3
- Views
- 2K
- Replies
- 63
- Views
- 6K