
You are using an out of date browser. It may not display this or other websites correctly.
You should upgrade or use an alternative browser.
You should upgrade or use an alternative browser.
917 Scratch Build
- Thread starter MrNoo
- Start date
Chris you're doing such a bang up job. Did you have a body available to you to get dimentions from & contoures? The body looks great you do have a good eye for contoures. It looks pretty much right on (you mentioned the 6" strech of the cockpit). I don't know how they are up there in Canada for street cars. But isn't getting a windshield going to be hard? Or do you have one from a supplier?
Mike S
Just working on my Lotus
Mike S
Just working on my Lotus

Thanks guys, Rick S, I have a Porsche 3.4 direct injection engine and 6-speed box to go in it from a crashed Cayman S, I intend to put a GT3 throttle body on and with a stand alone ecu and decent exhaust should see 340-350 out of it, so should be fun!!:drunk: Although I keep thinking I should be putting a GT3 engine in it, maybe I will make a "special" for myself once this is done!!!
Mike S, the screen I can still get from Pilkington Glass here in the UK, they have the original tooling and reckon they can get it "E" marked which is what we need here to get it road legal.
Jackal, you have plenty of talent looking at your build thread, mine looked just as yours does, I am just a bit further down the path, won`t be long untill you`re taking molds from your buck, doing a grand job!
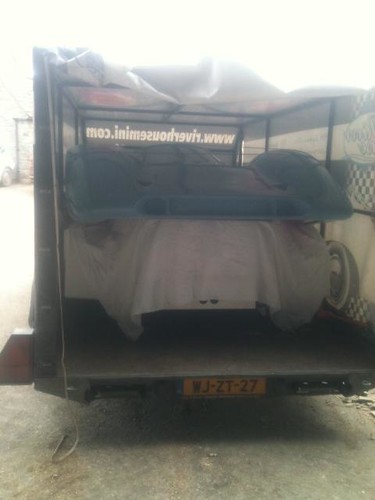
A pic of it all packed up to go to Stoneleigh Kit Car show then home to Holland, it is hoped that this will be a demonstrator with a view to make a limited number of kits available to sell, although a lot of developement work and re-developement lies ahead before we will be ready.
In the trailer is a Caterham style car, the front and rear sections of the 917 and doors and front hatch, pretty tight to say the least!!!!!
Mike S, the screen I can still get from Pilkington Glass here in the UK, they have the original tooling and reckon they can get it "E" marked which is what we need here to get it road legal.
Jackal, you have plenty of talent looking at your build thread, mine looked just as yours does, I am just a bit further down the path, won`t be long untill you`re taking molds from your buck, doing a grand job!
A pic of it all packed up to go to Stoneleigh Kit Car show then home to Holland, it is hoped that this will be a demonstrator with a view to make a limited number of kits available to sell, although a lot of developement work and re-developement lies ahead before we will be ready.
In the trailer is a Caterham style car, the front and rear sections of the 917 and doors and front hatch, pretty tight to say the least!!!!!
Hi Rick, the rad or rads will be one main one in the front where the oil cooler would go on an original car and then if we need extra then 2 (one each side) Porsche Boxster rads will go at the rear just in front of the rear wheels (there is a bit of space available) with air feed from the NASA ducts on the top of rear section.
Done a bit more, the section we showed at Stoneleigh was well received and drew a lot of attention, so work has continued with renewed vigor!!
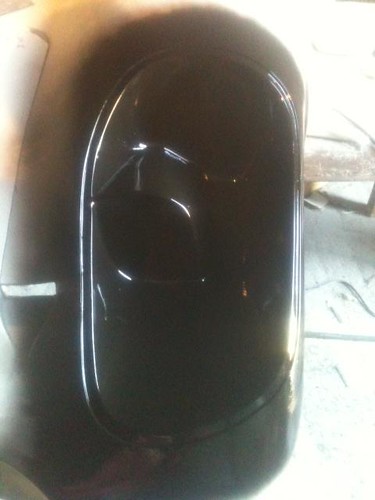
A couple of pics, done the light pod molds for both sides, as close as to the original but they are a tad taller due to trying to get the thing through the SVA test here in UK and much to my dismay one is wider than t`other by 1/2" but think I may get away with it!!!!
This shows the first one out from the mold and just placed in the cutout, needs a good fitting before bonding in.

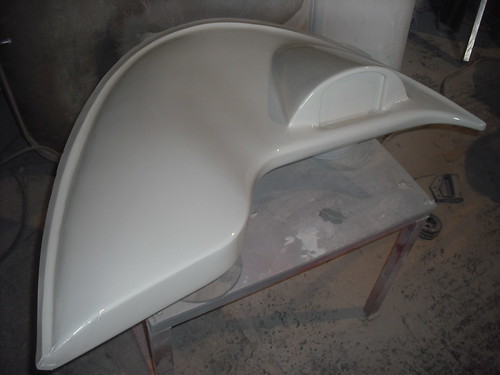
And other side primed prior to mould being taken
And lastly the dash, have tried to follow as closely as I can the original but are doing away with normal instruments and going with a Dash2 from Race Technology due to space restrictions, this is SVA complient, anyway pic so far, still some work to do before priming and molding.
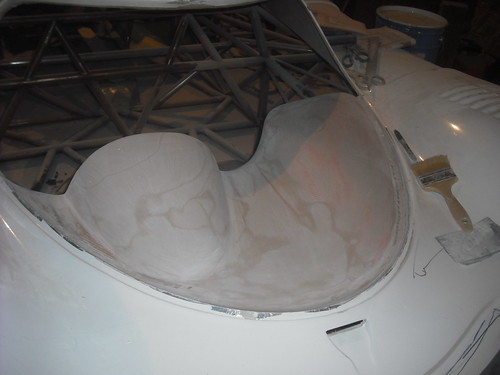
and lastly the dash having been removed from the car to do all the faces and switch recesses

Done a bit more, the section we showed at Stoneleigh was well received and drew a lot of attention, so work has continued with renewed vigor!!
A couple of pics, done the light pod molds for both sides, as close as to the original but they are a tad taller due to trying to get the thing through the SVA test here in UK and much to my dismay one is wider than t`other by 1/2" but think I may get away with it!!!!
This shows the first one out from the mold and just placed in the cutout, needs a good fitting before bonding in.
And other side primed prior to mould being taken
And lastly the dash, have tried to follow as closely as I can the original but are doing away with normal instruments and going with a Dash2 from Race Technology due to space restrictions, this is SVA complient, anyway pic so far, still some work to do before priming and molding.
and lastly the dash having been removed from the car to do all the faces and switch recesses
Wow chris, excellent progress, you dont hang about!
How did you mark out where the lights recesses are positioned, just "eyed" it or something more scientific? I have been dreading doing mine.
Cheers
Fred W B
How did you mark out where the lights recesses are positioned, just "eyed" it or something more scientific? I have been dreading doing mine.
Cheers
Fred W B
Wow chris, excellent progress, you dont hang about!
How did you mark out where the lights recesses are positioned, just "eyed" it or something more scientific? I have been dreading doing mine.
Cheers
Fred W B
Yours is coming along nicely, looking good!
Light recesses were originally done on the main plug, I did this using spirit level, laser level, so the "top" and "bottom" of the appertures where in place. The appertures themselves, I sketched the shape on one side, got it how I wanted then in-filled it with black tank tape (Gaffa Tape), stood back and had a good look at it, once happy I carefully peeled the tape of in one piece then reversed it and placed on the other side, hence transfering the shape, only somewhere along the way I ended up 1/2" out on the width, but what`s done is done, too late to change it now!!!
regards Chris
Chris 1/2" off is probably nothing. Most of these race cars can be off more than that from side to side. The rush to get them homologated (sp?) I think prevented them from making fixturing for some things. They were hand assembled/built without the luxury of factory type controlls.
How did you establish the dimentions for the body & actual conoures? Did you have one to work from or just pictures? It's really looking GREAT!!!!!!!!! A major undertaking well done. I just hope my Lotus project turns out as well.
Mike S.
How did you establish the dimentions for the body & actual conoures? Did you have one to work from or just pictures? It's really looking GREAT!!!!!!!!! A major undertaking well done. I just hope my Lotus project turns out as well.
Mike S.
Chris,
great effort and time consuming work as usual.
May i just ask you to think a little about your dash board. I fully realise that you are not doing an exact copy of the original but do please think about the glare that you may possibly have on that very forward instrument binnacle and its size and not being able to wipe/clean the windscreen easily. The original cars have a smaller and sunken in instrument housing which has a separate shroud over its face to cut out glare from the very deep windscreen.
It is not easy at the best of times to clean properly the inside of the screen but looking at your dash shape inside the bodywork i think you could have problems with easy access. That tall binnacle will also impede your forward vision, which believe it or not, is very limited when lying back in the seat. Again though ,i know you have altered things inside the cockpit area to be more user friendly and i do congratulate you on your hard work. An SVA/IVA pass is going to be quite an achievement.
Only trying to pass on some long term knowledge and experience of the 917 and problems that a few others have encountered around the globe in trying to make user friendly road going replica 917s.
Regards,
Graham.
Thanks Graham, I will hack it about tomorow and see how we go, the instrument is 105mm tall, current binicle stands 110mm above my crosstube/member but I get what you say, move it forward and inset it should liberate some more space betwix screen and dash. Won`t take long as all the hard work has already been done, I must say I was not 101% with it.
It is very hard to try and find enough room for all the lights etc instruments etc for it to be SVA legal, hence the choice of the Dash2, it`s all one contained unit, looks nice too, so will have a Mk2 version this time tomorrow!!!!
regards Chris
It is very hard to try and find enough room for all the lights etc instruments etc for it to be SVA legal, hence the choice of the Dash2, it`s all one contained unit, looks nice too, so will have a Mk2 version this time tomorrow!!!!
regards Chris
Have "cut it and shut it", its as small as I can make it using the Dash2 system, so view/window cleaning etc should be easier. Just need to get my head around how to mould it now, although think I have it sussed!
Anyway a pic of Mk2
Anyway a pic of Mk2
Looks good
As long as you can get your hand between it & the widshield you should be fine. But I do like (as suggjected) an eyebrow/hood over the instraments to help with glare. Mounting might be best from undernieth? A few alum. tabs & screws or pop rivets maybe? Threaded inserts? You'll work it out very nicely I'd say, judging by the rest of you project. Bravo!!!!!
Mike S.
Hi Chris
I guess you are not going to make the mould in one piece, as the recess for the dash unit would prevent it releasing if it was a one piece mould?
Cheers
Fred W B
I guess you are not going to make the mould in one piece, as the recess for the dash unit would prevent it releasing if it was a one piece mould?
Cheers
Fred W B
Ooh,
one other thing i must emphasize about the dash board. Cover all of it in the roughest, most light absorbing, matt black material that you can find. With that rake of windscreen and the closeness and area of dashboard you will be in deep trouble with reflection/glare if you don,t.
one other thing i must emphasize about the dash board. Cover all of it in the roughest, most light absorbing, matt black material that you can find. With that rake of windscreen and the closeness and area of dashboard you will be in deep trouble with reflection/glare if you don,t.
Similar threads
- Replies
- 13
- Views
- 3K
- Replies
- 5
- Views
- 2K
- Replies
- 14
- Views
- 5K