
You are using an out of date browser. It may not display this or other websites correctly.
You should upgrade or use an alternative browser.
You should upgrade or use an alternative browser.
Assembling a Monocoque
- Thread starter bune
- Start date
Rune
Supporter
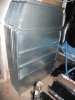
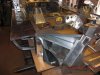
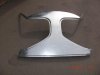
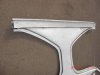
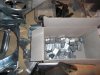
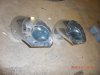
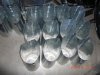
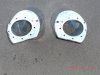
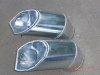
We also made some nice looking surrounds and floors for the monocoques, this was due to the access to this special press tool.
It is good to have these spare parts laying around if there come futures needs for rebuild, or restauration of a original car.
Rune
It is good to have these spare parts laying around if there come futures needs for rebuild, or restauration of a original car.
Rune
Attachments
Jim Rosenthal
Supporter
This is very impressive. When I started my project there was ONE person in the world making authentic GT40 chassis. Now there are several. This is very good for the hobby of those interested in these cars....competition improves the breed")
Rune
Supporter
There are several people/team around the world building gt40 monocoques, either from the drawings or other methods that bring them very close to the authentic car, but from my review I can not see any competition among the builders. I belive that all of us building this juvel , have our own time schedule for when the car is ready, and have no problem seeing some other working faster.
Number one rule for me is that there is no deviation from the original drawing. And hand build all parts (no parts to buy in the shop) so speed is not actual here only the accuracy.
Number one rule for me is that there is no deviation from the original drawing. And hand build all parts (no parts to buy in the shop) so speed is not actual here only the accuracy.
Rune
Supporter
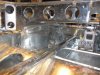
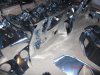
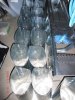
I have got lots off feedback from people that want to see the progress on this project . So here one can see some more assembly. If some of You think that the project is moving slowly forward, it is due to the fact that we build 13 cars at the same time. Then You can be most effective .
Attachments


why no pics at the factory webbsite: GOX Teknik - Sveriges just nu hetaste bilbyggare ..????
Rune
Supporter
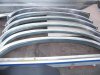
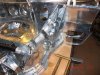
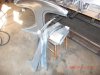
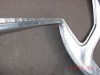
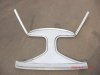
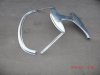
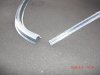
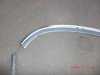
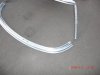
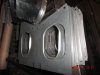
Here are a new bunch of pictures from building the monoqoue, one can observe a very nice roof section spotvelded together and with posts that make a perfect match to the rest of the chassis. The fit here are with less than a mm according to the drawing, The clue is to make good roof and surround press tools. Than the pieces fits together very well, as seen on some pictures here.
Rune
Rune
Attachments
-
 CIMG0155.jpg30.9 KB · Views: 1,179
 -
 CIMG0156.jpg46 KB · Views: 1,003
 -
 CIMG0157.jpg46.2 KB · Views: 1,095
 -
 CIMG0158.jpg42 KB · Views: 1,050
 -
 CIMG0159.jpg58.2 KB · Views: 1,084
 -
 CIMG0160.jpg36.8 KB · Views: 1,111
 -
 CIMG0164.jpg35 KB · Views: 1,079
 -
 CIMG0163.jpg47.2 KB · Views: 996
 -
 CIMG0161.jpg45 KB · Views: 1,013
 -
 CIMG0162.jpg40.6 KB · Views: 977
AWESOME! You guys are the masters of bloody sheet metal!
Rune,
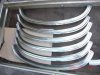
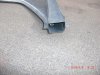
Thanks for the close up pictures of the profile of the channel. I have been doing some research on green houses but have had a hard time finding a profile shot! The workmanship looks great, keep the pictures coming. What thickness of material are you using throughout the build?
Brian
Thanks for the close up pictures of the profile of the channel. I have been doing some research on green houses but have had a hard time finding a profile shot! The workmanship looks great, keep the pictures coming. What thickness of material are you using throughout the build?
Brian
Rune
Supporter
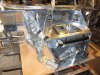
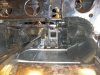
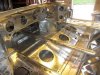
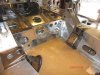
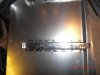
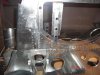
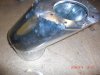
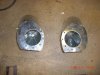
Here are some pictures show the pedal box arrangement, how to do the adjustments also some pictures show the huge size on the fuel filler tubing + some other parts not welded in place yet.
This may not be of big interest for everyone, but Iknow that some do a close study to this. And it show the inside of a chassis that most people never have seen or will see in the future. Enjoy the pictures.
This may not be of big interest for everyone, but Iknow that some do a close study to this. And it show the inside of a chassis that most people never have seen or will see in the future. Enjoy the pictures.
Attachments
Rune
Supporter
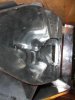
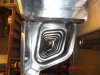
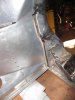
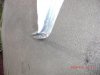
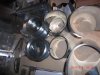
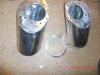
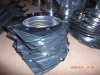
Here are some pictures that show the fuel filler tube . It is not straight forward to make this one it is lots of parts that must be welded together. Here it is. Enjoy.
Rune
Rune
Attachments
-
 CIMG0177.jpg44.4 KB · Views: 942
 -
 CIMG0180.jpg42.9 KB · Views: 1,025
 -
 CIMG0179.jpg51.3 KB · Views: 1,024
 -
 CIMG0176.jpg45 KB · Views: 976
 -
 CIMG0178.jpg48.9 KB · Views: 977
 -
 CIMG0181.jpg31.5 KB · Views: 1,006
 -
 CIMG0185.jpg46.4 KB · Views: 1,037
 -
 CIMG0186.jpg48.2 KB · Views: 946
 -
 CIMG0187.jpg46.8 KB · Views: 1,021
 -
 CIMG0188.jpg46.8 KB · Views: 981
Similar threads
- Replies
- 21
- Views
- 2K