Johan
Supporter
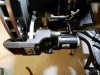
I added a Stewart EWP just before the radiator inlet controlled by the Holley ECU, I progammed it to come on 10* before the fans and it`s great.
Before, the fans came on if I had the engine idling for 15-20 minutes, but now the EWP comes on and it takes care of the cooling. The fan stays off. So at idle it isn`t enough flow in the system with the stock mech water pump.
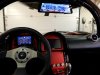
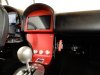
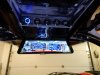
Also bought a Alpine 700, a short double din, only 75mm deep so it fits in the center console without modification. So BU camera in the Alpine and Rear View cam in the mirror, both works perfect. Thanks Cam for your help.
Before, the fans came on if I had the engine idling for 15-20 minutes, but now the EWP comes on and it takes care of the cooling. The fan stays off. So at idle it isn`t enough flow in the system with the stock mech water pump.
Also bought a Alpine 700, a short double din, only 75mm deep so it fits in the center console without modification. So BU camera in the Alpine and Rear View cam in the mirror, both works perfect. Thanks Cam for your help.
Attachments
Last edited: