Toms RCR 40 Trackracer

Status
Not open for further replies.
It has been awhile since I have check in on your build Tom -

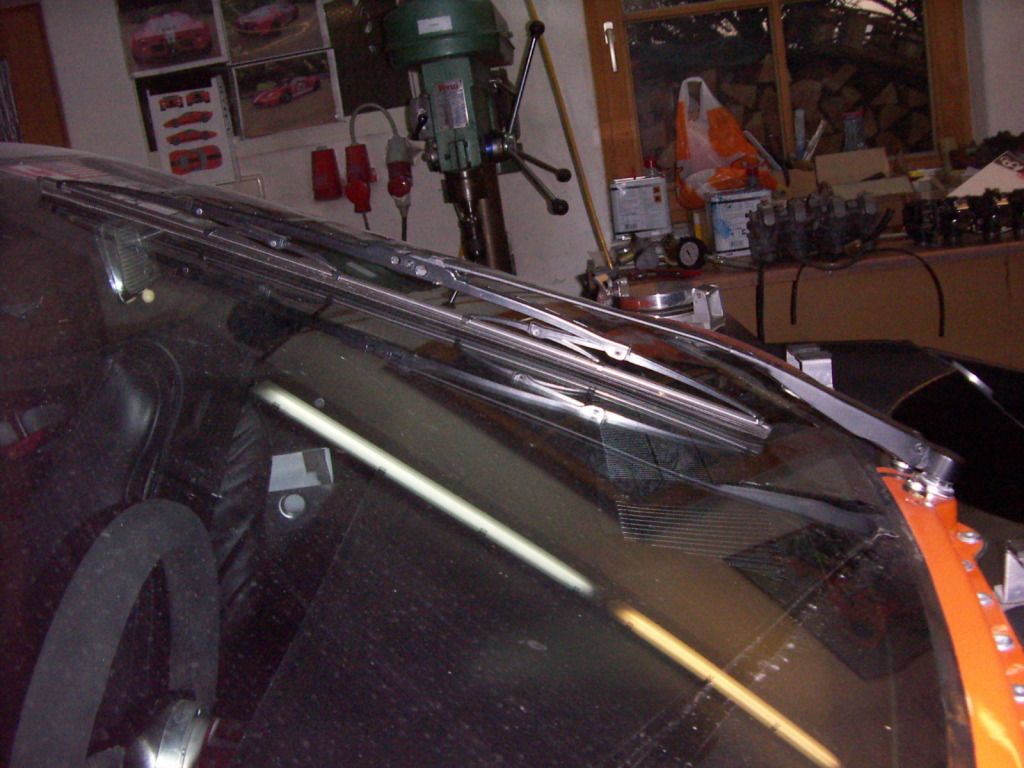
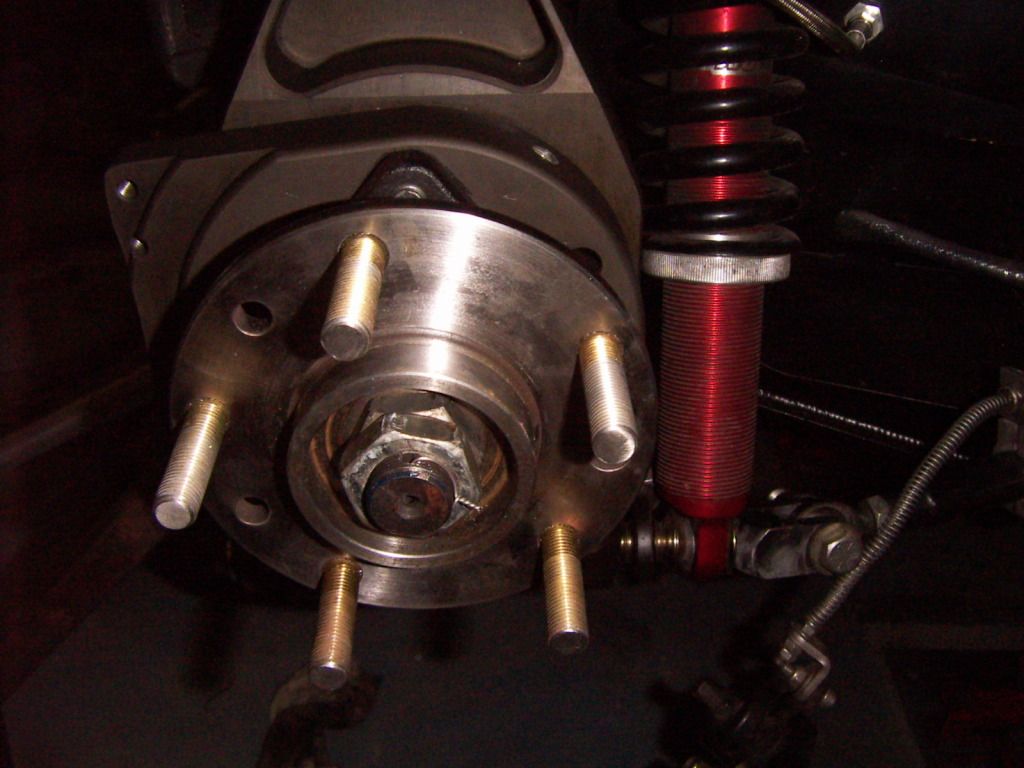
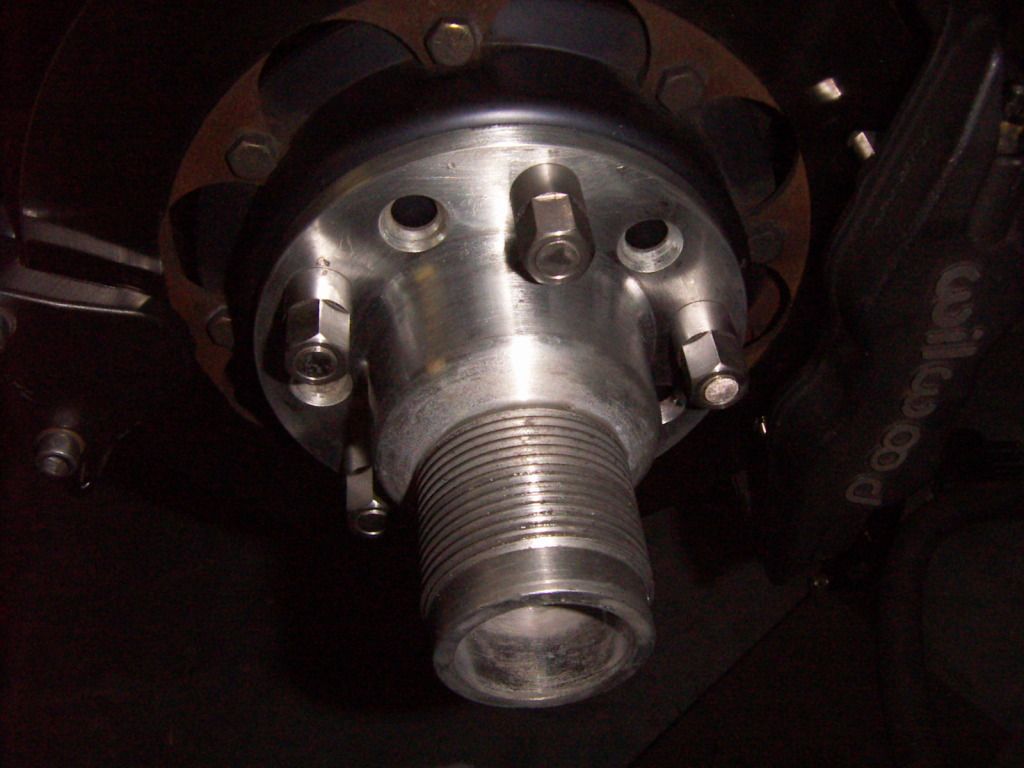
As usual you continue to select "just" the right detail for everything you include or modify on your car. From your hand made flares through to your final wheel selection, very nice taste. I like the way the wheel hats don't cone down to meet the wheel centers until they actually meet the wheel centers. Also enjoy the hidden three piece wheel bolts (even though I could not hide such on my car).

VERY nice work.
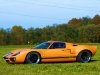
GT40s do indeed have beautiful proportions, as do the wheels and tires you selected for it. I think I will include your car on my desktop for awhile.

Cheers.

P.S. I think I read or heard somewhere that you will be building an SLC? If so, I will enjoy seeing your "take" on that car when you get to it.
 

Attachments

  • P1040566.jpg
    P1040566.jpg
    84.9 KB · Views: 1,051
  • P1040567.jpg
    P1040567.jpg
    114.2 KB · Views: 830
Thanks Reto
can´t wait to meet you as weill, hope you liked the gearbox and clutch system i supplied for your RCR 40. If you need any help i will be there for you.

Thanks Rob
Yes there will be a german SLC . Fran and me decided to build one for the german market to get an approval here. It will be a very stock build because we want to showcase the potential of the SLC KIT.
Car will be left in gelcoat ( white) .
We will show of the performance of the car on the track as well. So it will be a KIt with the streettail but with the option to mount the race aero package. Brakes will be stock. Wheels will be stock, It will have a race cage. Suspension will be upgraded to cockpit adjustable swaybars and Penske shocks.
Gearbox is already sitting in my workshop. It is an upgraded G96/50 ( oil cooling , Porsche LSD). Initialy we wanted to build a TT watercooled flat six car ( porsche 996 TT upgraded to 500 something HP) , but for the sake of easier and quicker build it will most likely be a LS 3 upgraded with a drysump system.

TOM
 
Tom,
Many thanks for your feedback on my proposed wiring. I like your point about keeping the ECU live even when the switch is opened, as it protecting it from spikes when the switch is opened and the current is dropped through the ballast resistor.
Regarding having the breaker switch in between the battery & the starter solenoid, I’ve done this method in the past and it does completely isolate the battery and would protect in the instance a short circuit of the starter solenoid. Generally I use the master switch to isolate the battery on the earth line, but this application it’s not feasible without much longer cables
Get wel soon
Regards,
Andy
 

George

CURRENTLY BANNED
Tom, you have an incredible car there. I love the way you made the front of the rear tires hang out past the body, it evens it out with the front since the front wheels do the same. I love the way your car sits.

The 345/35/ZR15s look amazing but so do the 17" wheels.

Thanks for sharring!
 

Urs

Supporter
Hallo Tom
wie Gehts so ?
Nie in der Schweiz Unterwegs mit deinem heissen Geschoss?
Wäre schön dich mal zu treffen :)

Gruess Urs
 
Hallo Tom
wie Gehts so ?
Nie in der Schweiz Unterwegs mit deinem heissen Geschoss?
Wäre schön dich mal zu treffen :)

Gruess Urs

Should i use it as a snowplow? As of April i will drive it again, when weather is permitting it. Will be in Hockenheim ring on 25.02 with a RCR 917.

TOM
 
Hi

Having never felt very comfortable leaving my car allone in public, because i had no locking system installed i decided to put in a keyless remote system.

I purchased this one
JOM - Central locking system, universal with 2 mini radio remote controls, 4 motors - 7104-4

It was quite nice to install. Fitted perfect into the inner door shells without any need for additional brackets. Connected nicely to my porsche locks.
I initially thougt about an emergency opening mechanism, but after my car started right away after sitting for 5 month without recharging the battery i called it good and decided not to.

PICT4531.jpg


PICT4534.jpg


I skipped all the connections to turnsignals or horn, jsut plainly installed the receiver and the two motors. Works great and nothing to see from outside ( only the two screws pictured above are visible from the inside).

TOM
 
Last edited:
Hi

Have managed to find some time to build my safety lock pins for the rear clip

Made brackets to hold the 10mm stainless steel pins ( made out of long 10mm bolts) out of aluminium. The flared holes allow me to have access to the hidden bolts with which the brackets are bolted to tread inserts in the firewall. They also add to stability and design.

On the outside i manufactured cover plates of aluminum. They feature a cylindric center to locate the ring pin. The stainless steel ring pin is the only purchased part ( sailing gear). The coverplate is bolted down to the rearclip with 3 M4 countersunk allenhead bolts and is black anodized to fit to the colorscheme of the car.

PICT4564.jpg


PICT4563.jpg


PICT4562.jpg


PICT4561.jpg


PICT4560.jpg


PICT4559.jpg


PICT4558.jpg


only i have not decided yet, if to polish or black powdercoat the holding brackets.

TOM
 
Tom,

I really love your car / built.

I have a few questions,
- since your car is road-legal (it has a license plate) where did you put your front indicators?
- what brand front fog lights do you have?
- where did you get that air cleaner (brand)?
 
Tom,

- since your car is road-legal (it has a license plate) where did you put your front indicators?
- what brand front fog lights do you have?
- where did you get that air cleaner (brand)?

no fog lights, H1 Cabellos for support of high beam, http://www.gt40s.com/forum/gt40-build-logs/24525-toms-rcr-40-trackracer-11.html#post254844

turnsignals
http://www.gt40s.com/forum/gt40-build-logs/24525-toms-rcr-40-trackracer-11.html#post256414

difficult to see when not activated but very good when.

Aircleaner is SUMMIT RACING brand part, i did black anodize all the aluminum parts on it.
http://www.summitracing.com/parts/SUM-G282/

TOM
 

Randy V

Moderator-Admin
Staff member
Admin
Lifetime Supporter
I see that happy birthday wishes are in order as of a couple of days ago. Happy Birthday Tom!

Okay - back to business.. :)

I am curious about your plenum that you made for your heater/ac unit. http://www.gt40s.com/forum/gt40-build-logs/24525-toms-rcr-40-trackracer-17.html#post281008

Do you have any pictures on how it clears your wiper motor assembly?
I have decided to go with a different wiper motor altogether as I did not like the engineering behind the original style, nor the means to mount it and the transmission.

Also, the HVAC unit I have is the older HotRod Air unit and wonder if that is the same as you.

Thanks for doing such a great job in documenting your build!
 
Thanks Randy for the wishes,

here you go
http://www.gt40s.com/forum/gt40-build-logs/24525-toms-rcr-40-trackracer-15.html#post269455

if you make that tube as short i did, the lucas wiper is realy running ok.
You also can see that i have mounted it on top of the 1" reinforcing tube. The panel for making the plenum is not installed in this picture. but you can see that the wiper motor clears easily.

I also have the Hot Rod air unit. I have not found a better picture, but in this one you can see how it is located under the chassis structure. to do so i have made up some brackets out of aluminum angle stock an flat alumnium , which bolt to the AC unit and than to the chassis.

PICT4133.jpg


TOM
 
Last edited:

Randy V

Moderator-Admin
Staff member
Admin
Lifetime Supporter
Hi Tom,
Thanks for that. Yes, I saw your posts on the wiper motor install, but was trying to determine if you needed the motor mounted lower because of the plenum.
I have already fitted another wiper motor that came from a 2004 Jeep Grand Cherokee rear hatch. I will try to find pictures to post later after work or this weekend. I am excited at the prospect of actually working on my GT once again!
 
Dear Randy

I mounted the wiper before i made the plenum cover ( but already had this in mind). The actual mounting position is more a result of my other priorities for the wiperdrive installation. First of all the pinion to mount the wiper arm has to have the correct angle to allow the wiper arm to run nice and flat, whithout and ineffective angle which is putting more load on the drive. Second i wanted to have short drive tube as possible. Third i did not want the wiper drive beeing visible in the front compartment.
Fourth, still it shoud be quickly removable ( which it is, onyl remove the main pinion nut and two other nut and bolts plus unjack one plug and take it out without the need for removing anything else on the car.
In the meantime i have manufacture a perfect length wiperarm out of the original lucas (landrover) lower arm part (which connects to the drive pinion) and a BMW arm. With the correct assymetrical blade length it reaches the top of the screen only short of 1/2 of an inch and at full sweep is touching the lower outline of the windscreen exactly at the turnover points. The sweeping angle of that supplied lucas unit is just perfect. So driver and passenger have a full clean view in rain, even with only one wiperarm, also in both parking positions the arm does not obstruct the drivers view. Can give you the lengths if you are interessted and should post a pic of that( you will have to wait a bit, because i´m in HK again).

Thanks
TOM
 
Here is another information on the wiper setup

The Wiperarm has been made out of the original Landrover lower part ( which fits the lucase unit perfectly) and a BMW type 3 wiperarm. I have chosen this wiperarm because it was long enough to fit to custom lenght and it was bend only lightly. I opte for a complete straight wiperarem (bending out the original angle).
Pictures show at most left , center and most right position. The "dust track" shows you how exact it reverses at the end. So the original sweep angle of the lucas unit is perfect.
The blade is assimetrical 10" from center to outside and 9.75" to the inside. Even better it would be to use a 10.5"/9,25" blade ( have not searched for one yet).

PICT4692.jpg


PICT4697.jpg


PICT4698.jpg


PICT4695.jpg


PICT4696.jpg


PICT4700.jpg


TOM
 
New Wheel studs

In order to be able to mount my 5 lug mount FIKSE racing wheels correctly i need longer wheelstuds. Originaly the have been cut back to allow the mount of the allen drive lug nuts.
I changed the original studs against ARP studs and had my Cousin manufacture high strenght stainless lugnuts with a metric 17mm hex socket. THey are made for maximum lenght. THe studs end 2mm short of the end of the hole in the wheel and now have plenty of thread engagement for the FIKSES.

ARP studs mounted
PICT4752_zps610d8fb2.jpg


New Lug nuts installed
PICT4753_zps56d6f343.jpg


TOM
 
Status
Not open for further replies.
Back
Top