I soldered Plumbing pipe olives onto my pipes . ....

You are using an out of date browser. It may not display this or other websites correctly.
You should upgrade or use an alternative browser.
You should upgrade or use an alternative browser.
Ian Anderson
Lifetime Supporter
Drill some Holes around the circumference about 1/2 inch from the end and fill with pop rivets.
Posh hose over rivets which will act like a bead.
Ian
Posh hose over rivets which will act like a bead.
Ian
Pop in when your passing eddy we’ll put a ring of weld around or a couple of spots on for you
Cheers mark and sam
Cheers mark and sam
Ed McClements
Supporter
Yet again, the GT40s forum comes up trumps. Mark / Sam - thanks for the offer....I'll pop in soon (and I want to see your progress - body looks great....err...the car, obvs).
Thanks Mike - I spoke to Kenny today....and my goodness he can talk! His opinion for the bottom-end was:-
However, I have already had my UN1-013 rebuilt and plan on using it. I'm concerned that the torque from a well-built 347 might be more than is comfortable put through a UN1, and I'd be personally happier with a "piddly little" 302 with a well-balanced bottom end using quality components. I noticed in Real Steel's price list a set of forged +0.030 Icon pistons:-
- 347 stroker based on new Eagle crank (don't bother with a piddly little 302)
- Forged pistons (doesn't trust any cast piston, even hypereutectic alloy)
- Use new rods - by the time old rods have been re-worked for ARP fasteners you might as well have bought new rods
FORGED BYKB747030
MODEL 302
BORE 4.00"
STRK 3.00"
C.H 1.298"
PIN 0.927"
RINGS 1/16"-3/16"
WT 565g
CROWN F/T -4.8
C/ROD 5.40"
With a weight of 565g, they're a lot lighter than the +0.030 KB pistons (703g) and are designed for use with 5.4" rods, potentially allowing me to build a long-rod 306ci with a zero-balance factor (I haven't finished doing the maths to work out if this is possible).
I might cross-post this to the "Engines" subforum for people's views.
Cheers,
Eddy
Hi Eddy. I had a disastrous time with Keith black ikon pistons. Mine suffered bad heat expansion so that when cold they banged like hell and eventually caused ring damage. I began to discover that cheap forged pistons not using metals with a low coefficient of expansion are not worth the aggravation. If you must go forged look at JE/probe/mahle. The hypereutectic are actually preferred by real steel in their own engines
Ed McClements
Supporter
Holy thread resurrection, Batman!
Work, life and some work on the house have intervened, and not much has happened on the car. To be honest, I also caught a dose of "the fear", and convinced myself that if I started drilling and rivetting the SGT panels I was going to cock-up, waste some panels and end up with holes in the wrong place. Also, I wanted to fit the floor, which meant inverting the chassis twice - once to rivet the floor on, then again to start panelling - and I can't manage that on my own. Eventually I screwed my courage up to 11, donned my lucky underpants and just got on with it. My son Matthew helped with the floor...


Essential tools...

And some progress this weekend...


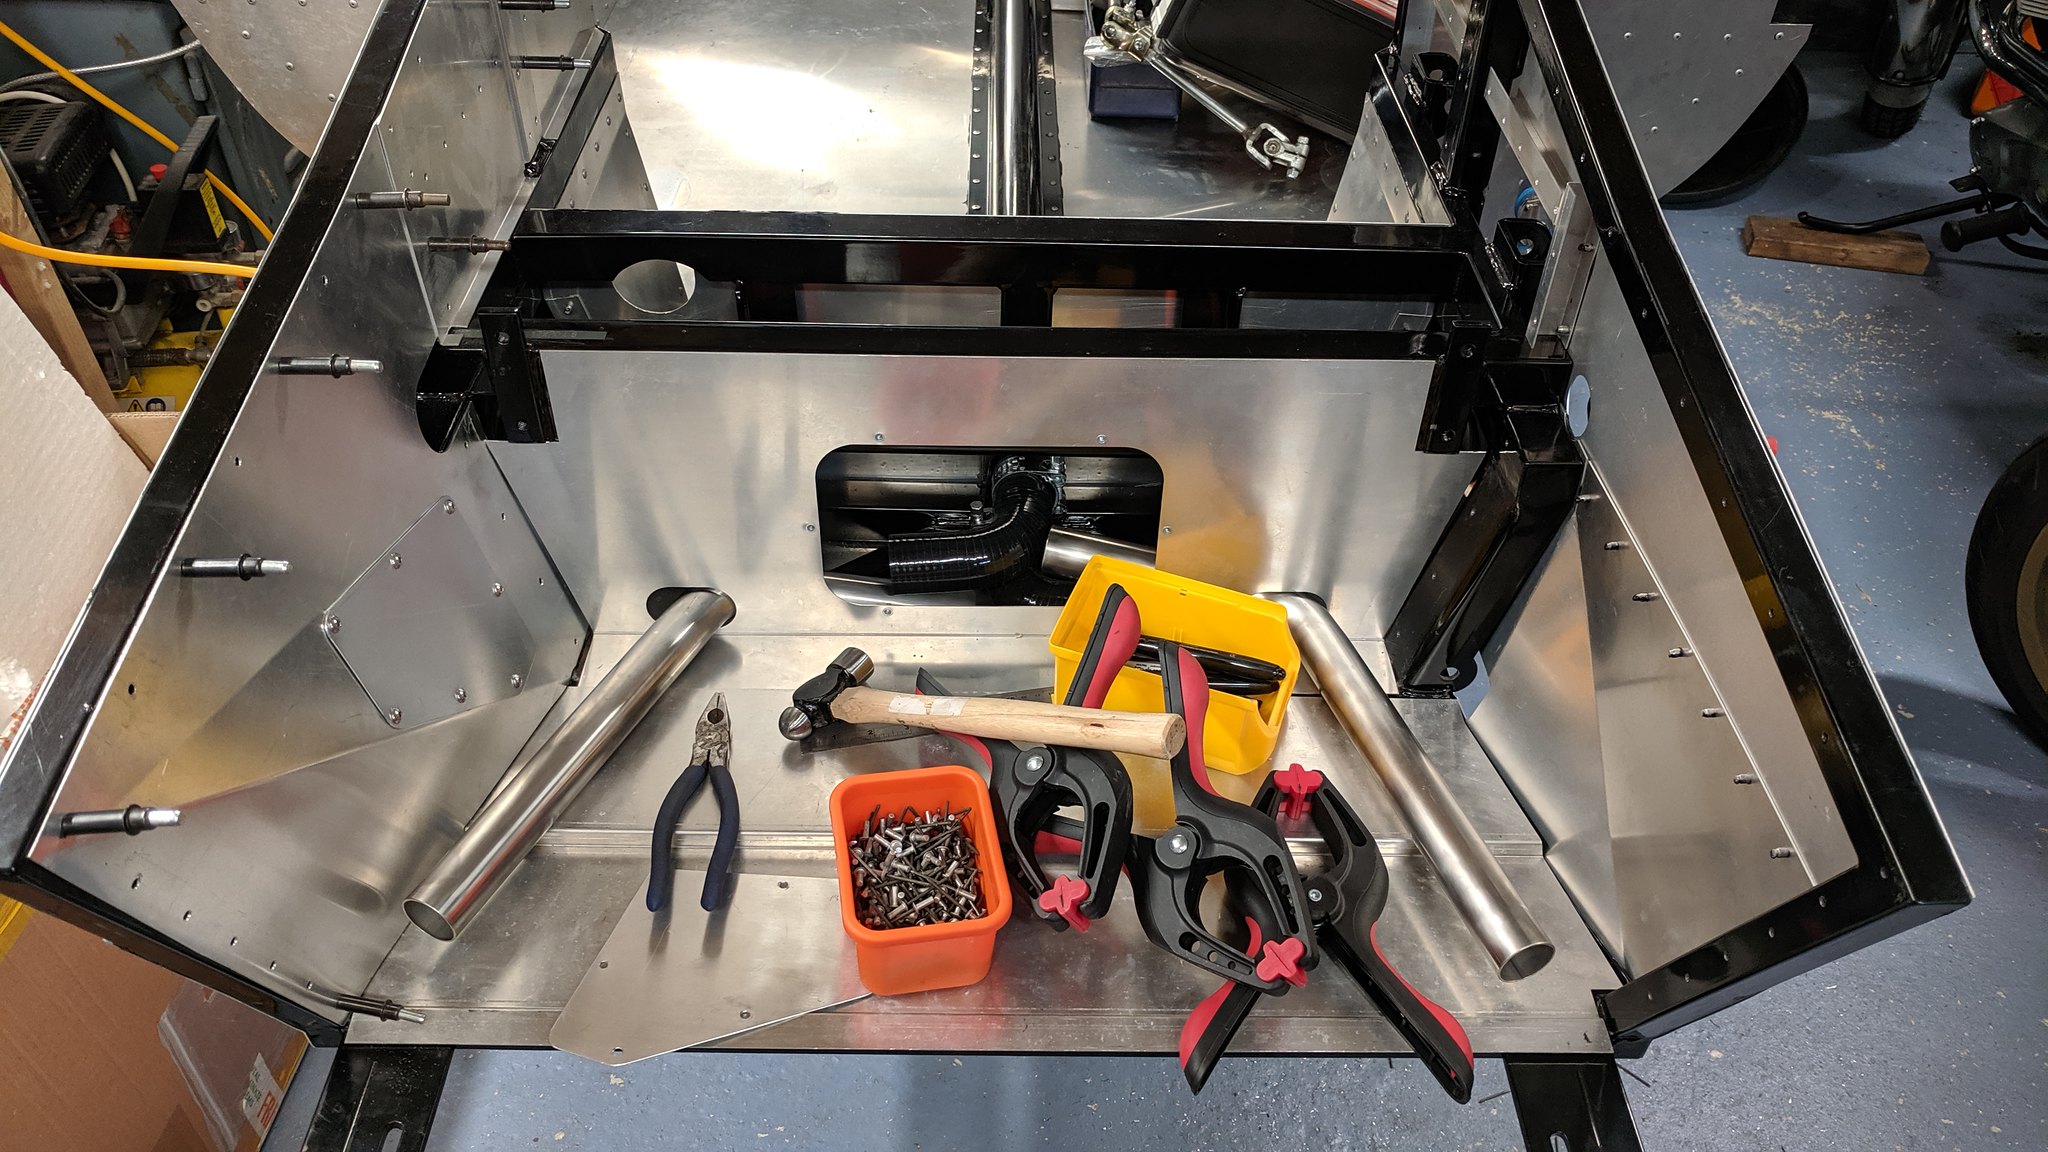


Note period-correct stablemate, leaning idly on an oily block of wood!
Work, life and some work on the house have intervened, and not much has happened on the car. To be honest, I also caught a dose of "the fear", and convinced myself that if I started drilling and rivetting the SGT panels I was going to cock-up, waste some panels and end up with holes in the wrong place. Also, I wanted to fit the floor, which meant inverting the chassis twice - once to rivet the floor on, then again to start panelling - and I can't manage that on my own. Eventually I screwed my courage up to 11, donned my lucky underpants and just got on with it. My son Matthew helped with the floor...
Essential tools...
And some progress this weekend...
Note period-correct stablemate, leaning idly on an oily block of wood!
Ed McClements
Supporter
I used my engine hoist to lift my chassis and turn it over for riveting on my aluminum panels. What aluminum alloy and what rivets are you using?
Hi Neil
Ah....an engine hoist, of course. I don't have one, but my brother has a pretty heavy-duty unit for his 4-wheel-drive VW Syncro buses. I'll borrow it next time.
The ally panels came from SGT, and I don't know what grade it is, sorry. I'm using 4mm sealed-end aluminium rivets in a couple of different grip lengths, depending on whether the rivet is passing through a single sheet or two sheets before the steel chassis tubes. Plus Sikaflex 252 sealant/bonding adhesive. I note that none of this is in the same league as your aerospace-spec work, which I have followed with great interest...and admiration!
Bill Kearley
Supporter
Engine hoist idea! An I beam cross bar on top of the 2 front posts of a 4 post lift with a chain block on trolly wheels. Small ramp extension may be ness.
Ed McClements
Supporter
Looks good Eddy once started it gets less daunting...Honestly")
Thanks, Shaun. Been following your build very closely!
Shaun
Supporter
I'm embarrassed as to how few updates I do, will sort some more just doing wiring and body....Gulp on the latter seems so daunting but had a good chat with Mick last week plus I picked up my EFi setup apart from the manifolds, that's some bit of kit, not cheap but a cracking setup
Cheers
Cheers
Ed McClements
Supporter
Just a few more pics...
The welded-on 90 degree bends, as they enter the engine bay (still have a second skin to fit behind them).

Water pipes as they enter the front compartment

Footwell

Rear bulkhead

Now that the footwell is panelled I'm going to re-visit the pedal box. Like Baldrick, I think I have a cunning plan....!
The welded-on 90 degree bends, as they enter the engine bay (still have a second skin to fit behind them).
Water pipes as they enter the front compartment
Footwell
Rear bulkhead
Now that the footwell is panelled I'm going to re-visit the pedal box. Like Baldrick, I think I have a cunning plan....!
Shaun
Supporter
I think SGT now supply those pipes with the bends, great minds thinking alike and all that, makes it much easier engine side, I found it tight on the front end getting the hoses on well, could do with those pipes being about 25mm longer but got there in the end.
You going for a floor mount box? I had to top hang as I am far to big for a GT40 anyway so needed all the legroom but now having sat in it (I have lowered pans) I think I could have gone floor, Micks top setup is nice though.
Spent a night soldering for the dash loom ah joy of joys, on the looms Mick now has a new supplier, if they are as good as the ECU loom I got they are chalk and cheese to the old ones which were not great as the chap I think was using up old cable stock before he retired!!
Ed McClements
Supporter
The new pedal box (yes - I'm starting again) will be mounted on 3/4" square aluminium rails, which in turn will be bolted to the chassis rails and floor, tying the whole lot together.
First I drilled a series of holes, 25mm apart (used the old Hobbymat / Prazimat milling machine, to ensure accurate spacing)

Picked up a nice sharp Dormer tap yesterday, and treated myself to a ratcheting tap wrench...what a great tool!
Aligning the drilled hole with the live centre on the lathe

Then drawing back the live centre, and using it to line-up the tap wrench to ensure I'm tapping perpendicular to the hole

Quick spin with a countersink, and job jobbed.
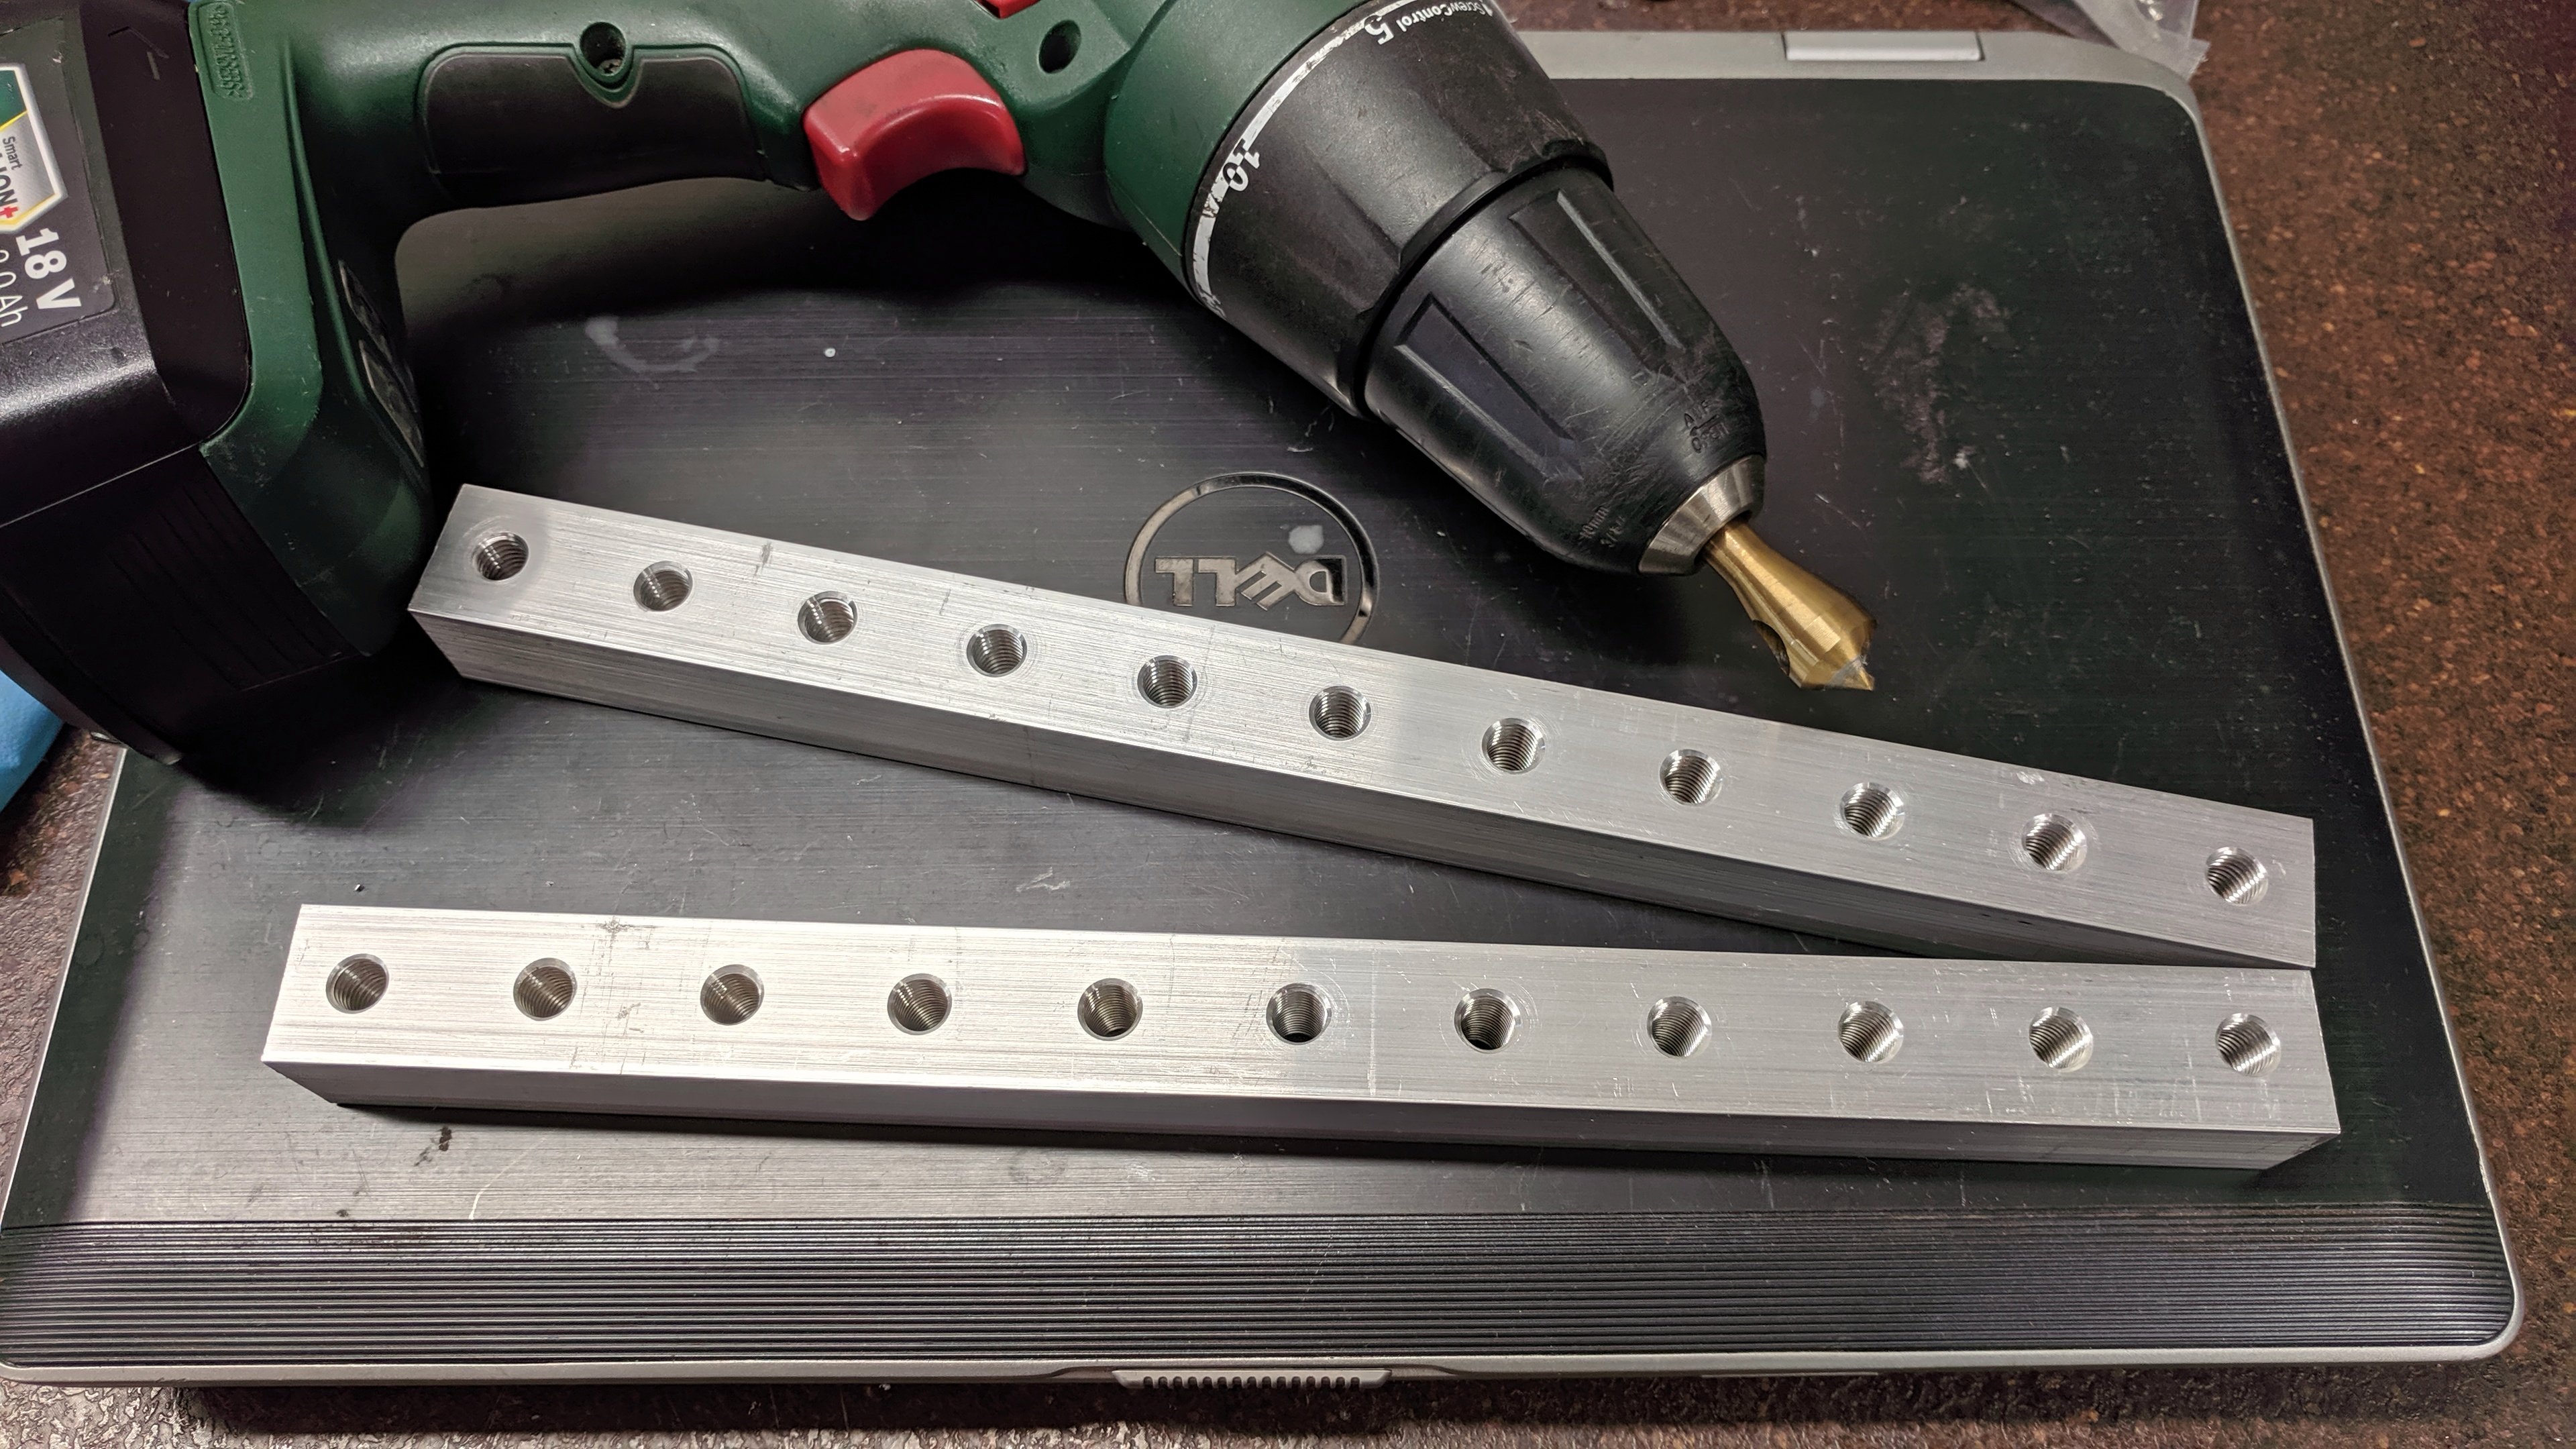
New pedal box will mount to these rails, be bolted-in, but will allow drivers of other statures to drive the car (though will need a 13mm spanner and a bit of agility to reach down into the footwell).
First I drilled a series of holes, 25mm apart (used the old Hobbymat / Prazimat milling machine, to ensure accurate spacing)
Picked up a nice sharp Dormer tap yesterday, and treated myself to a ratcheting tap wrench...what a great tool!
Aligning the drilled hole with the live centre on the lathe
Then drawing back the live centre, and using it to line-up the tap wrench to ensure I'm tapping perpendicular to the hole
Quick spin with a countersink, and job jobbed.
New pedal box will mount to these rails, be bolted-in, but will allow drivers of other statures to drive the car (though will need a 13mm spanner and a bit of agility to reach down into the footwell).
Similar threads
- Replies
- 2
- Views
- 995
- Replies
- 1
- Views
- 834