Back to the Future-Ron and Sydney's 1985 5L Mustang Build

Ron Earp

Admin
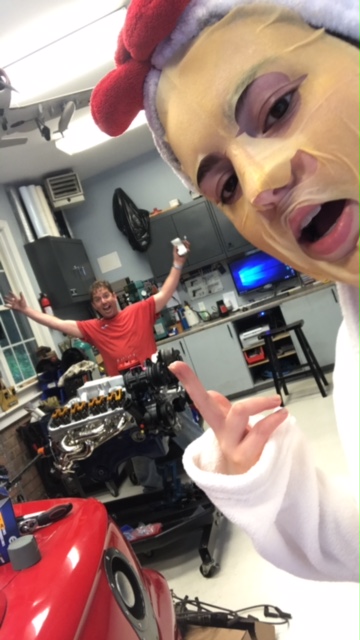
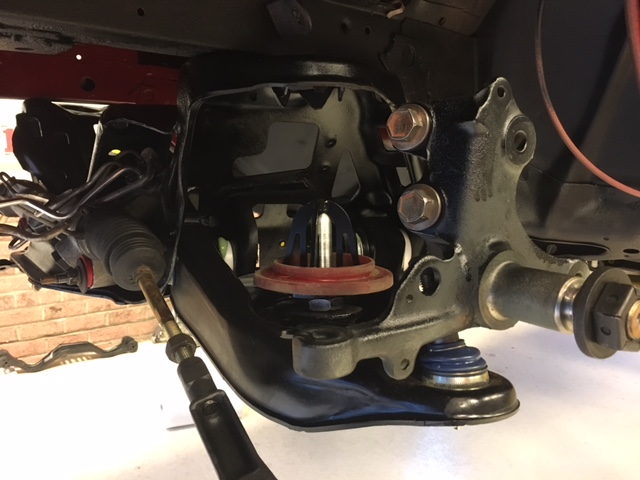
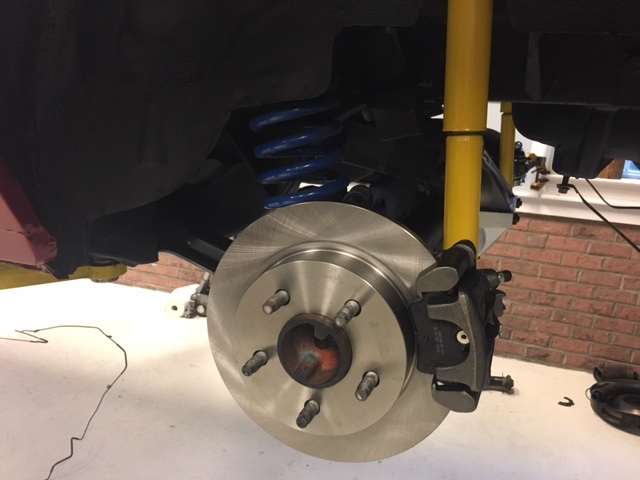
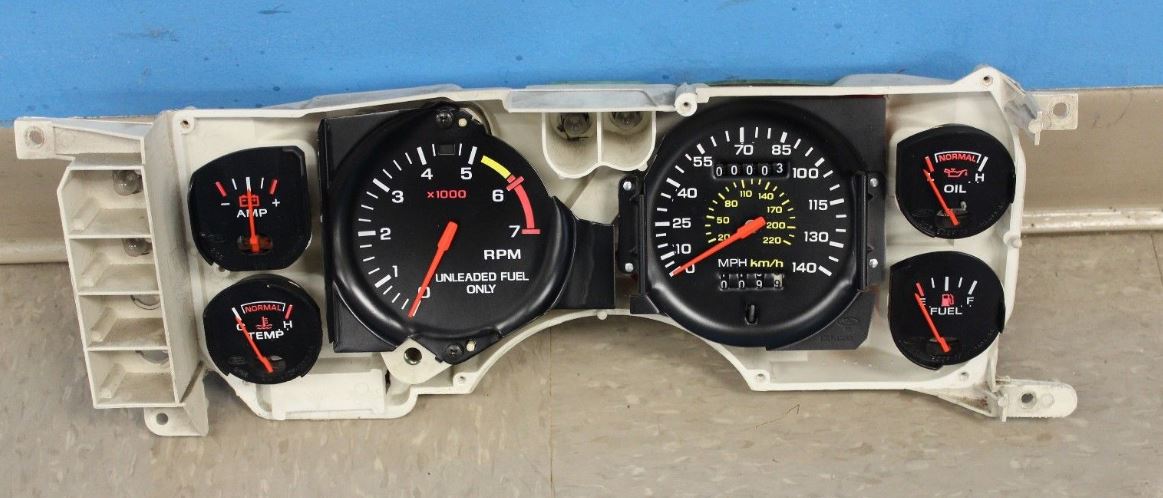
Busy weekend at the Earp garage with getting the race car out and prepped for the first time this year and still making some progress on the five point oh. The gauge cluster was rebuilt with the uber rare 140mph speedo. If you know foxes you know these were the shizzle back in the day. The only Fords with a higher than 85mph speedo were the SVOs, and the increments were not marked, as the SSP five ohs for the five oh. Looks like we'll be starting with 3 miles on the new clock.

cluster.JPG


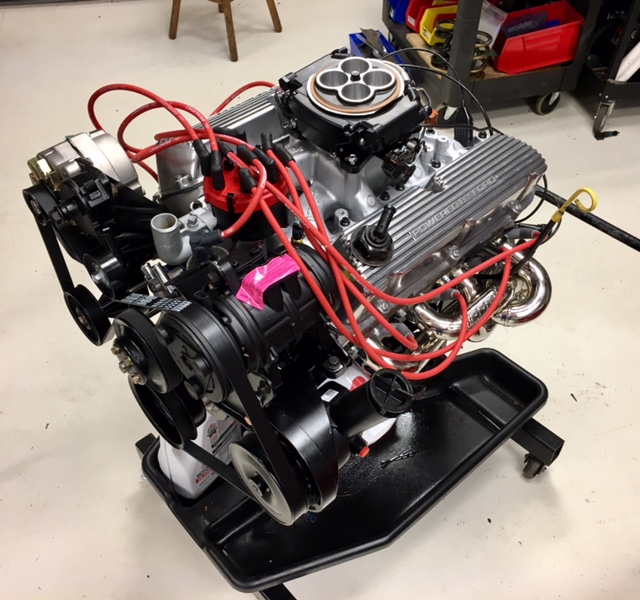
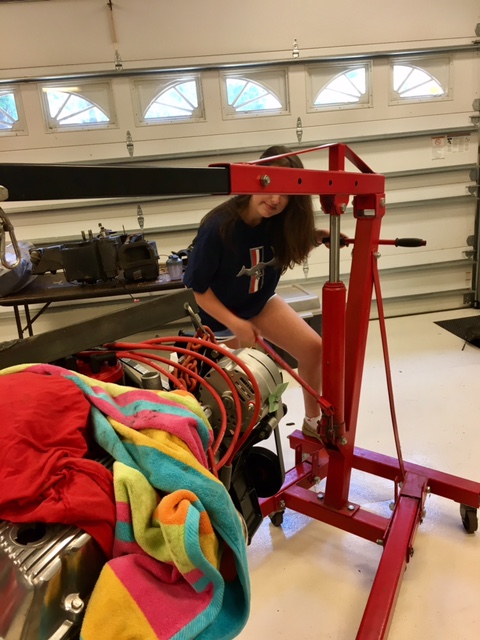
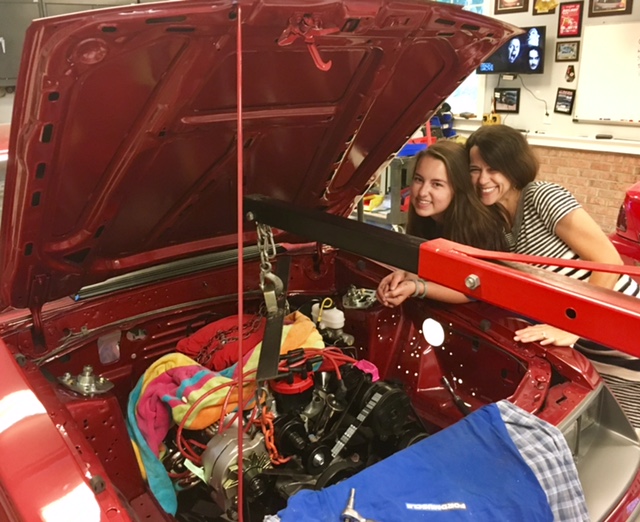
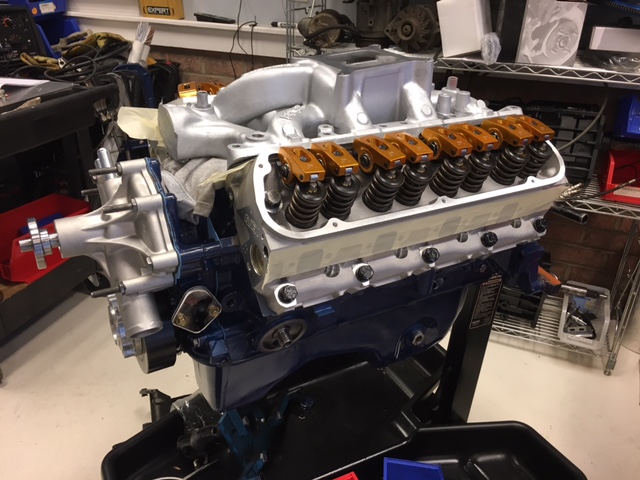
Engine assembly continued. Before the heads were bolted on Syd and I checked some piston to valve clearance. After she got past the "yay playdoh" phase that everyone has when they encounter it as an adult, we got down to business.

cluster3.jpg


cluster4.jpg


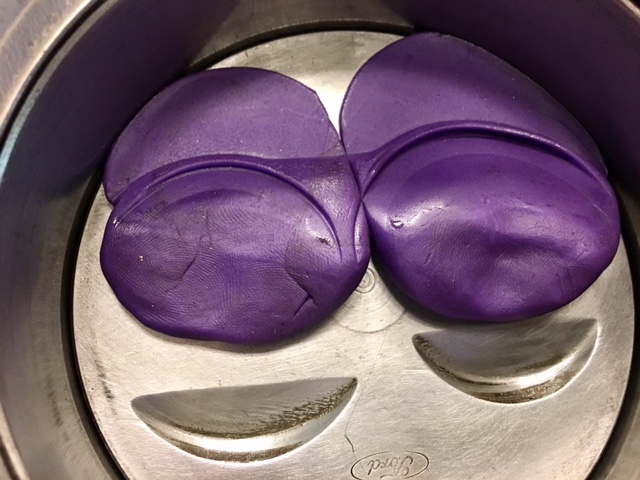
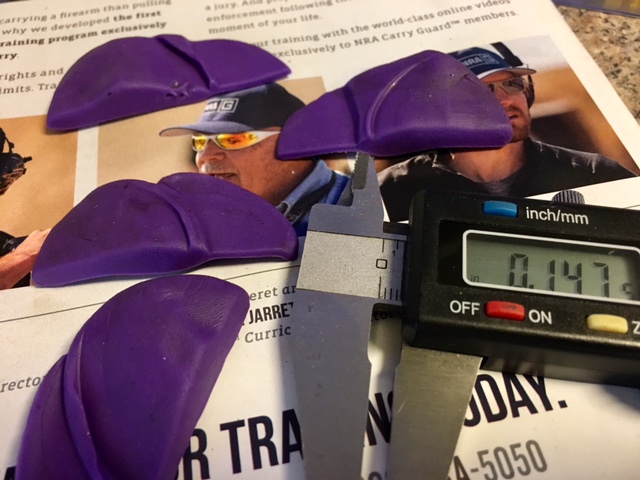
Predictably the exhaust is fine with something like 0.145" of clearance. The exhaust valve is smaller than the intake and the exhaust lobe has less lift. The intake on the other hand is a bit tight. With 0.555" of lift at the valve we only come up with around 0.095". That's a bare minimum when you count in piston rock, expansion, bearing clearance, and, well, just that shit happens. But it was checked with a solid lifter that we made from a hydraulic roller so we'll pickup some clearance in reality. Anyhow, I think it is okay for a street driven ride but I would have rather seen something around 0.110 or so.

Once we sorted that out the heads were bolted on and we used our adjustable pushrod to figure out what length pushrods we needed. We have adjustable roller rockers but you've got to watch the wipe pattern too. After checking a bunch of them 6.150" was decided upon as best fit.

cluster2.jpg


cluster5.JPG


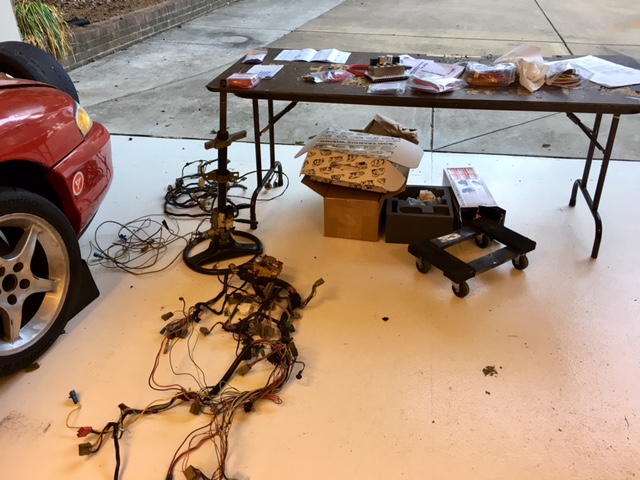
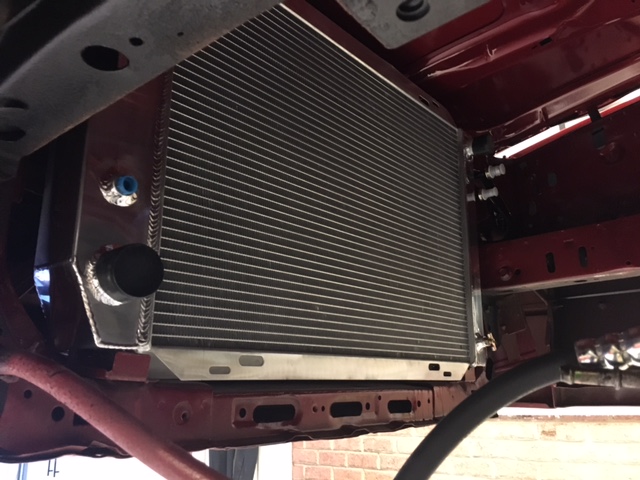
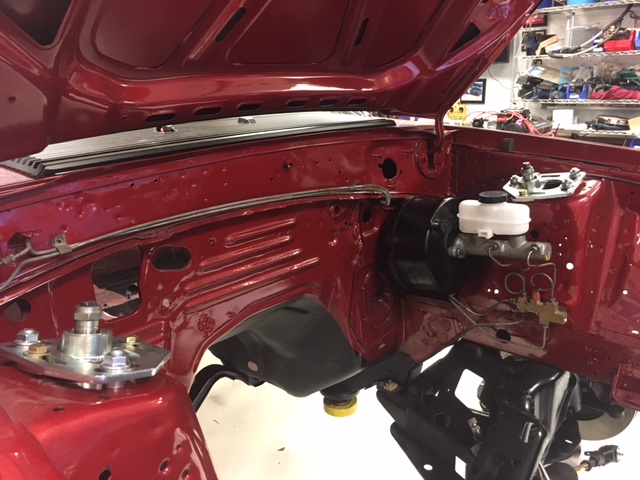
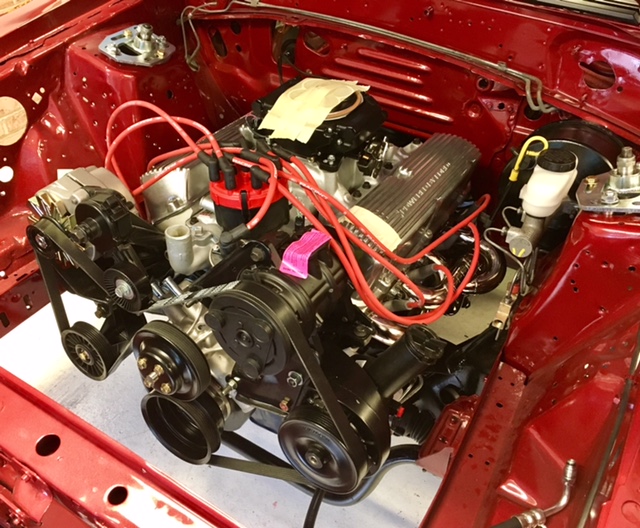
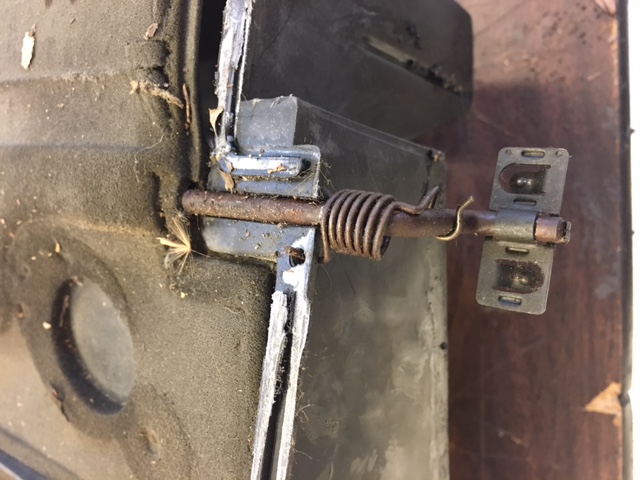
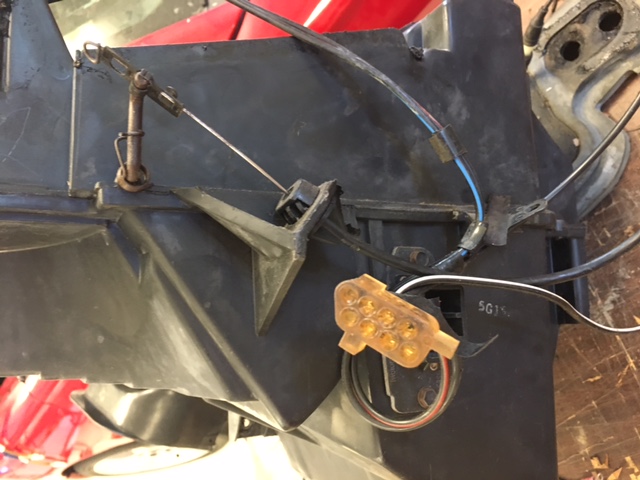
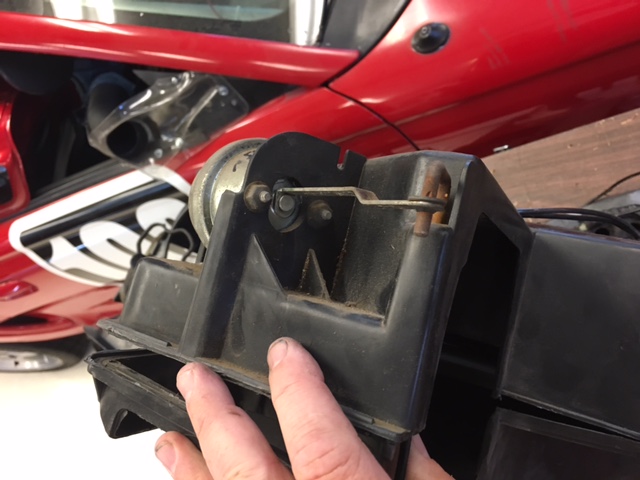
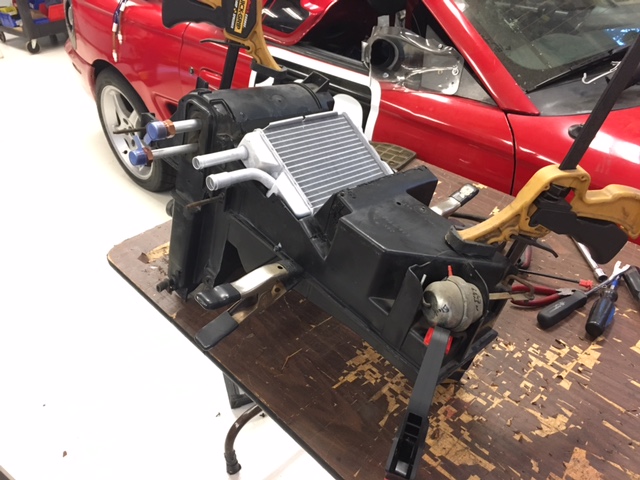
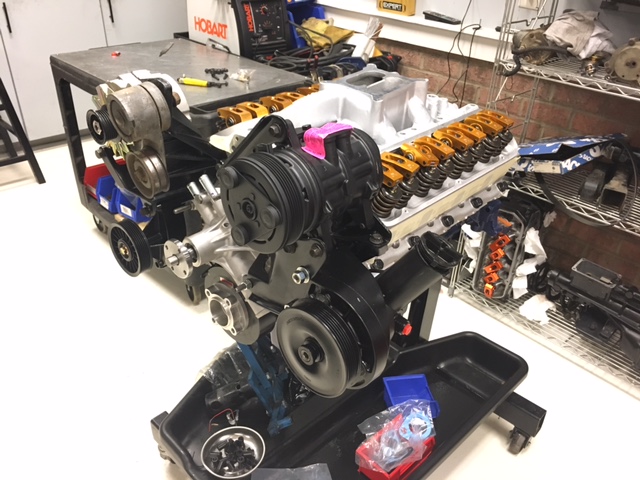
And Sunday morning I spent 2.5 hours with the hodge podge of mess on the front of the engine. I hate Ford's accessory bolt on schemes. They seem horrible. GM has got to do it better but I'm not sure. Anyhow, after a lot of puzzle solving I got it together. I need a new belt tensioner but we're good to go. New alternator, new power steering pump, new AC, new billet impeller water pump, and a smog pump eliminator bracket.

cluster6.JPG


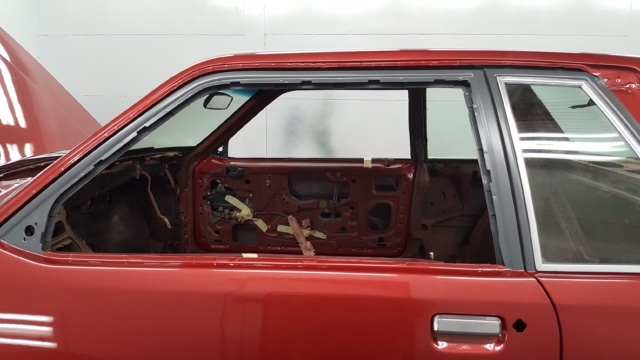
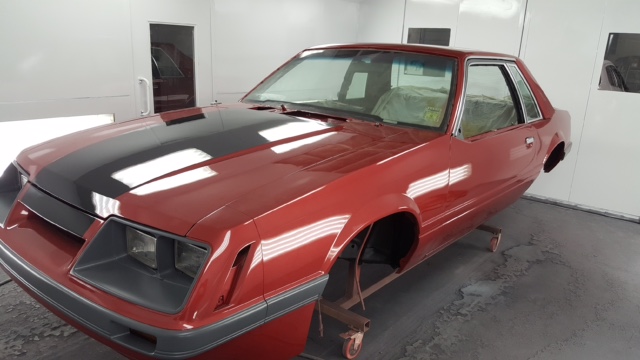
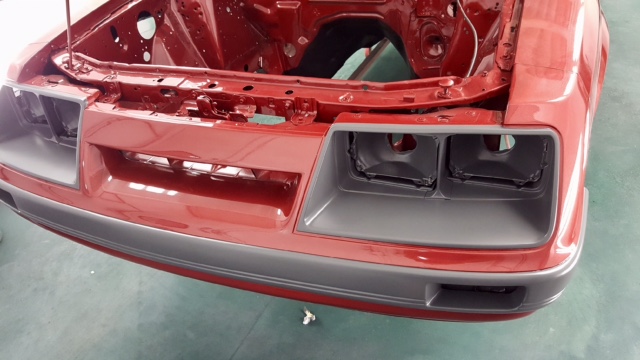
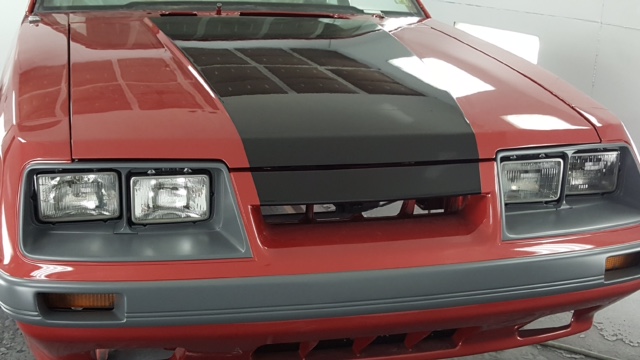
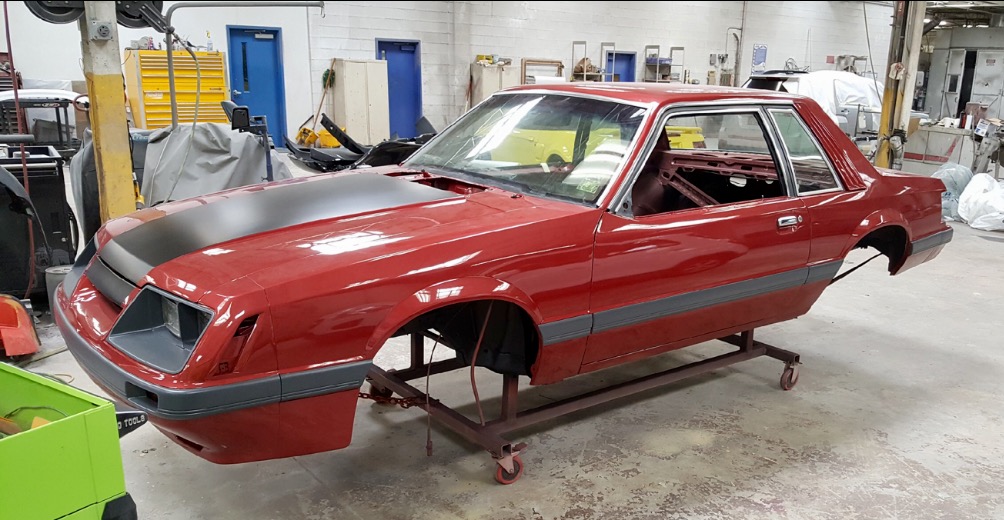
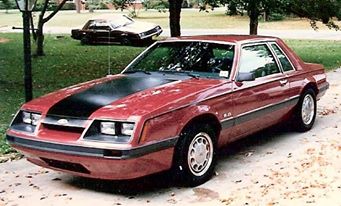
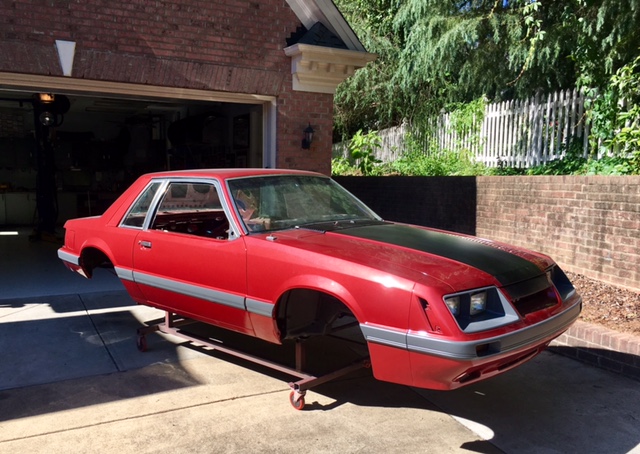
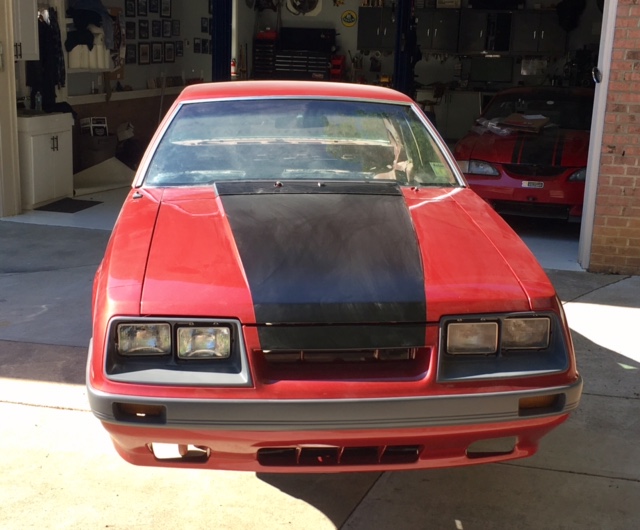
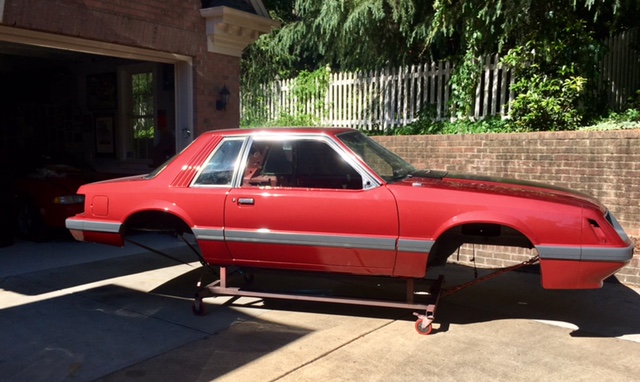
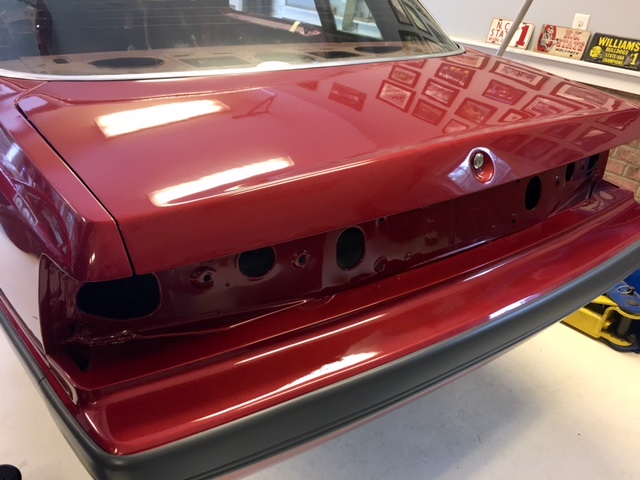
Fred says the car will be finished with paint on Sunday so I'll leave the race car on the trailer coming back from VIR and bring the five oh home on Monday. Perfect timing.
 

Ron Earp

Admin
I've been off racing but the paint was finished up over the weekend. Picking the car up today and bringing home to the shop. Pretty excited!


may8a.JPG


may8b.JPG


may8c.jpg


may8e.JPG


may8d.jpg


I think it is comparing pretty good to the original. And it's more bigger so better.

pic.jpg
 

Ron Earp

Admin
My daughter was visiting at VIR this weekend and lots of folks who have been following this thread on forums came over to say they liked this thread and offered her encouragement. Thanks! She really enjoyed that and it made her feel quite special. She had a good time and even got to drive the Boss around at lunch. This is Sydney in T3 with dad pointing fingers.

18222400_10212969518182401_2940109721718227851_n.jpg
 

Ron Earp

Admin
And brought the tub home yesterday. The paint looks great in the sun and the color seems to be properly matched with what I remember the car looking like. The paint on the car now is much better than the paint it had from the factory. No doubt there. The car has been painted on the bottom with a hardening undercoat that gives is a uniform color. I like that for the bottoms of cars. Ditto the trunk area on the inside.

may9a.jpg


may9b.jpg


may9c.jpg


may9d.jpg


may9e.jpg


may9f.jpg


Next up is brake and fuel lines, booster, master, subrframe, lower control arms, struts, engine, tranny, and rear end install. All that stuff is sitting here waiting to go or ordered in so I imagine progress will be fairly rapid when I get some shop time.
 
Great adventure, thanks for having us along. Syd will remember this forever and will be telling her grandchildren about it while showing 'boring' two dimensional photos as evidence.

BTW: I've never seen a cleaner mechanic, like. EVER.

Our family car was a red 66 Mustang convertible bought new when I was 5. I ended up buying that car from Mom as my high school car, eventually my sister got, then on to my nephew.
 

Randy V

Moderator-Admin
Staff member
Admin
Lifetime Supporter
Wow - very nice!
Not only making great memories, but building a car that's better than new!
 

Ron Earp

Admin
It's fun and we're having a good time with it. I wish we did body and paint work, but I've never really done much of that and don't have an aptitude for it. I tried to paint two of my race cars some years ago with not so good results, so I stick to the mechanical stuff. There I'm confident, can fabricate, and do a good job if I do say so.
 

Ron Earp

Admin
More work progress. The daughter unit joined me in the garage for some debriefing and project orientation before her bedtime. I'm sure this went on Snapchat or some sort of place.

may12f.JPG


We got the car off the dolly, on the lift, and the goal is to turn it into a roller pretty quickly. Or relatively quickly. There are many subprojects happening so a number of things occurring in parallel. Like this one, early morning before school subframe cleaning with Cayman. Never underestimate how far 8 mins here or 10 mins there, goes toward getting a project done.

may11h.JPG


Painted and installed subframe.
may12b.jpg


Prepping up for axle insertion.

may12a.jpg


may12e.jpg


All in

may12d.jpg


may12h.jpg


Meanwhile, over on the wiring ranch....Jeff G got a bunch of Deutsch connectors, I got a wiring kit, and we're off to the races. I figure about three weeks of work on this part of the project.

may12g.jpg
 

Ron Earp

Admin
Alrightly, had a bit of a break for a motorcycle trip to WVA but we're back on the case. We meaning Jeff and I, not Sydney this time around as she has the flu pretty bad. I hope she'll be in shape to work this weekend.

18581688_10213090837375305_8884560940957059686_n.jpg


Spent an hour or so trying to figure out how to put the fuel tank in the car. We've a ton of SN95 parts from the race cars and I wanted to use a 1998 Mustang tank for this car. The 1998 tank has a nice sump, integrated sender and pump, and based on our experiences with the SN95 chassis the 1998 tank doesn't experience starvation issues like the earlier models. What I didn't know though is the 1998 tank has a very different shape than the <1998 tanks. The differences are subtle if you just glance at one but the bottom line is that a 1998 tank isn't going into the 1985 Fox chassis without significant work. So the fuel tank situation was a bust and I ended up ordering a new <1997 tank, 255L/hr fuel pump, and sender for the car. A bit pricey at $325 for the kit but so be it. Time is ticking.

On to other matters then. The front arms were prepped some weeks ago with Global West bushings and those were installed. The weight jacking modifications worked out really well and are better aligned than the race cars we've done. A new steering rack was installed on the car too. I got one of the SVO units for a Fox that is 2.25 turns lock to lock.

may25d.JPG


may25e.JPG


The rear jackers worked out fine as well. Pins align and so on. Yes, still quite stock in the back but if there is time I'll work that out of the car and a suspension that will actually work well.
may25g.JPG


The radiator and condenser came in so I to trial fit them. The radiator is a three core aluminum so a bit thicker than stock. I'll hold up on the fan situation until the motor is in place so I can see what sort of room we have for a fan. I won't be using the stock fluid coupled clutch mechanical fan though. I like those for nostalgic purposes but they've no place on a restomod car.
may25f.JPG


Brake lines need to be run and in order to do that we need a booster and master in place. I'm using the 94/95 Cobra brakes and 14" rotors up front, stock SN95 rotors in the rear, so I ordered a 1993 Cobra booster and master to put into place. Why not a 1994/1995 Cobra booster? The bolt pattern for the booster doesn't match a Fox so the easy solution is use one that does match a Fox.

However I found that the 93 Cobra booster fouls on the strut tower wall and that needed a bit of massaging with a hammer to allow it to slide into place.


may25aa.JPG


There it is in place, easy peasy. I won't be using that stock brake proportioning valve after all. I'm just going to straight plumb all the lines with a rear proportioning valve. There isn't any ABS on the car and I've always liked the brake feel of the track cars so that's the way it'll be.

may25bb.JPG


Meanwhile on the other side of the garage taillight restoration is going on. Both of the lights looked a bit rough, especially considering the repaint, so I bought a lens kit and went to work. Pretty simple, clean the lights up, remove all the sealer, re-spray the silvering on the inside, and sandwich back together with the spring clips. They look good.

may25a.JPG


may25c.JPG


Next installment is running brake and fuel lines, then the engine and tranny are going in.
 

Randy V

Moderator-Admin
Staff member
Admin
Lifetime Supporter
Great progress team!

Okay - I'll be the sucker to ask ----
What in the world is that in your first picture just above?
 

Ron Earp

Admin
Green Bank WVA. The US Radio Telescope Observatory. Many discoveries have been make there and it's a place I've wanted to visit since I was a kid. Taht particular radio telescope is the world's largest single steerable radio telescope at 100m, name the something something Bryd telescope after senator Byrd from WVA who fought for funds to have it built after that scope's predecessor collapsed.

Green Bank is home of the Green Bank Equation that Drake proposed back in the 60s, and, is home to the first radio telescope that was used for SETI.

Good stuff up there, and a beautiful countryside. WVA is a beautiful state and it leaks into VA, TN, and NC in the mountainous areas. All if pretty similar. WVA doesn't have the high peaks of NC / TN but it has a lot of really interesting terrain mostly all mountainous in some fashion.
 

Randy V

Moderator-Admin
Staff member
Admin
Lifetime Supporter
Ahhhh... I figured it had to be something to do with extraterrestrial!!! Very cool indeed...
 

Ron Earp

Admin
We got things moving along now. Sydney is back on the case now that school is winding down. We were able to get the front suspension bolted on with brakes and the steering rack. She did this work with me giving a few pointers and I think she has some understanding for how struts, brakes, and steering works. I hope.

mm1.jpg


mm3.jpg


Lot of turning wrenches for these operations but something she did pretty well. Unfortunately I forgot to direct her to install the dust cap on the right hand assembly so I had to go back and correct that for her since she was out of work time. Proud brake owner. I think this machine will stop pretty well, certainly much better than it did back in 1985!

mm5.jpg


mm4.JPG


We also got the rear buttoned up with caliper install and springs in place.

mm2.JPG


Jeff G and I got the brake lines installed at least for the front so that we can continue with engine bay activities. Camber plates visible in this photo too. Not a fan of the camber plates but for the moment they are an easy button (came with the car) since I don't have any stock Fox plates. I would have preferred to use some stock plates and set camber around -1 neg with crash bolts and called it a day. It ain't a race car.

mm6.JPG


Sydney's calc exam is today and tomorrow's activity is a milestone, installing the engine. It's ready to go in. It's wearing original polished aluminum valve covers that were stock for the 1984/1985 5L model years. Shorty equal length headers and the Holley Sniper rounds out of the package.

jun1.jpg
 

Randy V

Moderator-Admin
Staff member
Admin
Lifetime Supporter
You are a very blessed man to have a beautiful daughter that's eager to learn from her Dad. Odds are that when she gets married someday, she will be teaching her new husband the way to "do it right"...
My hat is off to both of you!
 
Hi Ron and Sydney, I have just flicked through you build thread and most impressed with Sydney's eager involvement. I to have Daughter's they both love cars and my youngest (18yrs) is quite knowledgeable and most of her guy friends call her when they need car advice which I find quite funny. As much as they love cars and driving they are not as keen to get their hands dirty so Ron you are a lucky man.

Cheers Leon
 

Ron Earp

Admin
Thanks fellows!

The time arrived for the motor insertion. Sydney and I trussed the engine up, several times actually before we got the balance right, and hoisted it off the engine stand where it has lived for the last couple of months.

june5.jpg


Notice the Fox Mustang shirt.

june6.jpg


Really not a lot of tell about this operation. Just your standard pick and stick deal with no real drama the first time around. Even mom came out to assist a bit.

june3.jpg


And there it is.

june4.jpg


Drama still occurred however. Sydney had to run off to her jazz band so Jeff and I planned on buttoning things up, including the transmission install. I looked at the motor for a few minutes when I suddenly realized it was sitting really damn high. Further inspection revealed there was no way the tranny bellhousing would bolt up because the engine was being held in the wrong position. Further research revealed that I had gotten the wrong motor mounts from the parts store, so, out came the motor and on when the correct mounts after a quick visit to Advance Auto.

Later in the afternoon we went for the tranny install but that didn't work out either. We have lots of tranny parts around from the race car campaign and after scratching our heads for an hour about why the tranny wouldn't insert properly we discovered we had the wrong front bearing retainer on the tranny. We had one of our long nose units from the race car SN95 style while we needed one of our short units for this application. Swapped that out, checked bearing preload, and all is good.

So, a good day of work. The engine and tranny are in, with the addition of a few more accessories and parts I believe we can start the wiring which will be a pretty long job.
 

Brian Kissel

Staff member
Admin
Lifetime Supporter
Looking good Ron. Congrats on having the whole family. A family that wrenches together stays together. Keep up the excellent work. Sydney must be very proud to have you as a Dad, and you for having such a enthusiastic daughter.

Regards Brian
 

Ron Earp

Admin
It has been a couple of weeks since I've updated this thread but a lot has happened. First up is the HVAC reconditioning. I wasn't sure of the HVAC condition but given it is 30 years old it needs a rebuild. I do know that back in 1990 I replaced the heater core in the car and it was a hell of a job. And, now that the HVAC unit is out of the car I can see evidence of that junior league replacement.

Got to have a good work area for this sort of thing:

junac11.JPG


Splitting open the HVAC is a pain in the ass. After removing as much as possible, vacuuming out what I could, I was able to split it using heat and some tools. Nice AC evaporator there with lots of leaves and nuts. No doubt this unit has been home to many a small mammal.

junac9.JPG


And lots of detail pics so I can reassemble it, in no particular order:

junac10.JPG


juneac7.JPG


juneac8.JPG


Nasty AC core shown to match sealing around the edges.
juneac12.JPG


It's getting a new AC evaporator and heater core. Here is the unit partially assembled and it needs some foam and taping around the heater core.

junac14.JPG


Some of the doors I'm rebuilding with new foam that you can get off Ebay for this sort of thing. Most notably the recirculation door. The inside blend door is actually in great shape. The blower motor seems to be fine too. It's quiet and powerful so I don't plan to replace it.
 
Back
Top