Hi Keith,
Yes I’ve been following your Ultima rebuild and I’ve always been impressed by the quality of their bodies. It’s clear that the Tornado body is not one of its better features and all the ‘preferred’ builds seem to have all the issues I’m finding resolved when it goes to the bodyshop.
Good luck with the IVA on Thursday
Regards
Andy
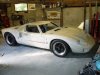

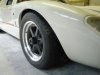
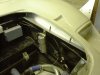
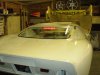
") looking good on it's wheels, also very nicely done that central brake light, can't remember seeing that before.
looking good on it's wheels, also very nicely done that central brake light, can't remember seeing that before.
")