Steve's GT-R Build Thread

Steven Lobel

Supporter
Moved 15 miles down the road. Car went in to temp storage. Back in garage ready for some work. Going with Speedway wiring harness and adjustable fan controller for fan 2 from Derale. Got Mouser for column connectors.
 

Attachments

  • 2019-10-17 17.52.04.jpg
    2019-10-17 17.52.04.jpg
    363.8 KB · Views: 565
  • 2019-10-17 17.51.37.jpg
    2019-10-17 17.51.37.jpg
    219.3 KB · Views: 569
  • 2019-10-17 17.52.33.jpg
    2019-10-17 17.52.33.jpg
    260.3 KB · Views: 500

Steven Lobel

Supporter
Still here. Got wiring harness started. Tail lamps from H are wired in. Look fantastic. Fan controller wired in except for AC switch. Ran wires from harness to headlamp area for lights, horn, markers. Ordered up some side markers that also do parking lamps. Wiring is a mental exercises unless you really know stuff. I do not. I have the GMPP that runs the engine, one of the fans. Need to figure out what my Speedway harness does other than lights and a wire for the keyed switch to starter. Still one small oil leak due to a bad fitting. Feels good to get things started up again.
IMG_0634.JPG
 

Steven Lobel

Supporter
Got back on track and did some basic wiring. Using Speedway mini harness and confused as heck. What wires run from that to the GMPP, any? Working on lighting first to lessen the headache. Run cable, loom it, unloom it. Solder on headlight connectors. Solder reverse light switch from Graz. Weatherpack are nice, but not without a good crimper. And watching the videos.

Got headlight harnesses done. Need to pick out some sexy turn/park lights for front and not the 6x3 trailer lights I have. Bought some turn signal indicators, a hazard switch, and a third brake light. Found out my car on my lift at max height is 75" from floor to chassis. And there is over 2 feet to the ceiling. Funny how you always need 1 more grommet, or ring terminal, or more flux. Just happy to be making progress.
IMG_1864.jpeg
IMG_1865.jpeg
 

Steven Lobel

Supporter
Wiring harness. About half of the Speedway gets used. The GMPP for the LS7 takes care of a lot of the headache. I ran wire before I got a harness for fuel pumps, fans, gauges. The AC has its own harness. Only problem I have is which half of the Speedway harness gets used.. ;)

Will mount it under dash. Need to run wires out front, out back, and to column. The Speedway instructions are decent, but I am a novice.
Any comments on running the fusible link from the battery to the harness instead of from the starter post? Seems like a few extra feet of not needed wire. Pinouts from the column are a little helpful, but I do not understand how it all works. Not as easy as a lightswitch.

IMG_1923.jpeg
 

Steven Lobel

Supporter
Easy day. Plugged some harness wires into the column. Able to start car and shut it down using a keyed switch. Got clutch interlock switch working. Gremlins: Brake lights not coming on. Turn signals come on, but do not flash. Haven’t hooked any ground wires up through harness so hope that fixes things. Everything is labeled but that isn’t helping much.
 

Steven Lobel

Supporter
Please provide assistance. I am not certain as to where I go from here. Wiring the column. Please help me fill in the blanks for the letters and numbers below.

Here is my harness.

Wiring Harness.jpg


Here is the column pin outs. I have the connector and terminal ends. I need help matching up wires from the Speedway to GM column. Headlights, park lights, turn signals. Wiper switch is on separate 6 pin connector.

Column pin outs.jpg

B=
C=
D=
E= ground
F=
G=
H= Acc power
J=
K= 28 High beam
L= 24 Low beam
R=
S= 1 Headlight power
T=
U=
V= 26 Horn
W= ground
X= ground
Z= +hot
 

Attachments

  • Wiring Harness instructions.pdf
    698.3 KB · Views: 458
Steve, I just re-wired my Daytona Coupe with the same harness from Speedway. It was much easier than the previous Painless harness, or an American Autowire Harness from my Cobra.
I do not have a GM style column or plug, so I may not be of help. Using the turn signal as an example, my car has a simple toggle switch for activating the turn signal."B" in your example has the green wire 21 (Ignition and Lights) going to the right side of the toggle, the green wire 21(Rear of Vehicle) goes to the right rear indicator. Green 17 (Fuse Panel and Front) to the right front indicator. The blue wire 16 (Instruments and Dash) to the turn indicator on the dash if you have one.
The instructions from Speedway are pretty vague compared to other harnesses, but it is a well laid out kit. All of the wires are well marked and there is plenty of length to cut, fitting your needs.
I am not sure that helped, but am happy to answer questions.
Rob
 

Michael Hampson

Supporter
Hi Steve, I will be going through the same thing as you shortly, so I wouldn't minding helping out any way I can. I am an electrical engineer (and licensed electrician), and I know my electricity well. The issue is the description and function of the various pinouts on the steering wheel harness, so this lack of knowledge of the actual column wiring might require some testing or further research. I will go ahead and start doing a little investigation work here - you are welcome to lend any knowledge gained to date and maybe between the two of us we can figure it out!

I haven't even purchased a wiring harness yet, but the issue remains, as it lies in the GM column wiring.

Michael
 

Ken Roberts

Supporter
I purchased the factory service manuals for the car the steering column came out of. I posted the pin outs and schematics in a older post. I'll see if I can find them for you. The schematics really help.

Here is a link to the schematics.
 
Kurtiss' GT-R build log page 7, he has a nice set of drawings (PDF)that identify many of the pin outs. The drawings are for the Infinity box but the pin outs are the same. I have used these drawings a lot and they work perfect for the steering column connections.
 

Steven Lobel

Supporter
I dislike the unneeded complexity of the Olds Intrigue column harness.

12/28/19


American Autowire Turn Signal Switch 500148
American Autowire Wiper Switch 500146- replacement pending, would not go into high.
American Autowire Headlight Switch 500358
American Autowire Flasher Relays 510226- repinned for LED x2


Diagrams from American Autowire make this zero headache option. Common front headlight wire for low and high beams. Common park wires for rear and for front.

Done: Turn signal indicators, CEL mounted in dash.
Next up: hazard button needs wiring and mounting, switches, HVAC, Ign key need mounting.


2019-12-28 10.08.38.jpg


signal indicators.jpg


wiper switch wiring.jpg
 

Steven Lobel

Supporter
Still working wiring. Going to seal spider before installing dash. Switches mostly installed. Need to make sure lighting all works first.
Ran into coolant leak at front of tunnel. Scrapped entire front setup of stainless pipes and silicone elbows. Got Gates flexible radiator hose. Tossed 5 pipes, numerous connectors and a ton of clamps. Much simpler, more flexible, no tie downs needed. And leak fixed. Once I get lighting sorted out I can mount dash. Gauges easily unscrew as a unit. Getting closer to go kart. Once I get wires done I can mount the parking brake and a seat. Coolant holding at 235 with just one fan running. Still more burping to do. Hoping for 220.
 

Steven Lobel

Supporter
1580732623275.png


Getting better. To do list is at top, stuff done under it. Took pics and hope to load them under it.

Temp: burped the system a bit more. Now holds at 199 with no fan on. After 15 min at idle one of two fans kicked on but temp never got over 201. I guess thermostat set at 195. GMPP fan at 210, other fan set at 199-200 (Derale controller).
Looking more like a car. Glad I ripped off the stalks and went with dash mounted headlight, turn, wiper. Way easier to deal with and a lot more room between wheel and shifter.
 

Steven Lobel

Supporter
Moving right along....
Coolant leak by radiator was due to a T-clamp that was 1/4" too big and never tightened enough. Fixed it.
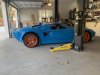
Oil leak at pan was one of my AN fittings not being tightened enough. Leak on driver's ride rear of pan looks like the gasket between the Dailey pan and the block. Gasket looks aluminum. Will replace gasket at first oil change as no issues with access.
Recent completed off to do list:
Mount fuse panels.
Column mount nuts and torque.
Test lights, signals.
Wire gauges.
Water temp sensor - had one with wrong Ohm range for gauges and read 60 degrees too cool. Bought cheap Autozone M12 1.5 to 1/8 NPT adapter and it snapped off in block when hand tightened. Easy out by hand and replaced with nice one from Speedhut.
Rewrap harness at gauges and fuse panel.
Oil leak 2 spots on pan. Maybe fixed. .
Tightened line to pump. Retorqued pan bolts.
Install fuel pump switch to fuse panel. The little pump is very loud when car not on. So just added a switch until motor is running.
Hvac wires and drain lines. Holes drilled in floor, lines can get silicone to seal through floor.

Upcoming is to wire hazard switch to turn signals, mount seats.

My buddy Jake is meticulous with keeping things where they belong. We have a bit more wire looming and electrical taping and wrapping and zip tying to do.


dash1.jpg


dash2.jpg
 

Steven Lobel

Supporter
3/28/20

Redo hazard and turn with new parts.

Hazard Switch - Carling, DPST, Toggle, 2 Position, (On-Off)
Turn Signal Switch - Baomain Toggle Switch SPDT ON/Off/ON
Trailer wiring adapter - Hopkins 48895 Incandescent LED Taillight Converter

Hazard and Signal New.png


Reclamp and replace front radiator pipes and hoses using 44-50mm T clamps . Went with Gates 25482 Hose for passenger side. 1.5” x 22” 30” for driver side.
unnamed-1.jpg

Recrimped power junction box for rear bulkhead.

unnamed.jpg


And I cleaned up the wiring harness under the dash...

unnamed.jpg


Slow and steady. If no more coolant leaks, will be bolting in seats tomorrow and drive around the block.
 
Back
Top