
You are using an out of date browser. It may not display this or other websites correctly.
You should upgrade or use an alternative browser.
You should upgrade or use an alternative browser.
Tornado TS40 #875
- Thread starter Scott Calabro
- Start date
Dave,
Yes sorry about the exposure.
I have found that I have to adjust the exposure of the pictures on my computer before I post them.
Some were some were not.
What guy's?
That is all me!
The car is very simple to panel.
Anyone with a few basic tools, some patience and reading comprehension, can panel a TS40 in the same timeframe as me.
Stay tuned and watch how fast it progresses after it is panelled!
Regards,
Scott
Hey Brian,
No worries, we can run to the packie for cold ones with 875 while we wrench on your car!
Here is tonight's episode;
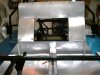
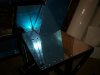
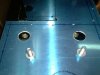
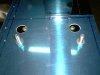
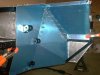
Cut hole for left fuel tank quantity sender.
Finished drilling both FWD sill top rivet holes.
Drilled small triangle plates to close cockpit.
Finish drilled both aft sill tops in engine compartment.
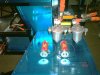
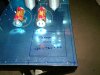
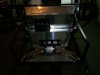
Mocked up oil cooler, just for kicks.
Mocked up dual pumps and filters , located and drilled pump mounting holes and fuel feed bulkhead fittings.
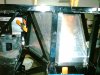
Layed out possible storage box modification aft of pumps.
The dotted line represents the storage compartment below the pumps.
S
No worries, we can run to the packie for cold ones with 875 while we wrench on your car!
Here is tonight's episode;
Cut hole for left fuel tank quantity sender.
Finished drilling both FWD sill top rivet holes.
Drilled small triangle plates to close cockpit.
Finish drilled both aft sill tops in engine compartment.
Mocked up oil cooler, just for kicks.
Mocked up dual pumps and filters , located and drilled pump mounting holes and fuel feed bulkhead fittings.
Layed out possible storage box modification aft of pumps.
The dotted line represents the storage compartment below the pumps.
S
Attachments
Last edited:
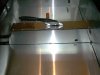
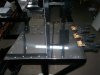
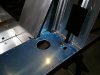
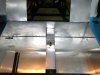
Tonight's work;
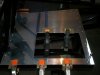
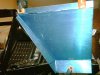
Cut rear bulkhead window blank and marked on rear bulkhead to cut.
Riveted both rear sills.
Riveted front panels 9,10 and 11.
Riveted both vertical sills.
Riveted triangle plates on rear bulkhead.
Cut 1 fuel tank attach bolt access hole in the left sill.
Mocked up remaining rear bulkhead panels for installation.
Wanted to cut rear bulkhead window hole but I ran out of time.
S
Attachments

Scott,
Thanks for all the numerous and detailed pics.I;m enjoying the build immensely.Keep it up my man!
Thanks for all the numerous and detailed pics.I;m enjoying the build immensely.Keep it up my man!
Eric and Bill, thanks for the compliments!
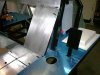
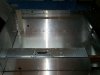
Tonight's report is small not much done.
After the following work done tonight is completed, and the bulkhead is riveted/window is cut out, its on to the front wheel arches and I'm finished panelling.
I hope to start the front wheel arches this weekend.
Tonight;
Cut remaining holes for the fuel tank attach bolts.
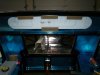
Skinned top aft surface of the cockpit in the engine comp.
Mocked roof spider to make patterns for engine comp. side panels.
That's it!
S
Tonight's report is small not much done.
After the following work done tonight is completed, and the bulkhead is riveted/window is cut out, its on to the front wheel arches and I'm finished panelling.
I hope to start the front wheel arches this weekend.
Tonight;
Cut remaining holes for the fuel tank attach bolts.
Skinned top aft surface of the cockpit in the engine comp.
Mocked roof spider to make patterns for engine comp. side panels.
That's it!
S
Attachments
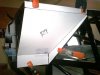
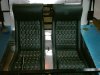
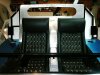
Saturday's work;
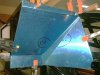
Cut bulkhead window and riveted bulkhead in.
Made patterns for the left and right eng. comp. closure panels.
Made the first pattern for the right and left wheel arches.
Placed seats in and sat in car for the first time! epper:
More wheel arch work tomorrow.
S
Cut bulkhead window and riveted bulkhead in.
Made patterns for the left and right eng. comp. closure panels.
Made the first pattern for the right and left wheel arches.
Placed seats in and sat in car for the first time!
epper:More wheel arch work tomorrow.
S
Attachments
")
Jack W,
How did you know?!!!!
Engine inertia dyno runs are scheduled for Mon. March 3rd.
epper:
S
How did you know?!!!!
Engine inertia dyno runs are scheduled for Mon. March 3rd.
epper:S
Looks great Scott, keep it up!
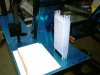
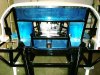
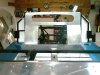
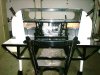
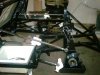
Some time constraints today, no riveting.
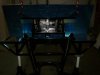
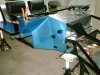
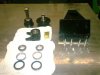
Built-up the rear uprights.
Pressed in all the control arm bushings front and rear.
Started hanging the rear suspension.
S
Built-up the rear uprights.
Pressed in all the control arm bushings front and rear.
Started hanging the rear suspension.
S
Attachments
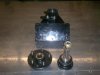
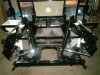
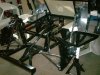
The contrast between the chrome arms and the black chassis looks great. Not too bling! 
Keep up the good work
Andy
Keep up the good work
Andy
Last edited: