33 Stradale Tribute

Hello everyone,

My dream is to build my own car....

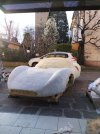
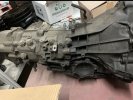
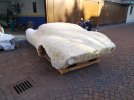
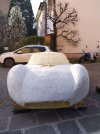
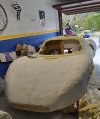
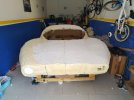
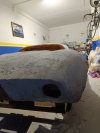
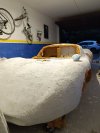
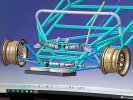
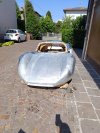
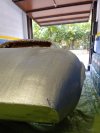
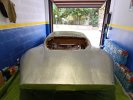
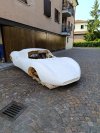
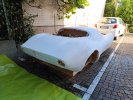
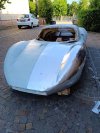
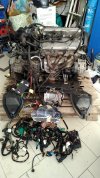
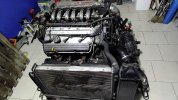
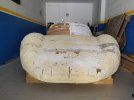
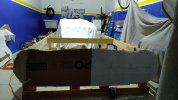
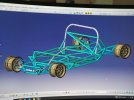
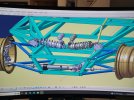
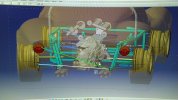
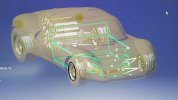
I would like to build a locost style chassis but designed by me, Alfa 2.0 v6 turbo engine and 33 Stradale body.

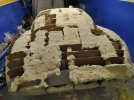
In 2020 I downloaded a cad of the body around the web, and created the sections.
In December 2022 I started the adventure....
 

Attachments

  • IMG_20220827_105559.jpg
    IMG_20220827_105559.jpg
    203.2 KB · Views: 172
  • IMG_20220823_171910.jpg
    IMG_20220823_171910.jpg
    265.4 KB · Views: 143
  • IMG_20221102_135120.jpg
    IMG_20221102_135120.jpg
    504.5 KB · Views: 148
  • MicrosoftTeams-image.jpg
    MicrosoftTeams-image.jpg
    189 KB · Views: 136
  • IMG_20230507_115747.jpg
    IMG_20230507_115747.jpg
    236.5 KB · Views: 133
  • 20240126_213213-COLLAGE.jpg
    20240126_213213-COLLAGE.jpg
    155.4 KB · Views: 126
  • IMG_20221217_153817.jpg
    IMG_20221217_153817.jpg
    360.1 KB · Views: 122
  • IMG_20231213_215705.jpg
    IMG_20231213_215705.jpg
    353.9 KB · Views: 116
  • IMG_20240126_181005.jpg
    IMG_20240126_181005.jpg
    263.7 KB · Views: 117
  • IMG_20240126_180935.jpg
    IMG_20240126_180935.jpg
    232.9 KB · Views: 132
All OEM parts are like a unicorn
I will use Lexan with rivets to copy the shape.
Now I've MX5 Uprights and I'm searching for an Audi Gearbox, in particular the 012 box from the 1.8 turbo A4 fwd
 
Hi There, great choice of car.

I have been down a similar road, if you have not yet seen it your might find some of my experience a help, see thread below

https://www.gt40s.com/threads/canamsa-sa-stratch-build.19604/

I also offer this advice to anyone doing a scratch build:

Starting out advice - mid-engined scratch build

A friend of mine who is not big on literature research is talking about starting a scratch build mid-engined full body sports/race car project, and in conversation with him I am reminded of things I have learnt during the process of my build so far. I note below some of my thoughts on how to approach a project like this. I understand that the below is spelt out in much greater detail in various excellent books and websites, and is being discussed on other threads, I note it here as a summarized version. If I had followed these recommendations when I started, I would have saved myself considerable time, hassle and expense.

When starting out at least do the following, in this order:
Decide what the car is going to look like, i.e what body shell, if not original. This also determines wheel base dimension and the width over wheels. i.e determine the wheel positions.
If original body, decide on at least the front and rear track, wheel base can be adjusted.
Decide on what tyres you will use, exact width and profile, and procure if you are serious.
Decide on what hubs/uprights/steering rack you will use and procure/make if you are serious.
Decide on what rims/offset you will use and procure if you are serious.
Decide on what engine and transmission you will use and procure if you are serious.

Position all above parts on garage floor or build table and sort ergonomics – where do you fit?
If you are going to draw up in cad, finalize the position of all above parts in your model only now.
All the above could be an iterative process, but please complete it BEFORE you start the chassis.

Design suspension – if you are not going to do the research to enable you to do this yourself the only options are:
Get someone else to do it for you.
Copy an existing car, strictly only valid if using that cars uprights/hubs/wheels/tyres.
Guess

Once you know where the inner suspension points are, you can design the chassis, to accommodate all above. CAD / balsa model / cut and tack on build table are all valid methods, but best results would be obtained by combining them. Please do not start with a Locost chassis and try to modify it to accommodate a rear engine drive train.
 
Last edited:
Hi, I'm very proud of your interest and your response because I had seen the construction of your Lola T70 years ago, and from there I decided to build my dream car from scratch! I was very inspired by you and being a process engineer I tried to think how to achieve a decent level of quality with fewer steps than yours...I'm still working on it!
About what you say I agree with everything... the decision of the components to use and the ground test in the garage with the pieces, in my case was replaced by a Cad project in which I inserted the bodywork, the engine/gearbox, the hubs, the steering box, the wheels to define the layout (DMU, digital mockup).
 

Attachments

  • IMG_20230926_153836.jpg
    IMG_20230926_153836.jpg
    468 KB · Views: 95
  • IMG_20240105_171054.jpg
    IMG_20240105_171054.jpg
    383.7 KB · Views: 90
  • IMG_20230118_083357.jpg
    IMG_20230118_083357.jpg
    529.3 KB · Views: 90
  • IMG_20220827_171835.jpg
    IMG_20220827_171835.jpg
    418.4 KB · Views: 100
As noted by Fred - ergonomics are crucial. These cars were often designed to minimize frontal area and mass, and often had zero crush space ahead of the front axle. So there's literally no wiggle room inside if you stay true to the original design. Depending on your stature, that could be a make/break issue.
 
luckily for me I am 1.72m tall and I think I fit..after the body construction anyway I will try to check, and in case to make some changes to recover some cm..
 
Next step is to fit the filler around the complete model and to smooth every curve..
I will use Wall plaster because is cheap and I know how to use it
 
Last edited:

Chris Kouba

Supporter
I used drywall compound- specifically what we call "10 minute mud". It dries very quickly when applied thin, and remains clay-like and shapeable until it dries- almost like modeling clay. The regular drywall compound seemed to take forever and was not shapeable while drying. I'd highly recommend the 10 or 5 minute versions. If you're applying thickly, the timing isn't really accurate.


It's also pretty cheap too!!
 
Back
Top