Andrew's GT Forte build.

Andrew,
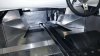
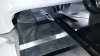
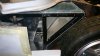
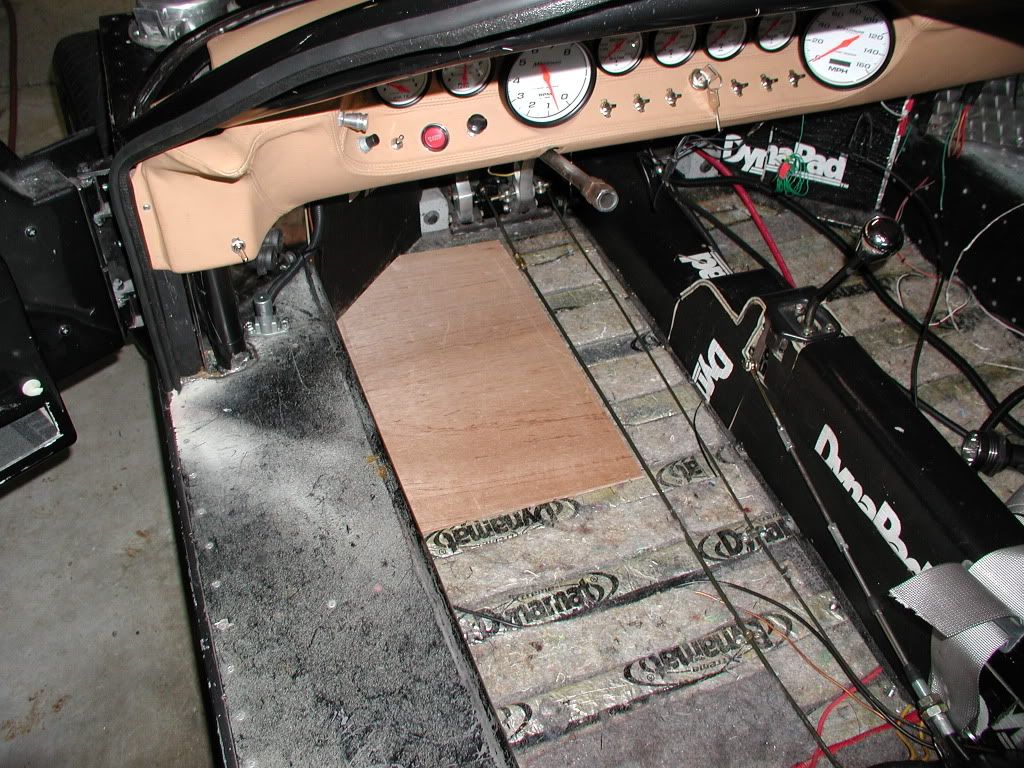
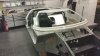
Your pipes are basicly the same layout as mine in the DRB. You will like the lower tunnel height when you get around to putting in your pedals. Allow enough room to add some closed cell insulation around the pipes. I used the stuff that is used on hot water pipes and got it large enough to close around the pipes I then insulated the outside of the tunnel with Dynamat and then leather(this winter)Dynamat.com | DynaPad Under Carpet Padding

P1010005-1.jpg


Bill
 
Hi Bill, yes got the pedals in already, went for Wilwood suspended type and the lower tunnel height in that area will make a huge difference.

Going to try and make up a tunnel template over xmas to see how things look.

Andrew
 
Progress and a major milestone past today.
The front end panels are all on and just need a good scrub up to get them nice and clean.

That's 6 months it has taken to get to this point but think that was the hard part of the paneling.

Andrew
 

Attachments

  • 2014-12-30 17.43.19.jpg
    2014-12-30 17.43.19.jpg
    182.2 KB · Views: 634
  • 2014-12-30 17.43.28.jpg
    2014-12-30 17.43.28.jpg
    177.4 KB · Views: 547
  • 2014-12-30 17.43.35.jpg
    2014-12-30 17.43.35.jpg
    182.9 KB · Views: 590
  • 2014-12-30 17.43.45.jpg
    2014-12-30 17.43.45.jpg
    168 KB · Views: 528
Very nice and neat panelling !!
Following tubes with bended alu is something very "tricky" work and you did it perfectly ; congrats
 
Thanks guys, expect it to look even better once it has been cleaned.

Cooling pipes were tricky, i drew them in 3D and then sent the design off to have it made. Guy did a good job, but not cheap, but worth it i think.

Wife working today, so a free pass to go and play in the garage again !

Andrew
 
got the grinder out with a polishing mop today and gave the panels a clean up. Come up nice !

Question now is, paint it all black or leave it as polished aluminium ?

Painted the front clip panels in matt black to see what i thought.
Final black would be crinkle finish which i do like !

Happy New Year all.

Andrew
 

Attachments

  • 2014-12-31 17.23.54.jpg
    2014-12-31 17.23.54.jpg
    194.3 KB · Views: 414
  • 2014-12-31 17.24.12.jpg
    2014-12-31 17.24.12.jpg
    164.5 KB · Views: 406
  • 2014-12-31 18.02.17.jpg
    2014-12-31 18.02.17.jpg
    136.7 KB · Views: 483
  • 2014-12-31 18.02.41.jpg
    2014-12-31 18.02.41.jpg
    140.7 KB · Views: 442
Andrew,
Before you commit I would suggest looking at a product such as "Linex" or truck bed liner material. It is like the Krinkle finish but much stronger and will last a lot longer. I did this to my front bay area as the frame members of my 40 were exposed to the inside and that had to be dealt with.

Bill

PB230017_zpsa4a5e7e2.jpg

PB230012_zps69fb0ee8.jpg
 
Thanks Bill, found that stuff on Google, looks very interesting, and they have a dealer in the UK.
Looks like it has to be professionally applied, did you do it yourself or get it done by the distributor ?

Andrew
 
Some progress at last. Has been a bit slow recently, mainly due to work commitments and being a bit undecided on how to proceed with some areas.

Spent a bit more time getting the inside area tidied up and paneled, still a bit to go, final floor pan and firewall, but starting to take shape.

Been playing around with paint finishes to try and get an idea of waht i fancy... matt, gloss, wrinkle... can't decide.... off and on a couple of times now.

Seem to have spent a lot of time just standing and looking at the car with a cup of tea.
 

Attachments

  • 2015-01-25 12.23.44.jpg
    2015-01-25 12.23.44.jpg
    928.4 KB · Views: 626
  • 2015-01-25 12.22.00.jpg
    2015-01-25 12.22.00.jpg
    805.5 KB · Views: 510
  • 2015-01-25 12.22.23.jpg
    2015-01-25 12.22.23.jpg
    646.7 KB · Views: 517
  • 2015-01-25 12.23.19.jpg
    2015-01-25 12.23.19.jpg
    853.6 KB · Views: 569
I had the dealer do it for me. They do sell some in rattle cans but I have never seen it applied. If there is some available it would be worth trying to see what it looks like. The commercial stuff is high temp. Noticed the other day that my new Ford eco boost truck had the liner applied in the bed. Looks just as good as my 40.

Bill
 
More progress today.
Only one more panel to fit into the footwell.
Cooling pipes laid in, fit perfectly... phew ! :pleased:
Pedal box and accelerator fitted, again, fit very nicely.
All coming together like it was planned that way.

A
 

Attachments

  • 2015-01-31 17.40.20.jpg
    2015-01-31 17.40.20.jpg
    149.1 KB · Views: 534
  • 2015-01-31 17.40.09.jpg
    2015-01-31 17.40.09.jpg
    129.9 KB · Views: 497
Andrew,
Looking at your pics, remember to leave access to the fuel lines/fillers. Putting them in is easy. Then sealing them in and trying to repair,change or add to would be difficult. Rivnuts are your friend.

Bill
 
Andrew, I agree with Bill. You also may want to consider cutting the holes for the fuel filler/caps before you start to get too cramped in that area.
 
Andrew, it will be very tricky to get the main filler pipes in and connected. I bought a part finished car and had to remove the end panels to get at the pipework, getting the jubilee clips on would have been virtually impossible. K
 

Attachments

  • IMG_20150201_182029.jpg
    IMG_20150201_182029.jpg
    174.6 KB · Views: 560
Andrew, looking again at your pix, you seem to have a panel to the rear of the triangular panel that I removed, (the pic I just posted). On the Tornado, when the door opens, part of the door swings into this void, so should not be panelled. Is the Forte different in this area? K
 
Nope it's the same Keith, I have panelled that part with the intention of cutting an access hole for the door to swing into. Just wanted it to be seamless round there, for purely aesthetic reasons.

Andrew
 
Cooling pipes in and the clamps have come of the 3D printer and fit.
They need to be secured back to the tunnel frame with 6mm screws and rivnuts, but coming together !

Andrew
 

Attachments

  • 2015-02-02 20.41.12.jpg
    2015-02-02 20.41.12.jpg
    843.7 KB · Views: 664
Back
Top