Norfolk Tornado

Engine Start-up – Part 2!!

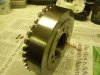
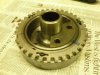
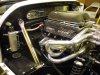
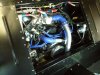
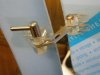
After the family holiday, I’ve spent a frustrating couple of weeks trying to start the engine. The TV damper was re-machined to give a cleaner signal to the crank sensor. This helped, but wiring the sensor the right way round made the biggest difference – doh!

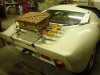
After getting the ignition system firing, the next issue was the injectors. Due to a mis-communication with the ECU supplier, I’d got too many earths and no volts going to them!

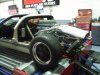
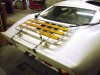
With that resolved and the engine trying to start, it was clear that there was a firing order issue. Swopping coil leads around, was the answer, but as the coils are mounted on the back of the heads, sod’s law dictated that with the corrected firing order a couple of the leads were now too short, so a new set had to be ordered.

Just when we thought we’d cracked it and a truck battery supplementing the car’s battery (as we kept flattening it), we knackered the starter motor. Admittedly it had had a hard time over the last few weeks, but it was a brand new gear reduction one so very frustrating.

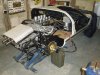
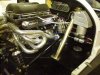
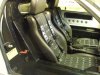
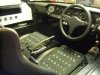
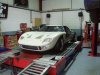
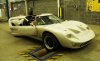
So after the new unit arrived, we finally had it started and idling, which is a major mo-jo boost. Next job is to finish putting the car back together and look at getting it to a local rolling road to sort out the calibration.

Regards,
Andy
 

Attachments

  • Damper 1.JPG
    Damper 1.JPG
    134.1 KB · Views: 452
  • Damper 2.JPG
    Damper 2.JPG
    138.6 KB · Views: 488
  • Engine start.JPG
    Engine start.JPG
    126 KB · Views: 673
Since getting the engine started I’ve been finished off various bits of the car and getting it ready for a rolling road session. The engine now runs off the vehicle tanks instead of a Jerry can. Fitting the bulkhead panel took a lot longer than anticipated due to a couple of riv-nuts that weren’t fitted properly. Seats & belts are also now in.

My latest issue is a non functioning clutch; basically I don’t seem have enough stroke on the master cylinder to release the clutch. Pedal load is OK, a larger master cylinder would move more fluid for a given stroke, but would put up the pedal load.

A bit more investigation revealed that the pedal hits the bulkhead before the piston in the master cylinder gets to the bottom of the bore. Having looked at modifying the bulkhead (very difficult now the car’s built up), it looks like there will have to be a Mk2 pedal design to overcome this issue – oh the joy of designing & making parts for yourself!!

Regards,
Andy
 

Attachments

  • Engine Bay 1.JPG
    Engine Bay 1.JPG
    151.5 KB · Views: 577
  • Engine Bay 2.JPG
    Engine Bay 2.JPG
    170.5 KB · Views: 578
  • Engine Bay 3.JPG
    Engine Bay 3.JPG
    113.9 KB · Views: 611
  • Cockpit 1.JPG
    Cockpit 1.JPG
    140.7 KB · Views: 604
  • Cockpit 2.JPG
    Cockpit 2.JPG
    144.7 KB · Views: 646
Dyno Time
We took the ’40 to a local rolling road last week to start the mapping process and after a few hours work (and a tank of fuel!) we had the low to mid range mapped. Generally the car ran really well, just some more debugging to sort out, mainly a low speed mis-fire. This was probably caused by the crank sensor wire running behind one of the ignition coils and is picking up interference. Unfortunately we didn’t do a final power curve; that will have to wait for next time.

The clutch still needs sorting, even with a revised pedal to give more clearance, I’m still not able to select gears cleanly. I’ve now ordered a larger master cylinder which will give 15% more travel, but will also put the pedal load up accordingly, so we’ll see how we get on.

I’m still going through the list for the IVA, The latest thing I come up against is that my ignition leads (the second set I’ve made, as the first set were to the wrong firing order) are not compliant as they don’t have any marking on. The requirement is for them to be marked with the manufacturer’s name. I had considered hoping it would be OK (as they’re not easy to get at), but as it covered under it’s own section (section 10 - Electromagnetic Compatibility), it’s not worth a fail for a few more quid…

Regards,
Andy
 

Attachments

  • Dyno 1.JPG
    Dyno 1.JPG
    114.4 KB · Views: 481
  • Dyno 2.JPG
    Dyno 2.JPG
    154.2 KB · Views: 573
Whilst waiting for the paperwork to come back from the DVLA to confirm my VIN number, I’ve been doing a few smaller jobs:
· The slow speed mis-fire has been fixed by re-routing the crank signal wire away from the coils.
· A larger clutch master cylinder (now 0.75”) seems to have done the job
· IVA compliant plug leads fitted
· A heat shield for the clutch slave cylinder (the rubber cover on the bleed nipple when it was on the dyno!)
· Side window hinges & catches have been installed (for post IVA fitment)
· Eyebrows fabricated from 1.5mm aluminium using a shrinker/stretcher tool. A bit fiddly, but does produce the results (for post IVA fitment)
· Rear spoiler fabricated (for post IVA fitment)
· Central locking modules added to the doors. I couldn’t get the modules mounted to have a direct pull on the locking latch, so I added a bell crank.
· In preparation for its maiden voyage to Classic LeMans in July, my wife has complained about the lack of luggage capacity in the car. Therefore I’ve come up with the European Touring Kit. Based on an old luggage rack I had for an MG, I modified the mounting to fit on the ’40. I’ve not seen this done before, so when this becomes ‘de-rigueur’ for LeMans etc. you know where you saw it first! :thumbsup:
Regards,
Andy
 

Attachments

  • window 1.jpg
    window 1.jpg
    139.5 KB · Views: 543
  • window 2.jpg
    window 2.jpg
    106.3 KB · Views: 551
  • eyebrows.jpg
    eyebrows.jpg
    136.6 KB · Views: 480
  • eyebrows 2.jpg
    eyebrows 2.jpg
    194.3 KB · Views: 490
  • spoiler.jpg
    spoiler.jpg
    174 KB · Views: 506
  • Door solenoid.jpg
    Door solenoid.jpg
    87.1 KB · Views: 566
  • luggage rack 1.jpg
    luggage rack 1.jpg
    213.8 KB · Views: 560
  • luggage rack 2.jpg
    luggage rack 2.jpg
    188.8 KB · Views: 594
Andy, Nice solution to a BIG problem regarding space in the 40. Wouldn't be putting any French chocolate's in there though!
 

Dave Bilyk

Dave Bilyk
Supporter
Nice one Andy, I was considering a luggage rack for my next long trip, nice to see it in picture. The subject of small trailers keeps popping in there too. Nice to see you into the final steps of your build - well done.

Dave
 
Andy,
Great job on the car. Like your electric door option. The bell crank is a nice touch. When I had my door panels made, I thought I was going with mechanical. So salvaged the door opener for the inside from a Toyota. Picked up the rods and their bell crank while I was at it. My door opener is located at the front bottom section of the door. I didn't like having to reach behind me to open the door. Have gone electric since then so the bars are joined and work well together. I added door poppers as well. It gets the door started opening when the lock releases and moves the door about 2 inches. I used a 40lb. unit I believe. They are mounted at the back near the base of the door. You might consider adding a heat shield to the base of your luggage rack. Especially if you plan to carry those French chocolates!!

Bill
 
Thanks for the positive feedback guys. I don’t think the wicker basket will be making it down to LeMans, but fitting a heat-shield to the bottom of the rack is a good idea, especially when the car gets stuck in the traffic around LeMans

Bill, I’m glad you like the bell-crank for the central locking, it works better than I anticipated. The EPAS also seems to work well, but the variable resistor used to control the amount of assistance doesn’t seem to do much. Something else to look at later

I’ve now had feedback from the DVLA and now have my VIN. It’s not what I requested, so the original has been removed and the chassis re-stamped. I’m now working my way through the requirements of the IVA application form. This should be posted later this week

Regards,
Andy
 
IVA Passed – First Time!
Well after a nerve racking day last Friday, I now have the IVA certificate for the ‘40. The inspector at the Norwich test station was extremely fair and it was clear that he wanted it to get through the test as much as I did. He was also very aware that it would all change afterwards! There were a few tweaks carried out during the test including:
· Headlamp aim – expected
· Brake bias - initially too much on the rear - also expected
· Handbrake efficiency - sent off to do a couple of laps of the test station to bed them in!
· Front Indicator – too far inboard (I checked against the front arches & forgot the back’s wider) New holes were drilled & then passed

The only other point I thought I may fail on was the speedo; as I hadn’t been able to calibrate it, however, as it wasn’t on a driven (rear wheel in this case) they couldn’t test it, so it was excluded from the test!

So pretty chuffed and emotional after 6.5 years work!

Next job is to start building it to my requirements. The correct filler necks have already been fitted, as well as my preferred steering wheel boss. It’s frustrating about the amount of hours I’m putting in at work have recently gone ballistic including overseas travel (this is being posted from Malaysia), just when I want to be getting on with car. However it’s booked in for paint in 6 weeks time and it still potentially feasible to get it ready for Classic LeMans in July.
Regards,
Andy
 

Attachments

  • P3142140.JPG
    P3142140.JPG
    304.7 KB · Views: 553
  • P3142143.jpg
    P3142143.jpg
    222.8 KB · Views: 536
  • P3142144.JPG
    P3142144.JPG
    344.6 KB · Views: 522
  • P3142146.jpg
    P3142146.jpg
    213.8 KB · Views: 527
Andy,
Congrats on passing. I know that the long wait is just about over. You will definitely love the driving experience. I have to ask one question. The trailer you were using in your first pic. Is it yours or is it borrowed/rented?? If it is yours would there be a way to get the specs. on it?? What are its dimensions?? If it isn't yours, could I get a link to the company?? I would like to build one actually.

Bill
 
Back
Top