Sandy's RCR40 Gulf Chassis #11

Sandy

Gulf GT40
Lifetime Supporter
Rob -

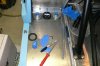
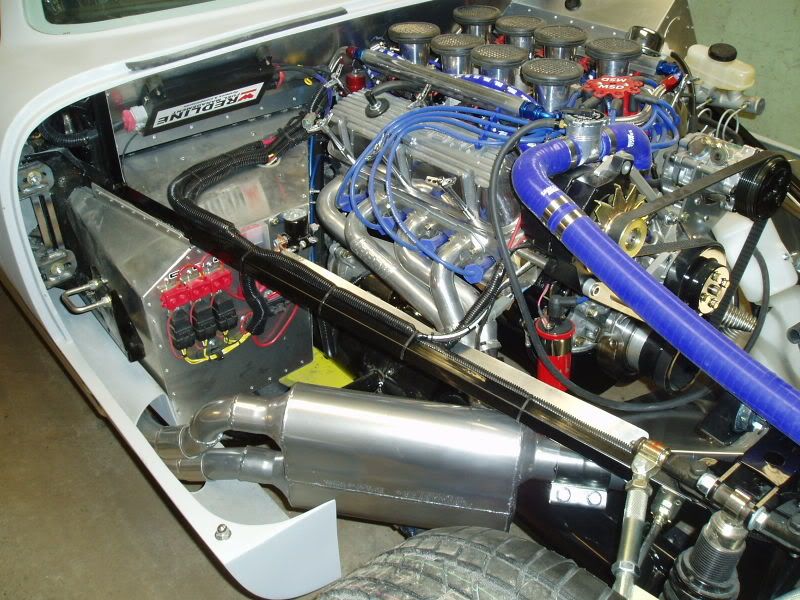
The bleeds will plumb back to a tank, but I don't yet have that mounted so will leave it hanging for now.

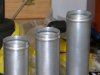
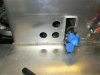
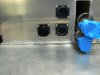
The tank vents were from a marine supply, just do a google search for boat fuel tank vents and you should come up with them. I think they were SEA DOG brand. The were about $16 each as I recall. The name of the place were I got them was something like fisheries supply but I'll have to dig up the invoice if you can't find it on google.

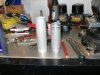
Yes, the hoses were from HRP World. One thing is that you need to use different hose clamps with the silicon hoses, McMaster has them with the extra non-perforated strip (liner) that keeps the hose from getting sliced. The one thing they didn't have was the reducer for the water pump outlet which was 1.75" to 1.5". I hit up Summit for it.


Sandy
 

Sandy

Gulf GT40
Lifetime Supporter
Here is a shot of the 3 pick up holes (SAE 5 Bolt Pattern) for the Return, Pickup and Centroid Sensor.

One thing to note is that the tank is not square so the outside hole will have the return which is shorter then the other two (or bent). One other thing is to be aware of the end of the fuel tank weld which is close. It all fits tight, but will make it.

As promised the RIGGED tool was a Milwaukee angle driver for hex type tools. I then ground up a bit to fit a holder that was in a Sears Craftsman kit. Got the back holes without as much wobble as I would have expected. The Right angle drill was just a bit too big to clear the back of the bulk head and the only other option was to remove it all, and that looked like a lot more work especially with the roll cage...

Last shot is a nifty tapping jig I got from Enco. It is a little guide that helps keep the tap perpendicular to the material. Looks to be real helpful.

Sandy
 

Attachments

  • FuelTank1.jpg
    FuelTank1.jpg
    46.3 KB · Views: 1,349
  • TapGuide.jpg
    TapGuide.jpg
    22 KB · Views: 1,339

Randy V

Moderator-Admin
Staff member
Admin
Lifetime Supporter
Sandy - That Tapping jig is very neat - I never knew of their existance!

RE: Fuel return line / pickup line / fuel level sender - I would make sure that you have the fuel return line sent off in a direction away from the pickup and sending unit. I've found that with high volume pumps, they have a tendancy to promote cavitation near the pickup. Also I would encourage you to consider a Duck-Foot fuel pickup similar to this one:
ATL Fuel cells - Pickups and Fittings Part No. TF239

Nice work!!
 

Sandy

Gulf GT40
Lifetime Supporter
That tapping tool is pretty slick. I have not used it yet, but looks to be a nice helper for the accuracy impaired :)

The pickup and return are on the opposite ends as I'm thinking. But I was going to put a bend the return to allow it to point away from the area of the inlet of the pump feed.

I don't think I'll be able to get a duck or corner pick up in the tank, not sure how I would secure it or does it just sit at the bottom loose? Remember no foam in the cells to help keep things put.

Inching along in any case. Now for the other side then I'll drill and tap the rest.

Sandy
 

Sandy

Gulf GT40
Lifetime Supporter
You can get them all over the web with what seems like various quality. I got mine from HRP HRPWorld.com Race Car Parts and Supplies They are expensive. They have a few sizes but no reducers or odd things that you sometimes need. Also Summit racing has them as mentioned (same type of prices, different brand), but I got a couple of reducers and they seem ok, but not as stiff a material as the ones from HRP, might just be my imagination since the HRP's have orange inside instead of blue :)

And don't forget the clamps should be different for the Silicone hoses. They have them at McMaster Carr and are not too expensive, look for lined clamps were about a $1 each.

Sandy
 

Sandy

Gulf GT40
Lifetime Supporter
Well not to drop off the face of the earth, one side of the fuel tanks are done.

Here are the pics, Outside is fuel return, center is the 'Centroid' (No pun intended) fuel sender, inner is the Fuel pick up. I am getting good at using tape on a stick to pick up the stuff that drops into the tank at this point...

For the fuel pick up I just flared the end of the -8 tube, it is very close to the back bulkhead of the fuel tank (Green Sharpie) Seems like it will work good for fuel on acceleration, on braking hopefully the baffles in the tank will keep things happy.


Attachments

  • P1010274.jpg
    P1010274.jpg
    40.4 KB · Views: 1,124
  • P1010275.jpg
    P1010275.jpg
    44.4 KB · Views: 1,136

Randy V

Moderator-Admin
Staff member
Admin
Lifetime Supporter
I don't think I'll be able to get a duck or corner pick up in the tank, not sure how I would secure it or does it just sit at the bottom loose? Remember no foam in the cells to help keep things put.

Hi Sandy - Sorry I didn't get back to you right away - I missed your post.. The duck foot usually is hose-clamped to the tube and just lays on the bottom of the cell.
 

Sandy

Gulf GT40
Lifetime Supporter
Thanks Randy. Then it might be something to try. I'm going to see how it works as is (Read as lazy). I do like that the back of the tank is close to the pick up and on acceleration fuel will push to the back a bit. Should be fine for starters.

Sandy
 

Sandy

Gulf GT40
Lifetime Supporter
Ok, been quiet for too long. I started working on some stuff, nothing major however, the big news might be that I put air in all 4 Avons :D

Also picked up a 5LB Safecraft Halon Fire system that will be mounted in front and parallel to the passenger seat, the 10LB one that I had was a few inches too long (wide), so had to reduce capacity a bit. Might do a second system down the line but for now I think the 5 LB Halon with a hand held should be ok.

Also picked up from Vintage wheels some of the wheel nuts, and from McMaster-Carr some Stainless diaper pins that seem to be just right if you remove the dust cap which I will not likely use. And from Amazon a nice huge socket and extension to actually be able to install and remove them.

I think I need to write a plan of attack, so I keep focused, too many bit projects on it and I get lost...

Sandy
 

Sandy

Gulf GT40
Lifetime Supporter
Started back working on the RCR40. I started back with some unfinished work with the front cooling system. I picked up a small tubing flanger for the cooling hoses. Let me spend some money and do something easy. So fixed up the pipes for the front. Will made a spare. Will be using this for the tangle of hose when I get to the rear cooling. After the bead roll I hit them up with a scotchbright, and they look right as rain...
 

Attachments

  • P1020168.jpg
    P1020168.jpg
    47.3 KB · Views: 437
  • P1020169.jpg
    P1020169.jpg
    44.5 KB · Views: 429
  • P1020172.jpg
    P1020172.jpg
    29.6 KB · Views: 444

Sandy

Gulf GT40
Lifetime Supporter
As they say 'That was easy'. And now I had to get back under the dash and start figuring out where to run the electrical. Right now I am using 3 - AMP Series 3 CPC connectors for all the wires from the dash. Each has a different Pin configuration as well. The dash houses ALL wiring so no separate fuse block will be needed. I think some description is a previous post. The 3 connectors are mounted from the inside as the idea is the chassis harness directly connected to the bulk head connectors. The Dash has the connector end so the Dash and all wiring (well except for the brake light switch) can come out with the removal of 3 connectors. I'll get some close ups of the connectors. Most of the wires will head back via the cooling tunnel. I will have to get some wire sheath for that as well as more teflon wire... The second picture show the flange from the connector on the outside, but it will be on the inside as that is the twist off side and will be in the cockpit.
 

Attachments

  • P1020174.jpg
    P1020174.jpg
    30.5 KB · Views: 392
  • P1020175.jpg
    P1020175.jpg
    33 KB · Views: 442

Sandy

Gulf GT40
Lifetime Supporter
Worked on the Wire harness in the dash section. Decided to bench test it and guess what, didn't light. I had a single botched wire that works the master relay on the wrong side of the switched power buss and moved it to the always hot side and all came up looking good. Blinkers and dash lights, and a few other things were tested. Would have been a bummer to have to yank it to find this. I got some harness covering a split nylon mesh for the blob of wires. I'll get a couple of pics for that. I also added into the master relay circuit for the inertia switch and some extra circuits for later expansion. All of the AMP connectors are wired up and hopefully will reach the ones in the chassis. Next will be to work on a bit of the RCR under the dash to put in some nutserts/rivnuts for securing the harness with adel clamps from the bottom side.

Got the Battery Box from Summit Racing. It is from Taylor and I don't think they could have made it any cheaper with paper thin aluminum. Good for dragsters but it is thin. It is much smaller then a standard box (tight fit to the Odyssey PC1200) so I'll fix it up and likely use that, will have to open up the battery cable holes, as they look like they are for 4 gauge and I think the welding wire I use is 0 gauge so will be more hacks to the box.

That is about is. Inching in steps of 1/16'ths

Sandy
 
Back
Top