Keith Baker's Southern gt on the build

Hi Dalton,.
I see your point and did consider this.
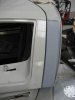
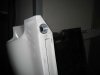
The dashboard originally was to be in a circuit car only and the minimum of gauges , switches etc were to be fitted. I then had a complete change of plan and decided circuits were limiting and an on the road car was decided. I could have thrown away the dash and gone all original but as you know 99% of the 40's you will see are replicas whether good or bad replicas.
The gauges in this dash were very expensive and not wishing to sell them off cheap decided to keep them. I can always change them later if need be.
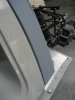
Most people who see the finished product will not know the difference and I personally like the look. We all like to personalise our cars whether by design or colour and I like the cill layout.
' I may yet get some nice deep shag pile and some flock wallpaper on the bulkhead '
It's a personal choice but your comments are very welcome thats why we have a forum.
Cheers.
 

Brian Kissel

Staff member
Admin
Lifetime Supporter
Hi Keith !!

I have to agree with you. It's your car,----- build it the way you want to. I think it is a beautiful piece of art. I look forward to each of your posts.

Regards Brian
 
Today I managed to finish the passenger side cill that was shortened and tidied ready for the paintshop.
The cill was final fit ( until I remove it again ) and fixed on the underside with M8 bolts, drilled through the fibreglass cill and into the main structure of the chassis.
Tapped 8mm holes at each end and at every 250mm in between.
The top of the cill was drilled and tapped with 6mm bolts.
Also started to cut and fit some edging trims around the front.
machined a couple of slotted plates for the rear deck pins,and a few other jobs as well.
I forgot the camera so no pictures I'm afraid.
I fitted the relay panel under the dashboard.Space is getting tight so I removed two rivets holding one of the wheel arch panels and made an alluminium bracket to support the relays this was then fixed, the fuses are still to be supported somehow.

Picture of relay panel, not a good angle though
 

Attachments

  • web 26 aug .jpg
    web 26 aug .jpg
    163.2 KB · Views: 808
Had a word with Mick at SGT about the immitation cill strips and he made a good point. He had seen some cars with machine pressed strips where persons get in and out sit on the cills and eventually the recesses dent and look tatty.
Although mine are not pressed in I can't see them denting.
Just a thought.
 

Malcolm

Supporter
What Keith? Like an original cill would? I would take the risk with the pressed ones anyday over the solid screw on ones. MHO of course! :)
 
Original ones are of course steel rather than aluminium. Best solution for alloy panels would probably be pressed in ribs with reinforcement underneath or just use thicker gauge alloy. I'm already considering if to do mine in a thicker gauge, ok so I haven't riveted them yet but already managed to make them slightly concave by sitting on them.
 
Lots of views !
Thing is all replicas are only replicas, we build them out of parts in kit form, therefore they are kits at the end of the day. I dont like the word kit, it sounds like a beach buggy of the 70's.
If I had posted the picture of the cill with the strips blended in everyone would say that I had the recesses rolled in good.
Each to there own !
Have a look at Glenn Masons Gulf GT40 the cills look good.
I was informed that my engine will be ready in the very near future. Damned if I'll put the spec on the forum yet as the opinions of everyone will differ from one end of the spectrum to another.

But I suppose that's what a forum is all about
 
A few updated pictures, one of the rear deck pin cover plates, there not finished, they will be thinned down on the lathe by a couple of millimetres then polished.
Also a few pictures of the edging trims around the front.
I ran out of trim so waiting for more.
Notice under the spider front passenger side I had to pack it up by about 4mm to get the doors flush.This will eventually be sikaflex sealed after paint and wont be seen.
The sikaflex will also seal the spider from any rain.
Cut and polished the " STICK ON " ally trims but I wont fix them until the very last.
 

Attachments

  • web aug 30 (11).jpg
    web aug 30 (11).jpg
    128.6 KB · Views: 766
  • web aug 30 (22).jpg
    web aug 30 (22).jpg
    110.6 KB · Views: 915
  • web aug 30 (23).jpg
    web aug 30 (23).jpg
    92.6 KB · Views: 824
  • web aug 30 (30).jpg
    web aug 30 (30).jpg
    83.3 KB · Views: 862
  • web aug 30 (24).jpg
    web aug 30 (24).jpg
    108.2 KB · Views: 858
Did a couple of hours yesterday evening, fitted the drivers side cill, now in final position.
As I have moved the standard position of some of the dashboard switches I have had to extend the wiring. For example " my cunning plan" the horn and screen washer push buttons are on the right but I have aquired IVA approved push buttons and placed them on the left outside of the 127mm area.
I purchased a small amount of matching colour cable and extended with a spade connection.
I'm also putting the two air con switches outside of the 127mm as these are soft rubber and SGT tell me they dont have a problem with these on IVA. !!!!!
The major arse ache at the moment is a small but significant misalignment of the rear deck against the spider, cant get it right so it's going to be a bodyshop job.
I will of course get it nearly there before they get it. It's one of those things that everytime you walk past it, it shouts out at you " fix me you lazy git ".
A little tip for fibreglass panels that are not quite there is to apply heat from a hot air gun around the area needing adjustment, then bend the panel just past where you want it , let it cool and It should have taken to the new shape.
Will post picture of this later as I'm off to Spain for a week.

Hasta La vista baby... I'll be back
 
Just a couple of pictures of the sound deadening pads.
These are Dynamat extreme as found through this forum. They are very self adhesive on one side and all that's needed is to clean the area where you want them, peel , stick and roller to press flat.
They stick like shit to a blanket anyway.
They wont look nice if you can see them but any surface thats practical and hidden will get the pads
 

Attachments

  • web dynamat  (2).jpg
    web dynamat (2).jpg
    188.4 KB · Views: 656
  • web dynamat .jpg
    web dynamat .jpg
    244.4 KB · Views: 643
I found that although the rear body aligned reasonably well, I had one area that was out by about 6mm and couldn't adust it.
This could be because the body had stood around for 3-4 years and may have distorted a bit.
Therefore I decided to make good the end result is more pleasing to the eye and is good enough before the bodyshop gets it.
I also decided to make my own body alignment pins / locators whatever you call them.
I want to get the shut lines reasonable and they are getting there.
I may need step up the time I'm spending on the car as my dealine for IVA was late October but this could be end November.
The engine is almost ready and will be Dyno'd next week it will breeze the 450 HP. I'll go up and watch that, I love to watch a new engine at 6-7k RPM !
The body catches are now in stock and I should have these in a couple of days.
The front and rear sections will need to be modified for these catches so more cut and carve.
Although the exhaust should only take about a week to make I have been told the camcoat is about 4 weeks.
This could hold the build up further !!!!
 

Attachments

  • web sept 15 (3).jpg
    web sept 15 (3).jpg
    57.4 KB · Views: 613
  • web sept 15 (8).jpg
    web sept 15 (8).jpg
    65.7 KB · Views: 631
  • web sept 15 (9).jpg
    web sept 15 (9).jpg
    67.4 KB · Views: 603
  • web sept 15 (15).jpg
    web sept 15 (15).jpg
    72.4 KB · Views: 658
I found that although the rear body aligned reasonably well, I had one area that was out by about 6mm and couldn't adust it.
This could be because the body had stood around for 3-4 years and may have distorted a bit.
Therefore I decided to make good the end result is more pleasing to the eye and is good enough before the bodyshop gets it.
I also decided to make my own body alignment pins / locators whatever you call them.
I want to get the shut lines reasonable and they are getting there.
I may need step up the time I'm spending on the car as my dealine for IVA was late October but this could be end November.
The engine is almost ready and will be Dyno'd next week it will breeze the 450 HP. I'll go up and watch that, I love to watch a new engine at 6-7k RPM !
The body catches are now in stock and I should have these in a couple of days.
The front and rear sections will need to be modified for these catches so more cut and carve.
Although the exhaust should only take about a week to make I have been told the camcoat is about 4 weeks.
This could hold the build up further !!!!

Looking good Keith. I know how it feels to have to wait around for suppliers etc, it's the one thing that frustrates me more than anything else. I ordered some snap-on tools last week and paid extra for next day delivery. I had an email yesterday telling me the tools will take a month to arrive, what a joke.

Trev
 
I can't afford Snap on tools Trev.... How the other half live.
Good news is SGT sent the catches,in each one there a mixture of original new old stock and a bit of modern manufacturing, they look good though, as they should for what they cost. Will post pictures when I take them!
I'm having a bit of a push at the moment so I had a day off. I cut one side of the front deck to extend the slot length of the body catches. At the same time reducing the width of the cut out by about 3-4 mm. Again will post pictures ASAP.
 
The new catches arrived and decided as this was going to be a messy job I would get it over and done with.
I managed to get all four recess slots altered and one catch fitted but it was not straight forward.
These two pictures show the catches and the stifner plate.
There nice looking catches,lots of dosh but I'm pleased with them.
The plate is just 3mm alluminium and is behind the catch.
Where the catch fixes to the body is a bit thin so the plate stiffens the catch and also packs it out by 3mm.
It dosen't show.
 

Attachments

  • web sept 21 (5).jpg
    web sept 21 (5).jpg
    237.5 KB · Views: 599
  • web sept 21 (31).jpg
    web sept 21 (31).jpg
    271.4 KB · Views: 557
As I said the front and rear deck cut outs for the catches are too short for these new catches therefore the slots need extending about 20mm in all the slot is now 110mm.
Also the slots are wider than they need to be so the plan is to lengthen and make narrower.
First you have to cut the bodywork, this I did with a 1mm slit disk on the grinder.
Then I made up three plates in 2mm alluminium, each one was measured individually the centre ally strip was then heavily scored on the body side, as was the body. the two were boded together with fibreglass matting and left for about 1 hour.
The two side strips were then cut to size, scored and bonded in again.
The back of the cut outs were also bonded in with fibreglass matting and they look like they originally did.
When all this looked good I set about the remaining three slots.
Finally the plates were tidied up and fibreglass was applied to the outside surface, sanded back ready for the bodyshop to finish.
All in all a good job out of the way.
I fitted one catch which proved to be a right B........d of a job.
The prevoius catches were drilled through into the chassis but the new catch fixing overlapped them and it was a right mess.
All the holes were welded up , ground flat and re drilled and tapped 5mm for the new catches.
 

Attachments

  • web sept 21 (17).jpg
    web sept 21 (17).jpg
    54.3 KB · Views: 541
  • web sept 21 (14).jpg
    web sept 21 (14).jpg
    83.5 KB · Views: 533
  • web sept 21 (20).jpg
    web sept 21 (20).jpg
    61.1 KB · Views: 500
  • web sept 21 (24).jpg
    web sept 21 (24).jpg
    131.4 KB · Views: 482
  • web sept 21 (26).jpg
    web sept 21 (26).jpg
    83.2 KB · Views: 515
Back
Top