
You are using an out of date browser. It may not display this or other websites correctly.
You should upgrade or use an alternative browser.
You should upgrade or use an alternative browser.
Norfolk Tornado
- Thread starter saxoncross
- Start date
Fantastic news. Congratulations ")
")
Keith Stafford
Supporter
Andy, again congrats, have you been out driving yet? How far in (errr out) did you have to move the front indicators? I may be OK, as I have another indicator lens in the centre of the lower aperture, beside the foggies. K
Brett James-McCall
Moderator
Yes Andy, same question here, as I think we are running the same micro indicators in the same position....
Thanks for the compliments guys, it’s an immense weight of my mine to get it through and it proves you can do it yourself, despite being told on a couple of occasions to take it to one of the specialists
The car’s backing the workshop now being stripped & prepped for painting, so unfortunately no chance to really drive it yet
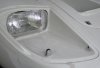
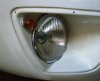
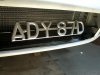
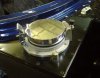
The attached shows where the front indicator ended up. I asked the inspector where he wanted them, he pointed, we drilled and he was happy – they aren’t even symmetrical!
I haven’t make my mine up yet what to eventually use, either the micro indicators where I originally had them or some small round ones in the corner of the spot light aperture.
Regards,
Andy
The car’s backing the workshop now being stripped & prepped for painting, so unfortunately no chance to really drive it yet
The attached shows where the front indicator ended up. I asked the inspector where he wanted them, he pointed, we drilled and he was happy – they aren’t even symmetrical!
I haven’t make my mine up yet what to eventually use, either the micro indicators where I originally had them or some small round ones in the corner of the spot light aperture.
Regards,
Andy
Attachments
Andy,
Do those micro units emit anything off to the side?? You may want to add some on the side of the front clip.
I think most people that see the car from the side, would be distracted and never see your "blinkers". I like for those coming from the side to know my intentions to turn.
Bill
Do those micro units emit anything off to the side?? You may want to add some on the side of the front clip.
I think most people that see the car from the side, would be distracted and never see your "blinkers". I like for those coming from the side to know my intentions to turn.
Bill
Hi Bill,
I've got some really bright LED side indicators in the same position as on yours, which are a UK legal requirement. These will be staying on the car for the reasons you've highlighted.
Regards,
Andy
I've got some really bright LED side indicators in the same position as on yours, which are a UK legal requirement. These will be staying on the car for the reasons you've highlighted.
Regards,
Andy
Despite being out of the country on what seems to be a regular basis, I’m still keep trying to keep the ’40 moving forward. Visiting the Stoneleigh show a few weeks ago was a good mo-jo booster to crack on with it, but I’ve now resigned myself to the fact that it won’t be going down to Le-Mans in July.
In the meanwhile the jobs list is slowly reducing
Andy
In the meanwhile the jobs list is slowly reducing
- Eye brows fitted
- Shut lines finished
- Lamps covers trimmed
- New side repeater fitted
- Seats modified – whilst they were comfortable, I felt I was sitting too high, so an 1” was taken out of the base foam
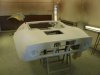
- Deep front vents fitted – easier said than done, as the panel pulled during curing causing it to sit proud of the body by ½”. Cut it off & start again!
Andy
Attachments
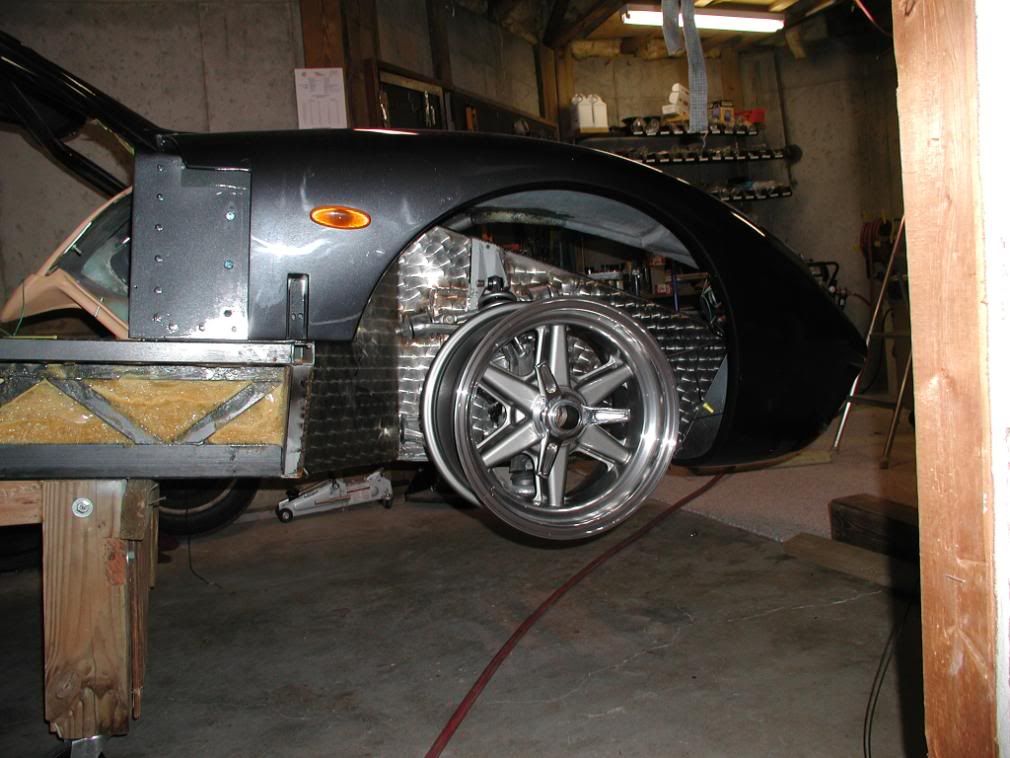
Again, works been getting the way of regular progress on the ’40 (currently writing this in South Africa) and I’ve been waiting for last several weeks for my slot at the paint shop to materialise. The previous car delaying my slot was a Jaguar XKSS, based on one of Classic Car Development’s tubs from New Zealand, but as the paint shop specialises in composites and aluminium bodies, I know it’s in good hands.
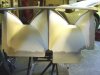
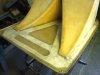
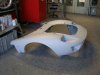
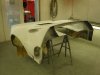
I did as much of the body prep as I could, mainly setting all the surface levels, shut gaps and keying the surface for the first coat of primer. However I was shocked how poor the front & rear clams were for distortions and sinks. About 20 hours of filling & sanding has had to go into these 2 panels alone to give an acceptable result. As the car’s going to be a dark colour the body’s got to be spot on to give a good finished result.
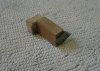
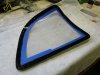
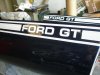
I added the black border to the head lamp covers. After reading how others did it, it seems complicated (reverse masking etc) so I looked for a simpler solution of a small jig to trim at a fixed distance from the outer edge. The attached was made in a few minutes using the blade from a modelling knife. The results worked well and I used Tamyia acrylic paint out of my old modelling box
In the mean while other jobs resolved includes:
Regards,
Andy
I did as much of the body prep as I could, mainly setting all the surface levels, shut gaps and keying the surface for the first coat of primer. However I was shocked how poor the front & rear clams were for distortions and sinks. About 20 hours of filling & sanding has had to go into these 2 panels alone to give an acceptable result. As the car’s going to be a dark colour the body’s got to be spot on to give a good finished result.
I added the black border to the head lamp covers. After reading how others did it, it seems complicated (reverse masking etc) so I looked for a simpler solution of a small jig to trim at a fixed distance from the outer edge. The attached was made in a few minutes using the blade from a modelling knife. The results worked well and I used Tamyia acrylic paint out of my old modelling box
In the mean while other jobs resolved includes:
- Front number plate mounting
- A/C lines sorted
- Minor electrical jobs resolved
- Suspension reset to a more realistic ride height
- Applied for registration and first tax disc
Regards,
Andy
Attachments
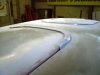
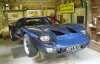
I’ve now picked the car up from the paint shop and to say that I’m pleased with the end results is an understatement. The guys have done a great job in sorting out all the irregularities in the body and whilst the paints more metallic than I was expecting, it does look brilliant in the sun.
Paying the bill was painful, especially as it’s been the largest bill since buying the car in the first place, but I always knew this would be the case and the paint has got to be right, as it sets the first impressions.
Anyway a bit of a teaser shot, whilst I get on with the re-assembly :thumbsup:
Regards,
Andy
Attachments
Brett James-McCall
Moderator
That looks fantastic Andy!
Just thought I'd have a look at the forum, not been on for a while.
Well andy I see your now a member of the elite road going gt40 owners.
Now the hard work starts. Stripping out and putting your stamp on it.
When mine passed IVA in a September the car was not on the road until February and it was snowing so it was a few months after that before it could be driven
You feel like ten tons have been lifted of you when you pass and the real enthusiasm to get it finished 100 percent
But there never finished, there's always a bit to do ,trust me
Well done Andy your not just light at the end of the tunnel, your through the tunnel and heading for the open road.
Keith Stafford
Supporter
Looks good Andy, I'm keen to see the assembled car.
Hi all,
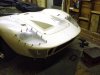
I originally thought I’d have it back together in a few weeks, but it now clearly not the case. There’s been so many little jobs that need doing or bits I’ve now decided need re-doing and this excludes the separate list of jobs after the cars on the road!
Registration was a lot easier than I anticipated; again the frustrating point is that I’ve been paying the road tax on in since the beginning of July, despite asking for an August start
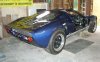
Anyway here’s where it is at present. Next big job is to get the front screen back in – properly this time :laugh:
Rgds,
Andy
I originally thought I’d have it back together in a few weeks, but it now clearly not the case. There’s been so many little jobs that need doing or bits I’ve now decided need re-doing and this excludes the separate list of jobs after the cars on the road!
Registration was a lot easier than I anticipated; again the frustrating point is that I’ve been paying the road tax on in since the beginning of July, despite asking for an August start
Anyway here’s where it is at present. Next big job is to get the front screen back in – properly this time :laugh:
Rgds,
Andy
Attachments
Similar threads
- Replies
- 4
- Views
- 2K