Rcr 40-31

Chris Kouba

Supporter
Fran sent me a few pics and I thought I'd share them. Not huge news yet, but the anticipation is truly building. My schedule necessitates delivery in January but it'll still be a Merry Christmas!

Looking forward to starting the actually build portion of the build thread!

Happy holidays to all,
Chris
 

Attachments

  • PRI pics 029.jpg
    PRI pics 029.jpg
    139.7 KB · Views: 4,952
  • PRI pics 031.jpg
    PRI pics 031.jpg
    146.4 KB · Views: 4,758
Re: Rcr40-31

Chris
Congrats!! You have made a wise choice. You won't regret your decision. If I can be of any help, don't hesitate to ask questions.

Cheers
Bill D
 

Dutton

Lifetime Supporter
Re: Rcr40-31

A Merry Christmas indeed.

Many would agree that there's nothing quite like a couple of pics from Fran to perk up one's day. Very much looking forward to watching your build, my friend.

The only challenge now is finding a way to keep you off that bike until the car's finished... :)

Best regards,

T.
 

Chris Kouba

Supporter
Re: Rcr40-31

Thanks guys. Bill- if I'm in the neighborhood, I'll drop you a line and invite myself over. Feel free to do the same (Phoenix).

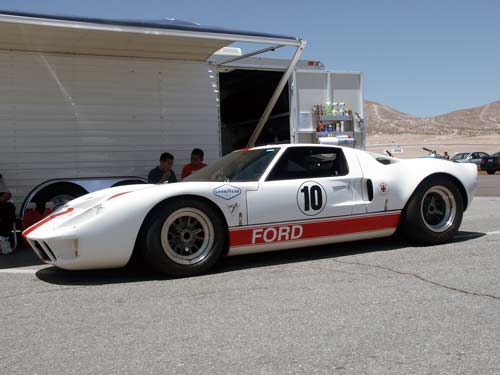
Plans for the car are a 350hp XB3 302 w/EFI through a ZF. Color scheme is going to look an awful lot like the opposite of Dean's car- white with red sill stripe. I'm not certain about the over the top stripe yet or if it'll get a red mustache yet either. Wheels will be 15" BRM's which I am strongly thinking of blacking out, ala Ron McCall. I think it'd all look pretty good.

Actually, I just remembered John Brice's car, #1043. It will look a lot like that one. Imagine this with completely black BRM's (I have no Photoshop skills):

GT40_1043_a.jpg


The theme for the build will be very basic. Except for AC and the EFI, it'll be pretty raw. I'll save complex paint jobs and intricate things for my "next" build. I ripped into a 67 Fastback with my dad while in college, but this will be my first build of something from the ground up. Thankfully it looks like a very strong platform to start with so I can already see it going well.

The only other thing I will be doing with it is putting in a robust and practical cage as I do want to see some track time with it. I had been corresponding with a local NASA inspector and things look like they can be worked through. The next step is to get the chassis here and work through a plan for the OK. They were open-minded about the whole thing though so I should be able to get something approved.

So things are coming together- except for my bike Tim. I need to replace a few things after my antics last week (helmet, shifter) and there were a few additional things (rims, brakes) which have been leading me to replace it altogether. Long story short- not riding until I get all that figured out. Once the car shows up, I doubt I'll be leaving my garage until it's finished!
 
Re: Rcr40-31

Looks good! Soon the fun begins.

BTW, you have to stay on that bike! You can't make the seats any bigger ;)

(My riding has really declined since I started getting involved in this stuff).
 

Chris Kouba

Supporter
Re: Rcr40-31

Spent the rest of the time with my dad working on final alignment of the body since I had the extra set of hands. It was quite interesting. I've never done this sort of thing before and obviously it's complex.

The panels are very accurate, down to the asymetrical features which make "alignment" a bit of a misnomer. I figured on this and pretty much carried on with the business but wondered if I was doing the right thing. This is the first time I've ever done such a feat.

My dad and I got through it and had the spider aligned- or so we thought. We started with the front and rear clips and had to re-do a lot of our work. I was getting a little... frustrated. I pulled out the phone in a moment of desperation and put a call in to Hersh. I left him a message saying I needed to validate what I was doing and asked if he'd be willing to swing by. The work week came and I let it go for a while.

Hersh was by Thurs and we started back from scratch, ironically getting just about right back to where we started. That's when he gave me the "it's a 1960's racecar and it's not square" speech. We (he) got a fit I am happy with. I will need to close up some gaps on the doors though as I put any errors there and left the spider & clips as close as I could to original.

Right now I am working on the doors and getting them to hang and swing. Holy crap it's a pain in the butt. And I absolutlely massacred the passenger door handle as well. I'm sure people who've built them already know this but it's a little difficult to get a drill bit in there to get the hole for the pivot drilled. Any recommendations before I deface the driver's side? What tool do I need?

Beyond that, positive motivation has been found in the driver's seat. I truly FIT!! I am 6' 2" and was concerned about sitting and fitting with a helmet. I have found a comfortable position where I see over the dash, with a half inch above my helmet, with room for a cage, a clear view of all gages, legs fitting nicely in the footwell and steering wheel right where I want it. Fran hooked me up with a seat base that isn't as tall as the normal one and it looks right on for me. I can't explain the happiness as this all came together!

Friday rolled around and I was back out in the garage. The phone rang and Hersh was taking lunch orders on his way over and wanted to know what I'd like. He helped for another few hours as we worked more on the doors and their swing. We also got the dash fitted and worked through a few other issues as well.

Pics follow. It was really nice having the success come to mitigate the frustration! It was even better having the experienced set of eyes and hands around to help a total newbie through the most laborious and time consuming portion of the build.

Again, thanks Hersh.
 

Attachments

  • aP1010011a.JPG
    aP1010011a.JPG
    42.4 KB · Views: 4,340
  • aP1017735.JPG
    aP1017735.JPG
    41.5 KB · Views: 4,249
  • aP1017736.JPG
    aP1017736.JPG
    46.9 KB · Views: 4,401
  • aP1017745.JPG
    aP1017745.JPG
    43.5 KB · Views: 4,111
  • aP1017746.JPG
    aP1017746.JPG
    43.8 KB · Views: 4,041
  • aP1017747.JPG
    aP1017747.JPG
    48.3 KB · Views: 3,943
  • aP1017749.JPG
    aP1017749.JPG
    41 KB · Views: 3,849
  • aP1017754.JPG
    aP1017754.JPG
    42 KB · Views: 4,230
  • aP1017759.JPG
    aP1017759.JPG
    39.4 KB · Views: 3,857
Re: Rcr40-31

DAMN! I've had my car almost a year and I still haven't aligned the body or hung the doors. Great progress!!
 
Re: Rcr40-31

On the door handles I drilled the hole out way to big and then glassed in some pipe to act as a sleeve. I think you can make it out in this picture:
 

Attachments

  • IM000470.jpg
    IM000470.jpg
    65.8 KB · Views: 3,723

Howard Jones

Supporter
Re: Rcr40-31

All real GT40 men do their own gaps. Welcome to the brotherhood! You will never look at a GT40 the same way again. The first thing I always look at first is the gaps.

Don't worry too much about fiberglass work. You can always just grind off the mistake and do it again

There is a huge amount of advice on doing what you are into right now. Hersh would be enough by himself but if you need any more help, just ask. I found ALL of the pitfalls when I did my car and ALL of the corrections here on this forum.

Gaps are a matter of 90% patience and 10% adding fiberglass. No matter how off they are, you can fix them. Go for a overall fit that gets as much of the gap length (total length of gaps on car) as close to a 3/16 - 1/4 width as possible. Then close the wide spots. I would recommend against cutting anything off unless it is of a last resort. PUT DOWN that saw big fella!

Get the doors as close as possible and set into the spider first then fit the front and lastly the rear clip and sills. Then it's back and forth between all three to achieve the most correct gap length idea. Don't get all fired up about measuring things. Nothing is the same side to side anyway.

Check out Tap Plastics for brochures on fiberglass products and other information. They really cater to the hobbyist. Drop by a store and have a look around.

You will need a orbital sander, flat boards for sanding filler, and a air-board sooner or later and rolls of 2" sand paper.

Add fiberglass to edges to close gaps in layers. Stand the piece on end with edge up. Lay 1/2- 3/4 " strips of matt soaked in resin on the edge and and let harden. You can do about 3 or 4 layers at a time this way. Then go back and add a few more until the gap is closed. Mask the piece with newspaper to prevent dripping resin from adding to the work. When you get it real close use a sander to trim off the excess.

Once the gap widths are done then add more matt where necessary to aline the panel surfaces. The resulting overlap at the edge is very strong. You can really get a lot done quickly this way and end up with a very strong edge.

A LIGHT coat of filler can be used to FINISH the edge. DO NOT use filler to close gaps, only to finish the surface, and only after all the fiberglass work is complete. I really like VET PANNEL ADHESIVE for filler. It is very strong. Much harder than body filler. It is also much more work to sand and really uses up sand paper but it is also much less likely to ding or chip off. This is really important around the edges.


Have fun!
 

Chris Kouba

Supporter
Re: Rcr40-31

Fran- I picked the car up on 1/10 (you of all people should remember this!) and you're looking at what roughly 2 wks has done (about 8 or 9 days of the car actually residing in the garage). The body work stuff is laborious and can be frustrating but once the doors are finally hung and trimmed, just cleaning up the gaps will be all that's left.

Through all this work however, I am leaning toward actually painting it now- especially if I'm doing the body work stuff. It'll be a learning experience for sure but everything on this project will. I am going to start obsessing about what colors now.

Bill - You might not have the body hung but you're well ahead of me on other issues. I'm sure you'll grow to love it as much as I am. Nice progress by the way.

Jonathan - Thanks for the tips. I have a feeling I am about to become an expert in fiberglassing.

Howard - that's Hersh in the picture and we're in the process of trimming down the dash so the A-pillars can slot in. That saw is getting little use in reality. Between Fran's assembly guide and Hersh's experience, we have arrived exactly where you indicated- as even as possible on the gaps all around the car, with the exception of the doors. I am working on getting them placed precisely and then will fill in the gaps. The back of the door is where it seems largest and will need the most attention. Like you said though, I am confident it will mostly be patience and persistance to acheive the desired results. Thanks for the pointers on the gap fill as well, Gorilla Hair was what Hersh recommended. Any thoughts on that?

I'll be back at it on Thurs, Fri and part of Sat. Time to see how patient I can be.

Cheers,
 

Alex Hirsbrunner

Lifetime Supporter
Re: Rcr40-31

I'll second Howard's recommendation. I use Evercoat Vette panel adhesive/filler for non-structural leveling. Gorilla hair and similar long fiber products are fine, but I think they are even harder sanding and still usually require a skim coat of body filler. Neither should be used to fill panel gaps though. Here's the .pdf for the Evercoat product.

Regards,

Al
 

Attachments

  • VETTEPIS.pdf
    123.6 KB · Views: 894

Rob

Lifetime Supporter
Re: Rcr40-31

Hey Chris,
Looking good man...
I support Alex's comments re Gorilla Hair. It is not a top coat product. Don't get me wrong, I use the stuff for certain applications. But generally for material fill. Usually repair work and not projects such as these. The Vette panel adhesive is good stuff.
 
Re: Rcr40-31

I've successfully used Gorilla hair for door edges.
As far as I can tell it's strong enough and easier to build up (especially in small areas) than layers of cloth. Of course you still need putty skim coat,
but you need that with cloth as well. IMHO there are many ways/products to achieve the same end result....just a matter of what each is comfortable with.

MikeD
 

Chris Kouba

Supporter
Re: Rcr40-31

More fun with fiberglass this week.

Gauges in - check
Rear clip vent cut out - check
Taillights installed - check
Pedal box built up - check
Headlamp and driving light covers fit up - check
Headlamp holes cut out - check
Box with bunch of wires in it opened - check (what to do with it next???)
Filler caps located - check

Looking more and more like an actual car - priceless

Also included is additional random imagery, like more wiring mess and my home-made totally ergonomic front clip workstation. Enjoy, and as usual any suggestions appreciated.

Also FWIW, my handheld electric angle grinder did wonders on trimming the lamp covers. It was magical. I stenciled the headlamp openings with a piece of paper and cut it to very near net shape and finished the job with a hand file to trim it up. Work? Yeah, but I did both sides in about an hour and a half (including setup of that high tech egro fixturing).

The wiring and bodywork is what I have been dreading. So far so good, but credit a strong package off the shelf which has so far enabled me to be where I am already.
 

Attachments

  • 1P1010023.JPG
    1P1010023.JPG
    77.8 KB · Views: 3,559
  • 1P1010012.JPG
    1P1010012.JPG
    39.5 KB · Views: 3,356
  • 1P1010033.JPG
    1P1010033.JPG
    89 KB · Views: 3,611
  • a1P1010003.JPG
    a1P1010003.JPG
    73.9 KB · Views: 3,323
  • 1P1010017.JPG
    1P1010017.JPG
    66.3 KB · Views: 3,310
  • 1P1010003.JPG
    1P1010003.JPG
    73.2 KB · Views: 3,261
  • 1P1010014.JPG
    1P1010014.JPG
    87 KB · Views: 3,546
  • 1P1010015.JPG
    1P1010015.JPG
    70.9 KB · Views: 3,168
  • 1P1010038.JPG
    1P1010038.JPG
    53 KB · Views: 3,224
  • a1P1010002.JPG
    a1P1010002.JPG
    71.9 KB · Views: 3,375
  • 1P1010024.JPG
    1P1010024.JPG
    100.8 KB · Views: 3,086
  • 1P1010026.JPG
    1P1010026.JPG
    99.8 KB · Views: 3,766
  • a1P1010001.JPG
    a1P1010001.JPG
    77.5 KB · Views: 3,148
Re: Rcr40-31

Excellent progress Chris!! You're really coming along. I was going to do my lights this weekend but the rainy weather prevented me from doing so. I see you have your tach rotated 90* also - excellent!

If you need more information on the brake ducts I made, let me know and I'll send my information along.

And any other RCR builders who want the information, just let me know.

Bill D
 

Ron McCall

Supporter
Re: Rcr40-31

Chris,
Great progress! You are really smoking along!
One suggestion ,replace the master cylinder fittings with banjos.
It makes hooking up the lines MUCH easier!!!
I have the p[art #s if you need them.
 

Chris Kouba

Supporter
Re: Rcr40-31

Thanks gents, things have been going rather well this week.

Full disclosure- the lights are in the holes but not yet actually mounted. They're taped in currently but I wanted the gratification of seeing them in the proper place. I'm saving the fiberglassing to be done at one time and I also need to fab up the mounting plates as well.

Regarding the pedal box, I'll need to do a little modding of how the clutch master mounts as where I want it puts the cylinder in the space of the lower left A-arm's front inboard mount. Still thinking up how to deal with that one and I'd be open to suggestions. I will definitely take you up on the P/Ns for the banjo fittings, Ron. That was something I saw as soon as I tried to set the pedals where I wanted them.

Unfortunately the body situating isn't quite finished yet. I have the hinges mounted robustly and the doors are swinging well but I think I can do a little better on their alignment so I'll get at it over the weekend if I'm around.

I'm still a few days from worrying about brake ducting Bill, but when you get a minute feel free to send it my way. Thanks in advance. It looks pretty sweet!
 
Back
Top