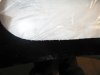
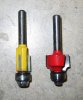
I got the borders of my side windows painted. I used the poly-carbonate paint from Jerry Bickel.
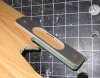
Per the instructions on the can, once you tape off the border you need to scuff the Lexan and spray numerous light coats. That keeps the paint from running under the tape.
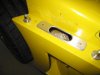
The only instruction on the can that you should not follow is Step 6 that says "Allow 24 hours for paint to thoroughly dry before removing the masking tape". Against my better judgment, I waited 24 hours and had a very ragged edge. The paint has an elastic quality, that rips unevenly when the tape is removed. I tried a razor to cut a separation line to reduce the uneven ripping, but no luck. I ended up remasking and repainting the border.
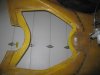
Pull the masking tape off while the paint is still tacky and you will get a smooth edge.
Per the instructions on the can, once you tape off the border you need to scuff the Lexan and spray numerous light coats. That keeps the paint from running under the tape.
The only instruction on the can that you should not follow is Step 6 that says "Allow 24 hours for paint to thoroughly dry before removing the masking tape". Against my better judgment, I waited 24 hours and had a very ragged edge. The paint has an elastic quality, that rips unevenly when the tape is removed. I tried a razor to cut a separation line to reduce the uneven ripping, but no luck. I ended up remasking and repainting the border.
Pull the masking tape off while the paint is still tacky and you will get a smooth edge.