Rcr 40-31

Chris Kouba

Supporter
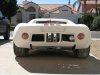
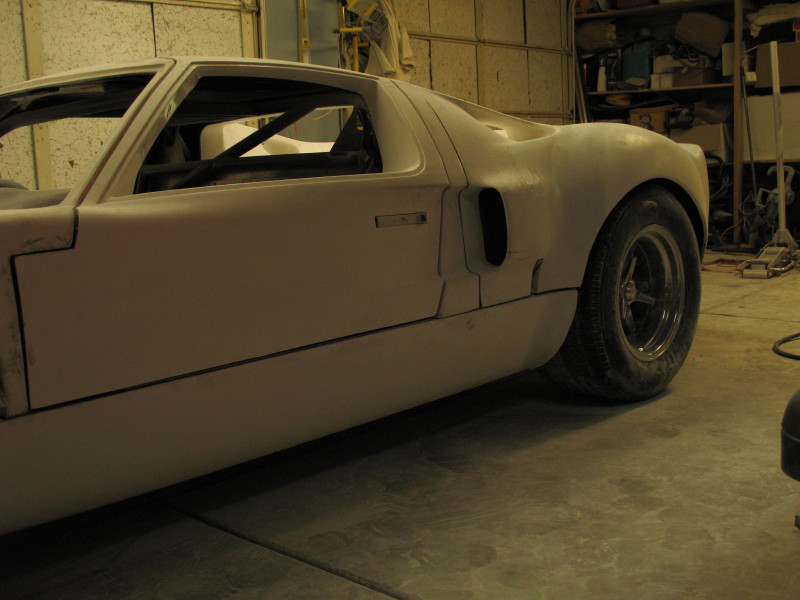
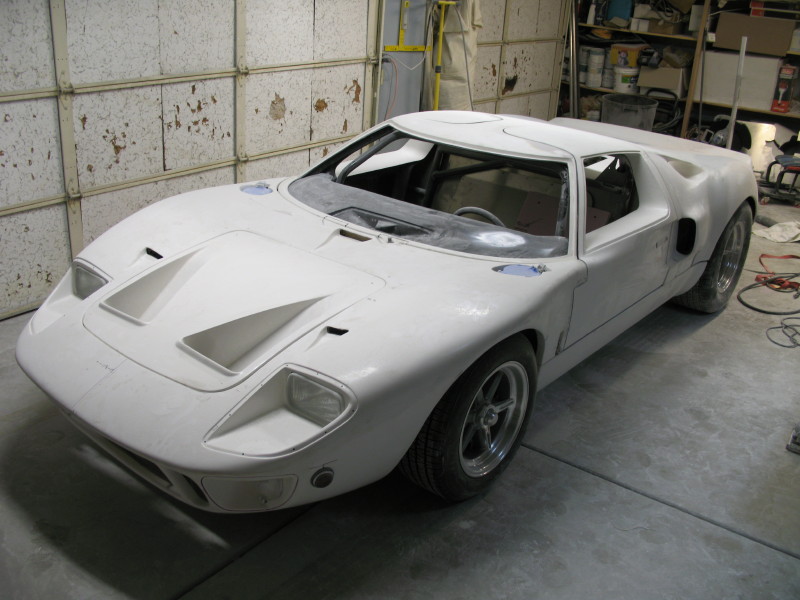
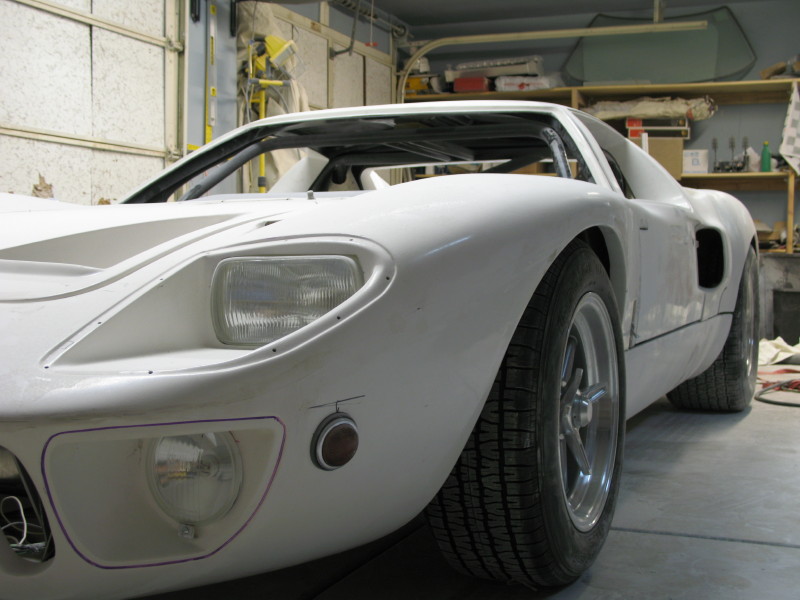
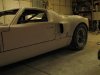
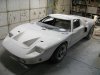
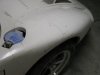
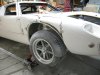
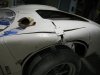
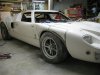
Sill extensions mounted. I hit it with a little white primer to get the feel of what it'll look like. Then I started sanding and then with the bondo. That's going to be some labor intensive stuff.

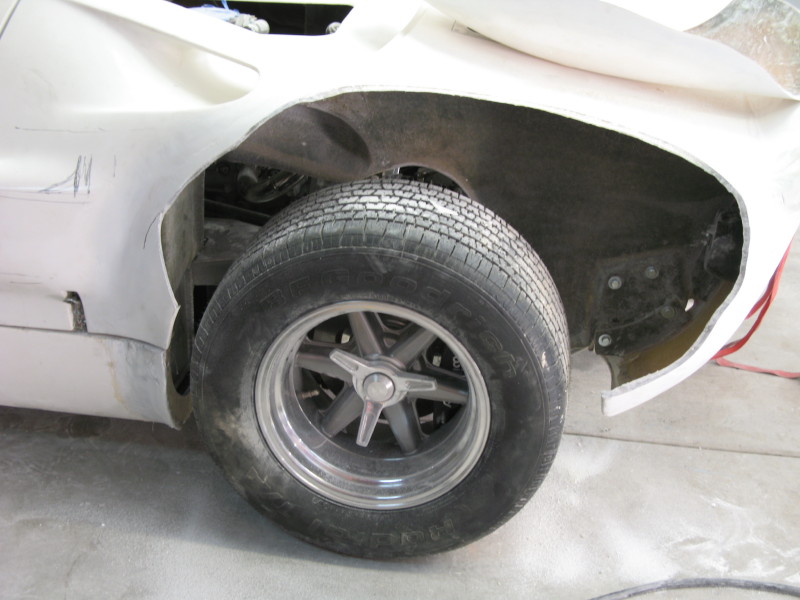
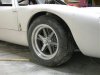
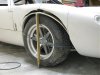
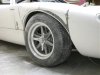
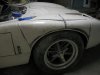
Martin - These are the 2"/side flares from Fran and not Gulf sized. I think they look great and still allow me to use a 15" wheel under a flared rear clip without going to race rubber. Thanks for the encouragement (yours are looking great too BTW), but I have a feeling I've only just begun.
 

Attachments

  • hi view 1.jpg
    hi view 1.jpg
    36.1 KB · Views: 1,637
  • low view 2.jpg
    low view 2.jpg
    41.4 KB · Views: 1,633
  • low view 1.jpg
    low view 1.jpg
    36.9 KB · Views: 1,640
  • closer view.jpg
    closer view.jpg
    34.8 KB · Views: 1,706
Chris,
I should have read Frans post stating they are not Gulf flares. I see now they are not, but i still like them a lot.The profile looks really nice from sill to arch, you've done a good job there. Going with the large spot lamps also. I'm looking forward to seeing more progress. I found the bodywork painful, but ultimately rewarding. I can see the light at the end of the tunnel now and you are not far behind me on that score. Keep grafting. ...:D
Martin
 

Chris Kouba

Supporter
One step forward, two steps back...

On the rollouts for the pictures, I noticed the rear clip wasn't level to the ground. I figured it was an illusion, but after looking again, I got out the tape measure and started investigating. Sure enough, the left side was about an inch lower than the right.

After my 4 months away, looks like things settled. Before committing the flares, I set the ride height and made sure the gaps were what I wanted but I didn't check the basic squareness of the clip to the ground. Ugh! Once corrected, the flare was an inch higher and I don't want the uneveness.

So what to do? I always wanted to do something like the MKII rear support and create some luggage space (much like Dave's RCR MKII just posted this morning- looks fantastic, BTW!). I took this as the opportunity to do so. I picked up some square tube, got out the welder and chop saw and went at it.

The pics follow, the first one showing the twist (take a look at the ovals on the top vent panel, comparing right to left) and then a few of my new subframe. I still have a little reinforcement to do, but it's already sufficiently rigid to get the job done. It's pretty cool what a protractor, a tape measure and some common sense will get you.

Once the clip has settled on its new digs for a little while, I will figure out what to do about the flares. If anyone has suggestions, fire away. I'm all ears.
 

Attachments

  • IMG_2096.jpg
    IMG_2096.jpg
    45.4 KB · Views: 1,505
  • IMG_2109.jpg
    IMG_2109.jpg
    58.2 KB · Views: 1,566
  • IMG_2114.jpg
    IMG_2114.jpg
    46.6 KB · Views: 1,475
  • IMG_2115.jpg
    IMG_2115.jpg
    43.3 KB · Views: 1,439

Chris Kouba

Supporter
More steps forward! The driver's flare didn't settle after I had reset the clip with the rear panel square(-ish) to the ground so I decided it needed to be moved. Nobody seemed to have any suggestions here either.

The car when I woke up this morning:

IMG_2096.JPG


By 10am the clip was cut out. This took a little courage.

IMG_2119.JPG


IMG_2121.JPG


Before 1130 it was screwed in place.

IMG_2125.JPG


Spent the rest of the afternoon generating pink snow and fiberglass dust.
Getting closer:

IMG_2133.JPG


And the final product for the day:

IMG_2137.JPG


IMG_2140.JPG


The funny thing is how quickly this one went- from pulling it off the car to resetting it and filling. I was clean and having dinner with Bethany by 7p or so. Third time's the charm I guess.

IMG_2145.JPG


Next steps are back to the finalizing the body gaps and getting all the rest of the fiberglass where it belongs. It was an incredibly productive day and my skills with the glass are improving exponentially with each endeavor. I might even roll it outside for pics in the sunshine tomorrow!

edit: Linked pics not showing up. Added them as attachments.
 

Attachments

  • IMG_2121.jpg
    IMG_2121.jpg
    45.4 KB · Views: 1,155
  • IMG_2125.jpg
    IMG_2125.jpg
    29.6 KB · Views: 1,163
  • IMG_2133.jpg
    IMG_2133.jpg
    50.6 KB · Views: 1,129
  • IMG_2137.jpg
    IMG_2137.jpg
    33.3 KB · Views: 1,114
  • IMG_2140.jpg
    IMG_2140.jpg
    43.5 KB · Views: 1,111
  • IMG_2145.jpg
    IMG_2145.jpg
    40.6 KB · Views: 1,161
Chris,

Most people that skilled in fiberglass work at a GM Auto Body Dealership (think Corvette).

Your progress in correcting the misalignment is amazing. I would not be surprised if other forum members request lessons on fiberglass repair.

Looks very good to me. Good luck, and keep us filled in on your ongoing work progress.
 

Rob

Lifetime Supporter
Way to go man..... lookin good. See, I knew you'd do the right thing... and be glad that you did. Now you can look at it forever and be happy. :)

Excellent...!
 
Chris,

I forgot to ask in my earlier post.......how are you doing for selecting a color combo?

I think the Essex Wire Team Colors would look very, very nice on your GT40. But the stripe as used on the Gulf cars would also look great.

As always, thanks for your updates, and keep on plugging away!!!
 

Chris Kouba

Supporter
Hey Gary-

The two leading contenders are the Essex-Gulf combination and what I'll call the Shelby-Gulf combination pleasantly represented by 1036 (Guardsman blue with a Wimbleton white Gulf stripe). I think the car needs metallic paint to highlight the shapes so the blue appeals but I like the white and red. I also haven't ever seen it on a car before (doesn't mean it hasn't been done but it'd be cool to have my own scheme). I was also thinking about blacked out wheels with the E-G colors.

So, no decisions but narrowed down a bit.

Hope you're doing well!
 

Attachments

  • 1036-002.jpg
    1036-002.jpg
    70.9 KB · Views: 1,253
  • RCR40-31 Essex-Gulf.jpg
    RCR40-31 Essex-Gulf.jpg
    44.5 KB · Views: 1,183
Chris,

I really like the Blue/White stripe example you posted above. My personal choice would not include the rounels, however......but the Blue/White stripe does look nice.

I can see where a White car with a Red stripe would be good looking also. I am surprised someone has not put a GT40 together with that combination, so some full scale pictures could be viewed.

Is someone out there with photo shop or some kind of computer program that can change the color on a car for viewing purposes?
 

Randy V

Moderator-Admin
Staff member
Admin
Lifetime Supporter
Hi Chris,

Great minds think alike! I'm currently planning on the Blue/White very similar to the one shown for mine.. :)
 

Chris Kouba

Supporter
Randy,

A number of other small but nice pics of the scheme are HERE. Their main GT40 site (Racing Icons) has neat pics showing nice detail of a few GT's, including 1076.

I really like both of the combo's I posted. I've found the paint selection to be the toughest decision of the build.
 

Chris Kouba

Supporter
Couple of projects going on lately:

I wanted to do something a little more specific for my seat to get as much headroom as I could with the cage and helmet plus I wanted it molded to me. I had tried a number of different ways to accomplish this (off the top of my head, I can think of 3 times I had tried already). This time I was going to win!

The synopsis: I fabbed up a tube frame for the seat, stuck it in a big bag, placed it in the car, poured some 2 part foam in the bag and sat my butt in it. The foam formed to my backside inside its bag and enveloped the steel frame as it expanded. I have tabs on it to be able to bolt the seat to the chassis.

After the foam cured (only about 5 min, and it got WARM while it set up), I glassed it with a layer of cloth. I am still undecided about how to actually finish it but I am pretty stoked with how this one came out. I think once I have a good thick layer of glass on it, I'll send it to an upholstery shop and get it done nicely.

The other project stemmed from my work on the rear flares. Now that I had the rear fenderwells nice and tightly trimmed to the tires, it made me focus on the fronts. Everyone knows that these cars have all lived "interesting" lives and they were made a long time ago. End result? The mother car's race history and repairs coupled with a generation of mould making and my mounting job gave me a car with the left front wheelwell being about 1.2" lower than the right.

After tackling the rear flares, realizing I screwed up and then doing the one over, I decided that since I had put THAT much effort into it I would make the front match as well.

So in another moment of "What am I thinking???" the sawsall came out and sliced through some VERY thoroughly thought out cut lines. In the end I only made one slice a little too wide and everything went pretty well. I had spent a bit of time in the garage lately just staring at the clip and thinking about how I was going to cut it. I was also thinking about why I wanted to cut into a perfectly good clip, but in the end I guess my obsessiveness won out. If you compare the first shot of the wheelwell with the last one, it's clear as to how drastic the change is. It's looking a LOT better!

So yep, I've been busy. I (obviously) still have a lot of work to do to get it back to where it was but I am very glad I took the time to do it. My goal is to be in paint by the end of the year. We'll see what happens...

Hope everyone had a good Thanksgiving. I did!
 

Attachments

  • IMG_2507.jpg
    IMG_2507.jpg
    47.1 KB · Views: 1,064
  • IMG_2510.jpg
    IMG_2510.jpg
    37.4 KB · Views: 1,010
  • IMG_2511.jpg
    IMG_2511.jpg
    44.9 KB · Views: 965
  • IMG_2513.jpg
    IMG_2513.jpg
    30 KB · Views: 1,004
  • aIMG_2475.jpg
    aIMG_2475.jpg
    33.5 KB · Views: 968
  • IMG_2476.jpg
    IMG_2476.jpg
    21.6 KB · Views: 941
  • bIMG_2479.jpg
    bIMG_2479.jpg
    39.1 KB · Views: 1,015
  • IMG_2482.jpg
    IMG_2482.jpg
    42.7 KB · Views: 949
  • IMG_2485.jpg
    IMG_2485.jpg
    31.6 KB · Views: 1,004
  • cIMG_2493.jpg
    cIMG_2493.jpg
    32.6 KB · Views: 982
  • IMG_2498.jpg
    IMG_2498.jpg
    42.2 KB · Views: 980
  • IMG_2504.jpg
    IMG_2504.jpg
    31.4 KB · Views: 1,007

Randy V

Moderator-Admin
Staff member
Admin
Lifetime Supporter
:eek: ((YIKES))!!!! :eek:

You need to meet a fella that goes by the handle "HOOFA" on the ffcobra.com site!

I sure hope this turns out as well on the front as it did on the rear...

I've been measuring the body on mine for symmetry and have found it to be very close so far. Unless I'm measuring in the wrong spots.. As you pointed out - these bodies were from a mold/buck that was an original competition car.

-edit- BTW, nice job on the seat! There was a thread on one of the competition forums I've been on for a number of years now about this way of making a seat. One fellow got some pretty bad burns from the catalytic reaction being so intense that it actually started melting the bag in spots. Turned out he had used Home Insulating foam...
 
Back
Top