Always do a test panel ! I learned forty years ago. I was painting a Can Am McLaren for Sam Posey. The car came from McLaren painted red. Sam wanted the car red, white and blue. I painted the car late Friday night. I came in the shop Saturday morning to admire my master piece only to find a pink car. White over red doesn't work. The red "bleeds" through the white. That's when I learned about "sealer" !

You are using an out of date browser. It may not display this or other websites correctly.
You should upgrade or use an alternative browser.
You should upgrade or use an alternative browser.
Rcr 40-31
- Thread starter ckouba
- Start date
Hey Chris, I see you have quite a mess on your hands. Hats off to you though, body and paint is something best left to the pros. But, with a little guidence and a lot of patience, the same end result can be obtained by a beginner. When you get the body ready for paint again, why don't you give me a call. I've got over 30 years experience and I am also PPG certified. I have sprayed every kind of paint on the market, mostly custom finishes (house of kolor, metalflake, etc). I could suggest the proper products and easiest methods, with the conditions your spraying under, to give you the best results.
www.spikescustompaint.com
www.spikescustompaint.com
Chris Kouba
Supporter
Thanks for the offer Spike, I might just take you up on that but it'll still be a while. I am just getting settled back in the house after a ~3wk trip. It's still ridiculously hot here so it'll be a while before I get back on it in earnest as well. I figure things will be tolerable in another couple weeks and I'll take it from there.
Very good Chris, I know how you must have felt. There is nothing more gratifying than getting to the paint stage, but it's the unforseen in painting that can beat you down. Painting is definately the hardest part, and it's the first thing everyone sees. When your ready, if you need any advice you can contact me through my site.
Later,
Spike
Later,
Spike
Chris Kouba
Supporter
Back into the garage...
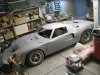
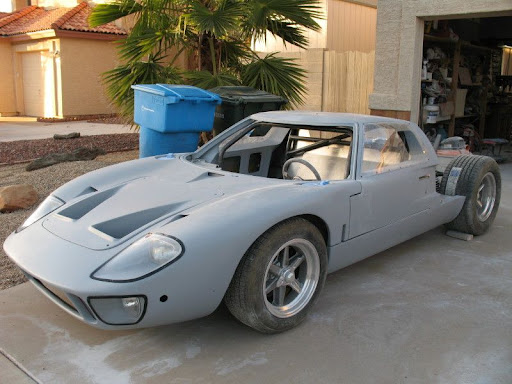
Yes it's true. The temps in Phoenix have dropped a bit recently and I have been able to spend some time back in the garage.
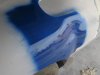
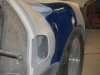
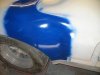
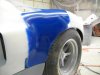
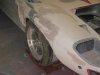
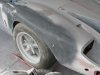
I chatted with Spike and got a few tips for addressing my remaining problem areas (Thanks Spike). These were various small areas of the rear clip behind the scoop and in front of the wheel arches. I needed a different touch to the sanding I was doing and I finally turned the corner on it. I have seen enough 40's though that I wanted to be sure, so I grabbed a rattle can with a shiny dark blue in it and sprayed a bit through this area to check the reflections (I am using as light a primer as possible due to the white color). I was more than pleased with the result!
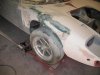
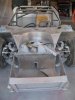
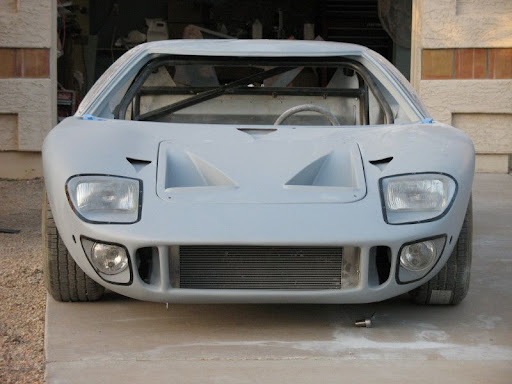
Next up was the front clip. When I hinged it originally, I didn't have it squared properly and as Tom noted in one of the earlier posts, it was subtly higher on one side. It became even more distracting when I put a bar across the grille for a tow eye- it looked like it was slanting across the opening. I straightened this out and got things leveled.
But nothing is ever simple. Upon doing this, I noticed that the right front fender over hung the tire considerably more than the left one. Remarkably, it was by about the same amount which I cut the fender apart and widened it by last year. After spending the time to get the nose level and all the gaps even I wasn't in the mood to just leave one side hanging out that much more than the other. So you guessed it, I went back at it with the saw and took out the mod that I put in. All you guys with RCR's at home who ran to check out your clips with tape measures can rest easy. I've put it back to where I got it.
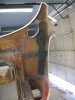
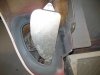
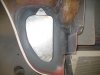
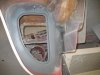
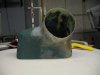
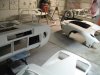
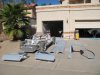
After all this went down, I also needed some positive reinforcement so I started working on some brake ducts for the rear. I know Bill Hough does them but I am interested in my own. I modeled the shape in foam, sealed it with a layer of glass and then pulled a part off it. I know it's not the original configuration but I will connect it to the caliper with a bit of hose later on. I just realized I only have pics of the pattern under construction. Use your imagination and you'll figure out what it will look like...
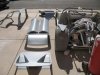
Lastly for now, I made the driver's side cover plate for the headlight compartment. I had some alu laying around, trimmed out the shape, bent it for the tab at the top and then put in a winged Dzus fastner to hold it in. I will put some of the self adhesive foam on it to keep out the water from the backside but want to powder coat it first. I thought it was a pretty good and simple design though. The passenger side will follow in time.
That's about all for now. I "only" have the sill panels left to sand down (already started on one) and prep, then with a little more finish prep I will be ready to spray primer again. As I sand, I am still smelling the solvents being released from under the sealer coat. As big of a pain as this is, I am glad that I didn't spray the white as well. I am glad this final coat will be starting from scratch.
Yes it's true. The temps in Phoenix have dropped a bit recently and I have been able to spend some time back in the garage.
I chatted with Spike and got a few tips for addressing my remaining problem areas (Thanks Spike). These were various small areas of the rear clip behind the scoop and in front of the wheel arches. I needed a different touch to the sanding I was doing and I finally turned the corner on it. I have seen enough 40's though that I wanted to be sure, so I grabbed a rattle can with a shiny dark blue in it and sprayed a bit through this area to check the reflections (I am using as light a primer as possible due to the white color). I was more than pleased with the result!
Next up was the front clip. When I hinged it originally, I didn't have it squared properly and as Tom noted in one of the earlier posts, it was subtly higher on one side. It became even more distracting when I put a bar across the grille for a tow eye- it looked like it was slanting across the opening. I straightened this out and got things leveled.
But nothing is ever simple. Upon doing this, I noticed that the right front fender over hung the tire considerably more than the left one. Remarkably, it was by about the same amount which I cut the fender apart and widened it by last year. After spending the time to get the nose level and all the gaps even I wasn't in the mood to just leave one side hanging out that much more than the other. So you guessed it, I went back at it with the saw and took out the mod that I put in. All you guys with RCR's at home who ran to check out your clips with tape measures can rest easy. I've put it back to where I got it.
After all this went down, I also needed some positive reinforcement so I started working on some brake ducts for the rear. I know Bill Hough does them but I am interested in my own. I modeled the shape in foam, sealed it with a layer of glass and then pulled a part off it. I know it's not the original configuration but I will connect it to the caliper with a bit of hose later on. I just realized I only have pics of the pattern under construction. Use your imagination and you'll figure out what it will look like...
Lastly for now, I made the driver's side cover plate for the headlight compartment. I had some alu laying around, trimmed out the shape, bent it for the tab at the top and then put in a winged Dzus fastner to hold it in. I will put some of the self adhesive foam on it to keep out the water from the backside but want to powder coat it first. I thought it was a pretty good and simple design though. The passenger side will follow in time.
That's about all for now. I "only" have the sill panels left to sand down (already started on one) and prep, then with a little more finish prep I will be ready to spray primer again. As I sand, I am still smelling the solvents being released from under the sealer coat. As big of a pain as this is, I am glad that I didn't spray the white as well. I am glad this final coat will be starting from scratch.
Attachments
-
 IMG_3956.jpg23.8 KB · Views: 610
 -
 IMG_3959.jpg31.8 KB · Views: 694
 -
 IMG_3964.jpg27 KB · Views: 640
 -
 IMG_3951.jpg32.2 KB · Views: 666
 -
 IMG_3928.jpg28.8 KB · Views: 619
 -
 IMG_3930.jpg34.9 KB · Views: 654
 -
 IMG_3935.jpg24.5 KB · Views: 620
 -
 IMG_3957.jpg33.9 KB · Views: 592
 -
 IMG_3968.jpg33.7 KB · Views: 631
 -
 IMG_3969.jpg31.8 KB · Views: 682
 -
 IMG_3967.jpg37.4 KB · Views: 620
 -
 IMG_3948.jpg25.1 KB · Views: 647
 -
 IMG_3943.jpg28.4 KB · Views: 608
Chris Kouba
Supporter
Thanks for the encouragement guys, it's been a LONG road back.
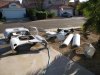
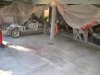
It's been a few good productive days. I didn't manage to get as far as I thought I would by today but the good news is the garage is cleaned out again and I am pretty close to being able to spray primer again. It felt so nice washing all the dust out.
Fingers crossed for primer next week!
It's been a few good productive days. I didn't manage to get as far as I thought I would by today but the good news is the garage is cleaned out again and I am pretty close to being able to spray primer again. It felt so nice washing all the dust out.
Fingers crossed for primer next week!
Attachments
Chris Kouba
Supporter
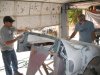
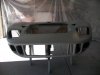
The pics are pretty self explanatory. My dad was in town and I had a friend who's done a bit of painting come over and we got it primed. With it all in one color, I can see I have a little touch up to do on some surfaces but this time it went down smooth and easy. Actually, it did the first time too but this time I was given the correct chems and we used them. I am trusting this will show in the results.
Thanks to Dustin and my dad for their efforts!
Thanks to Dustin and my dad for their efforts!
Attachments
Chris Kouba
Supporter
Thanks guys. Yep, we put some time in and I was back at it today. Did some sanding, glazing, more sanding and then more priming. It seems never ending...
I will start wet sanding tomorrow. I took care of the borders on the lamp covers today in between other tasks. Masked off per Scott Calabro's Tornado 875 post, it went extremely well (thanks Scott!).
I put the lamps back in on a whim (visual inspriation), will be removing them tomorrow to let the sanding commence.
Chris
Last edited:
Chris,
Looks like you've kicked it into a higher gear, you're cranking now!
Get 'er done! :stunned::stunned:
Cheers,
Howard
_______________________________________________________________
RCR40 #40 underway
Looks like you've kicked it into a higher gear, you're cranking now!
Get 'er done! :stunned::stunned:
Cheers,
Howard
_______________________________________________________________
RCR40 #40 underway
Chris Kouba
Supporter
Yeah Howard, I get semi-OCD sometimes. Whatever I do I get into it pretty well.
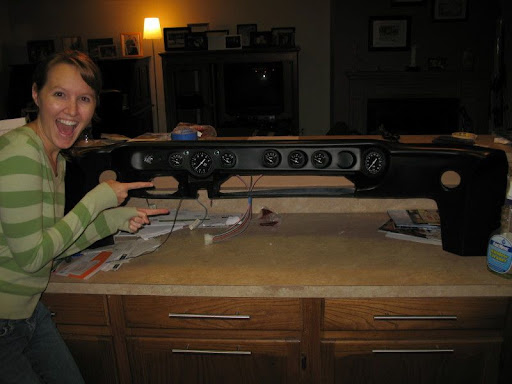
I am still wet sanding and will be for some time. I still intend to spray paint before Christmas. We'll see if reality matches my OCD-ness. Along the lines of goodness, I did actually get something done yesterday (after needing a break from sanding my arms off) and painted up the dash.
I used black exterior automotive trim paint, satin finish. It's not too glossy and it still looks like it'll clean up very well- should be perfect for under the windshield.
Bethany was just as excited as I was when she came home to see it completed on the kitchen counter:
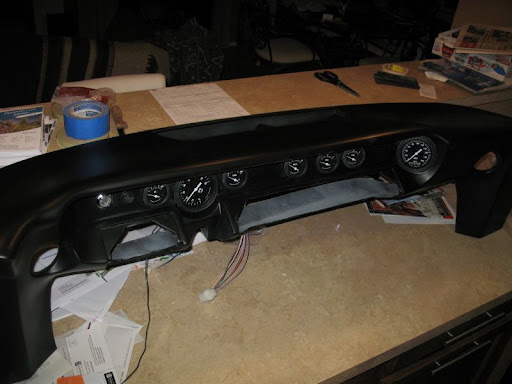
With covers in place (ignition switch from a 65-66 Mustang, while not original, it looks the part! Thinking about using a headlamp switch and heater controls too.):
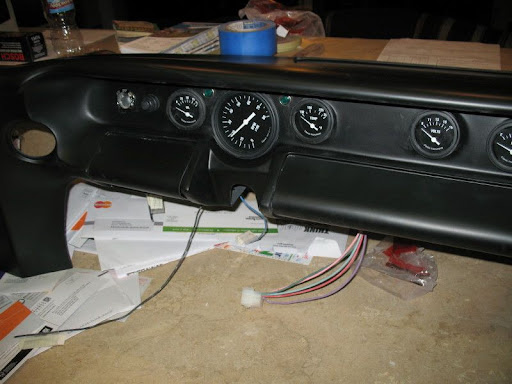
Still not sure what to do with the last gauge slot:
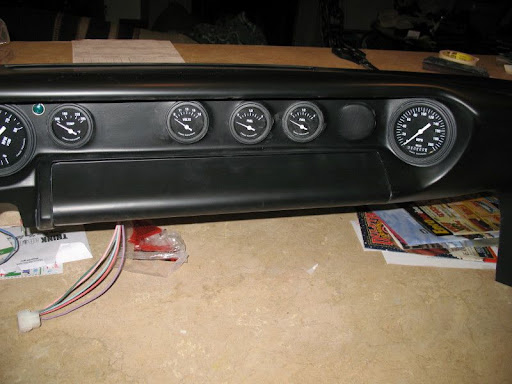
Actual progress feels very good! And now back to the sanding...
I am still wet sanding and will be for some time. I still intend to spray paint before Christmas. We'll see if reality matches my OCD-ness. Along the lines of goodness, I did actually get something done yesterday (after needing a break from sanding my arms off) and painted up the dash.
I used black exterior automotive trim paint, satin finish. It's not too glossy and it still looks like it'll clean up very well- should be perfect for under the windshield.
Bethany was just as excited as I was when she came home to see it completed on the kitchen counter:
With covers in place (ignition switch from a 65-66 Mustang, while not original, it looks the part! Thinking about using a headlamp switch and heater controls too.):
Still not sure what to do with the last gauge slot:
Actual progress feels very good! And now back to the sanding...
Chris Kouba
Supporter
Hey Tom,
They're still there for me and I haven't changed anything regarding where they are hosted. Try re-booting the computer. I'm not too computer savy but maybe someone else might know what's happening.
The first one's the only real imporant one anyway!
They're still there for me and I haven't changed anything regarding where they are hosted. Try re-booting the computer. I'm not too computer savy but maybe someone else might know what's happening.
The first one's the only real imporant one anyway!
Chris Kouba
Supporter
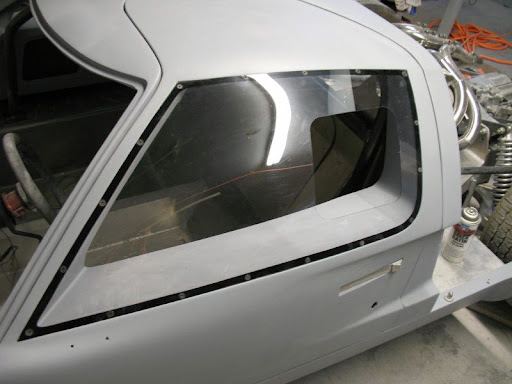
Door windows now match the lamp covers:
Ron McCall
Supporter
I can't see the pics either...
Pics,what pics?? Not seen here.
Progress seems to be going well, best of luck to you.
Progress seems to be going well, best of luck to you.